-
Overview of the Advanced View
The Advanced View in SMART Estimator Quote IT provides powerful tools for managing clauses and conditions for each project. These tools can automatically add or recommend relevant clauses, streamlining your estimation workflow.
Where do I go to modify the Clauses and Conditions?
You can find the Clauses & Conditions Dialog by clicking on their SMARTText in the Item Description Section. You can also find it in the Terms and Conditions Section on the quote. For further information, click here.
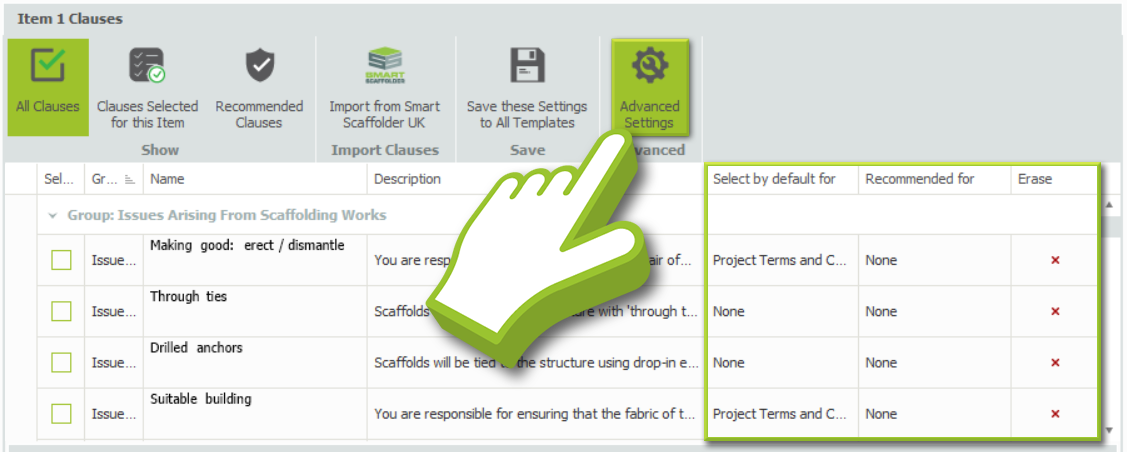
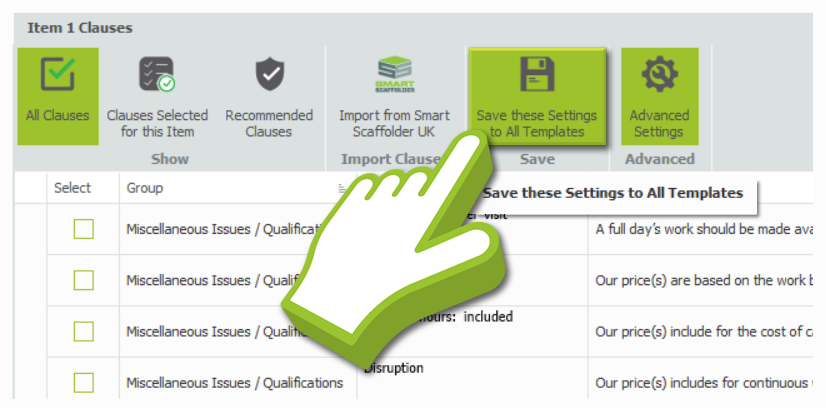
In order to simplify day-to-day use, these features are turned off by default. You can enable them by clicking on the Advanced Settings button. Once activated, you will see three additional columns: Select by default for, Recommend for, and Erase.
-
Adding New Clauses & Conditions
At the bottom of the Project Conditions configuration page, you will find a section called Add New Clause. In this form, you can enter the details of the new clause, assign it to a group, and give it a name that will make it easier to identify.
A description can also be added, which appears as text on the quote. Once you have entered all the necessary details, click the Add button to add it to the list. For information on how to share your changes with the Enterprise Server, please click here.
-
Grouping your Clauses and Conditions
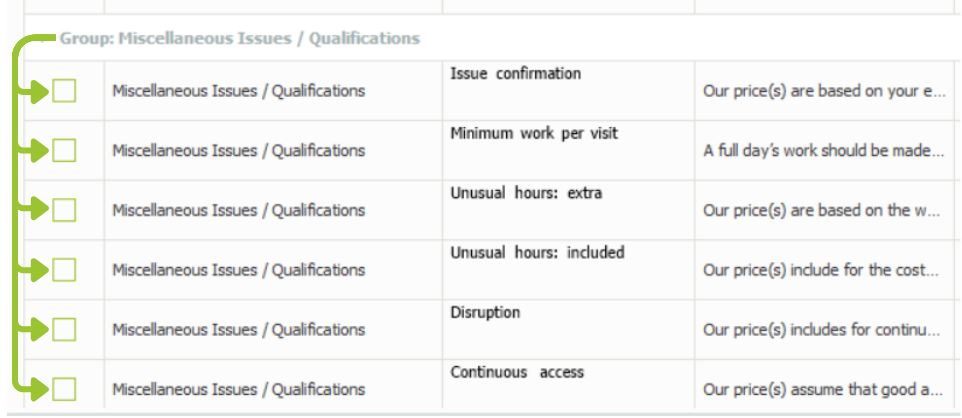
Organising your clauses and conditions into groups helps keep your project details structured and easy to manage. To add new conditions to an existing group, ensure that you type the name of the group exactly into the designated box. In the event that the project name does not match exactly, a newly created group will be created on the list based on the entered name.
Copying and Pasting the Group Name
When creating a batch of Clauses & Conditions, a simple way to avoid creating a new group is to copy and paste the name of the group using Ctrl + C to copy and Ctrl + V to paste.
-
Automating the Selection of Clauses
Every project will usually have some clauses that are always included in the quotation. Furthermore, there may be some clauses you always include for a particular type of scaffold, such as a temporary roof.
Clauses can be set so that they are automatically selected and applied to the quotation when specific criteria are met. For example, if there is a loading bay in use, you may want to include a clause describing responsibility for the foundations.
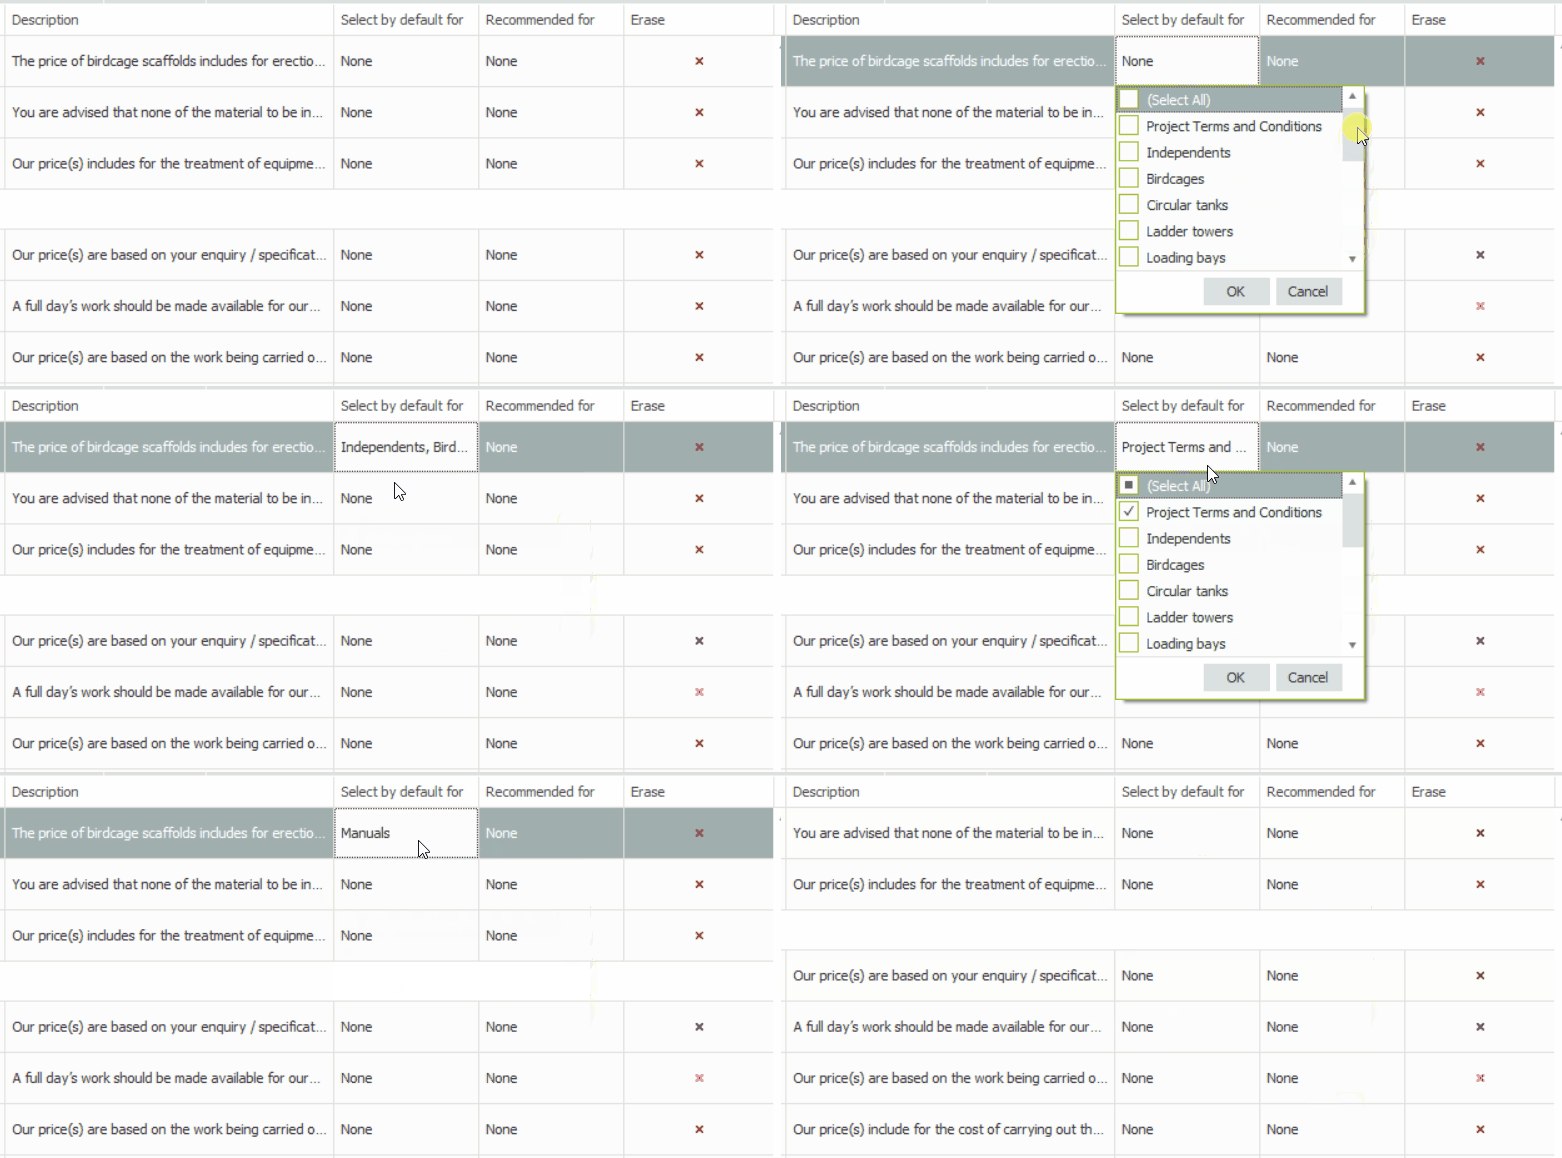
Navigate to the Select by default for column on the table. Then, click on one of the boxes for the row of the Clause / Condition you wish to select automatically. Once clicked, a dropdown menu will appear below with options to configure the automatic selection. For information on how to share your changes with the Enterprise Server, please click here.
Options to choose from for Future Projects:
- If the Project Terms and Conditions option is selected, this condition will be automatically selected and shown in the Terms and Conditions SMARTText.
- If a Scaffold Type is selected, this clause will be automatically selected and shown in the Clauses SMARTText, for items which include the selected scaffold type. For example, if Independents is selected, this clause will be shown automatically for any item which includes independent scaffolds.
- If Manual is selected, this clause will be automatically selected and shown in the Clauses SMARTText, for items which include manual scaffolds and also for empty items.
-
Specifying the Clause Recommendations
There are some clauses that are not appropriate for every project, but should be considered at all times. For example, if you have a clause related to winter designs, you can specify the clause recommendations so that it includes this for scaffolding that will be in place over the winter period.
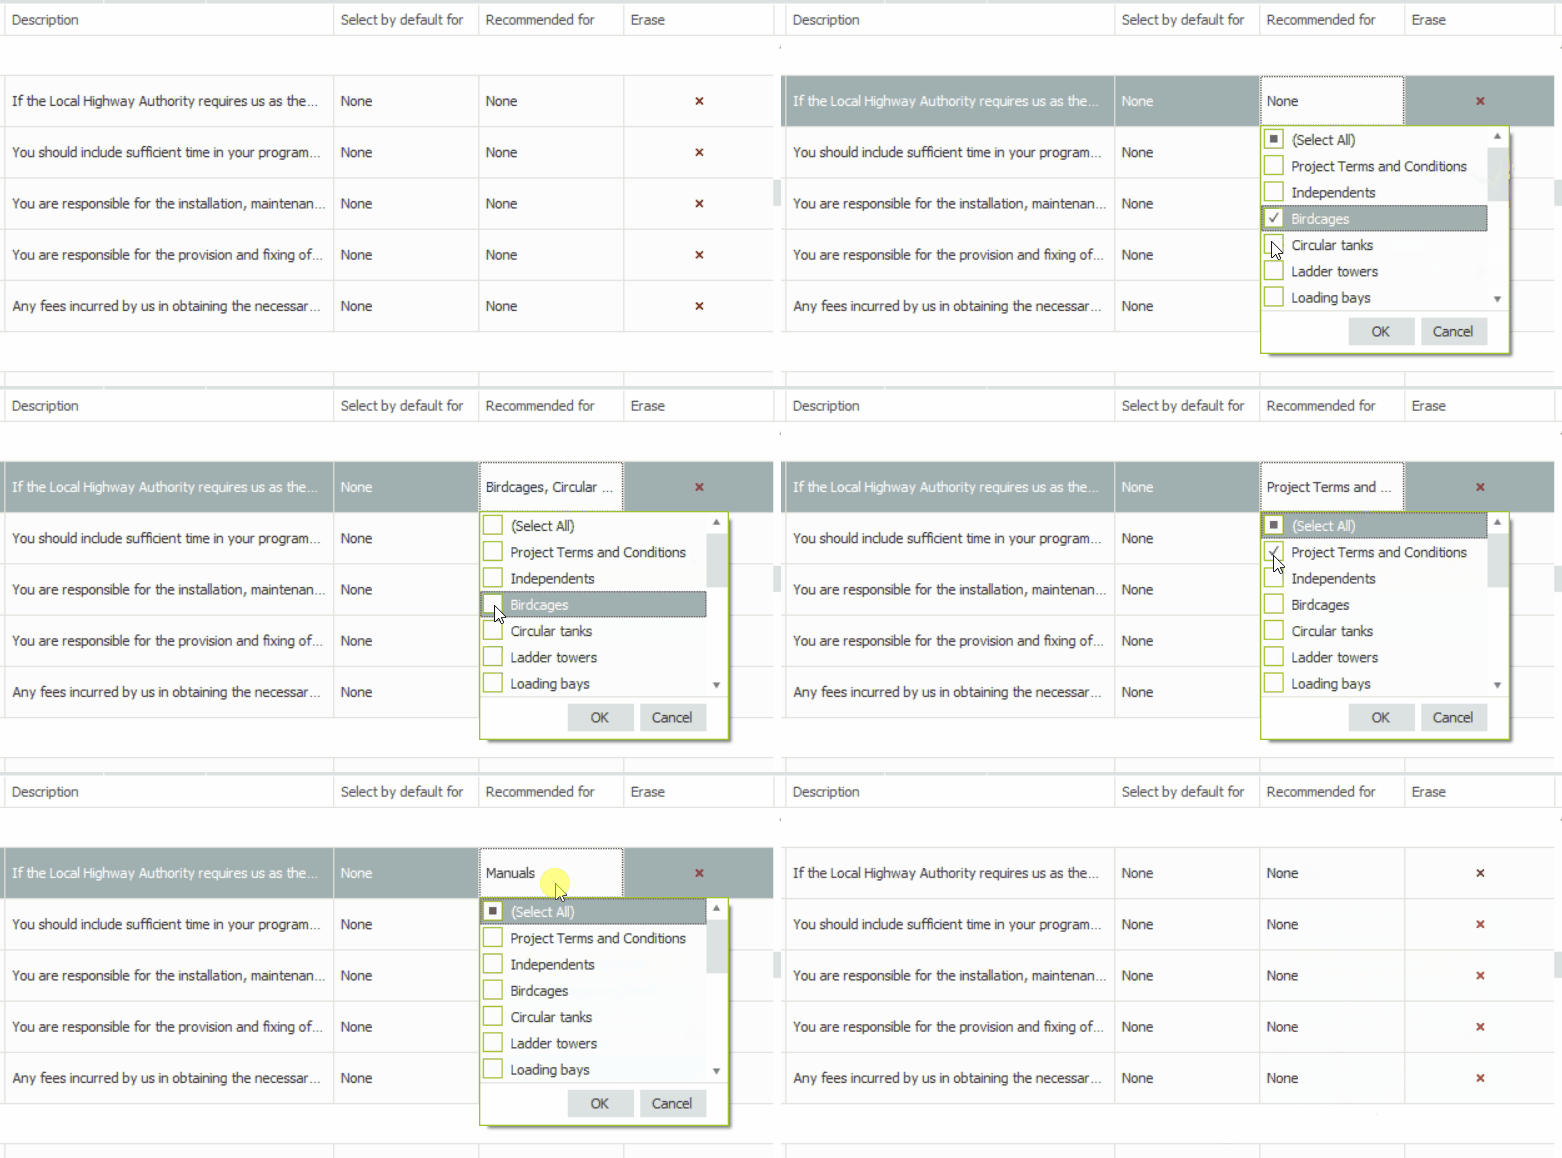
Navigate to the Recommended for column in the table. If you then click on one of the boxes for the row of the Clause / Condition you wish to specify recommendations for, a dropdown menu will appear below with options for configuring recommendations. For information on how to share your changes with the Enterprise Server, please click here.
Options to choose from for Future Projects:
- If the Project Terms and Conditions option is selected, this condition will appear when the Recommended Conditions view is shown on the Terms and Conditions SMARTText.
- If a Scaffold Type is selected, this clause appears when the Recommended Clauses view is shown on the Clauses SMARTText, for items which include the selected scaffold type. For example, if Independents is selected, this clause appears when the Recommended Clauses view is shown on the Clauses SMARTText for any item which includes independent scaffolds.
- If Manual is selected, this clause appears when the Recommended Clauses view is shown on the Clauses SMARTText, for items which include manual scaffolds and also for empty items.
-
Erasing the Clauses & Conditions
To permanently remove Clauses & Conditions from the list, at the end of the table, you’ll find an Erase column. Simply click on the Red Cross in the row of the Clauses & Conditions you wish to delete. A prompt will appear to confirm your action. Click the OK button to finalise and permanently delete the Clause & Condition. For information on how to share your changes with the Enterprise Server, please click here.


