-
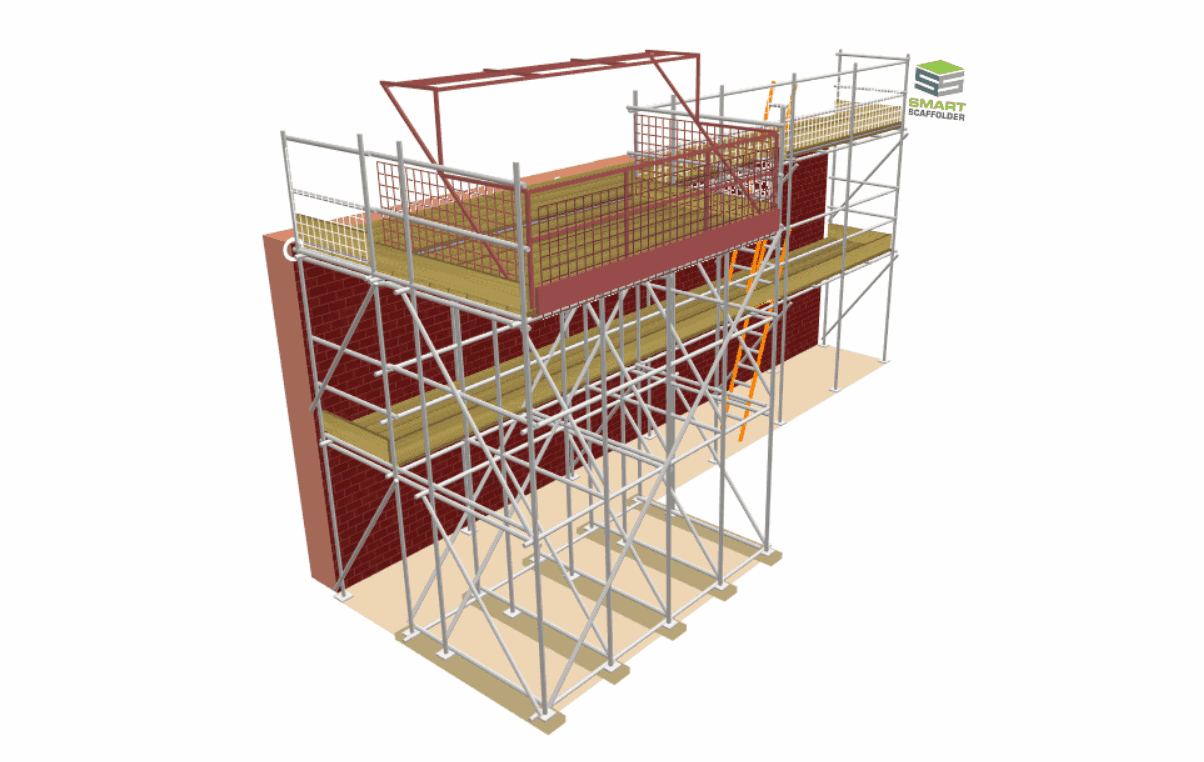
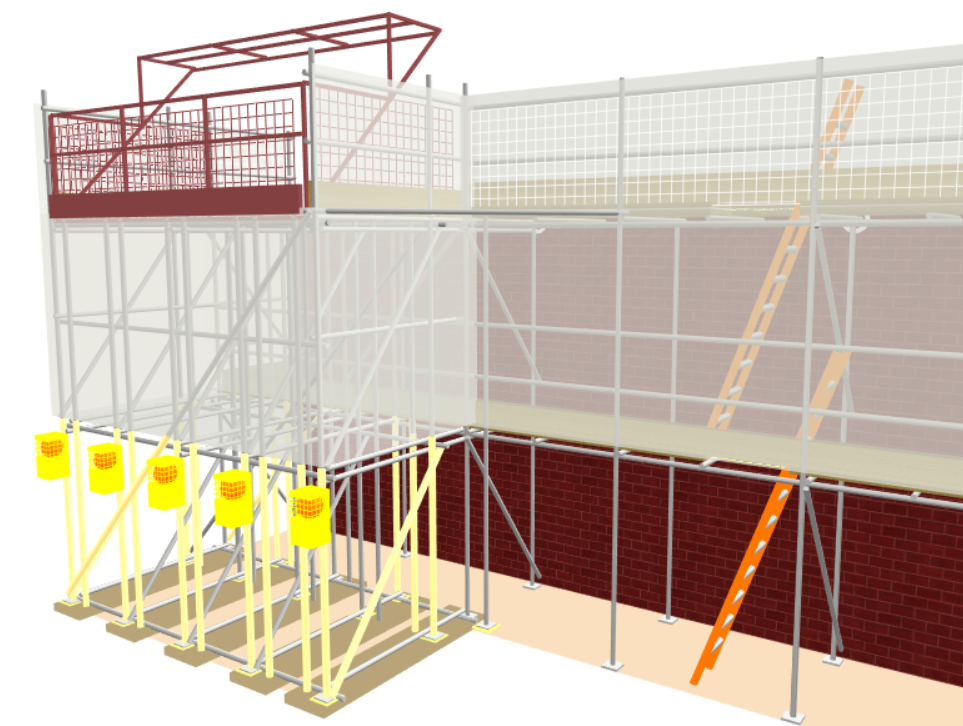
Overview of a Loading Bay
As with other attached scaffolds and non-attached standalone scaffolds, SMART Scaffolder’s loading bays function similarly.
-
Adding an Attached Loading Bay
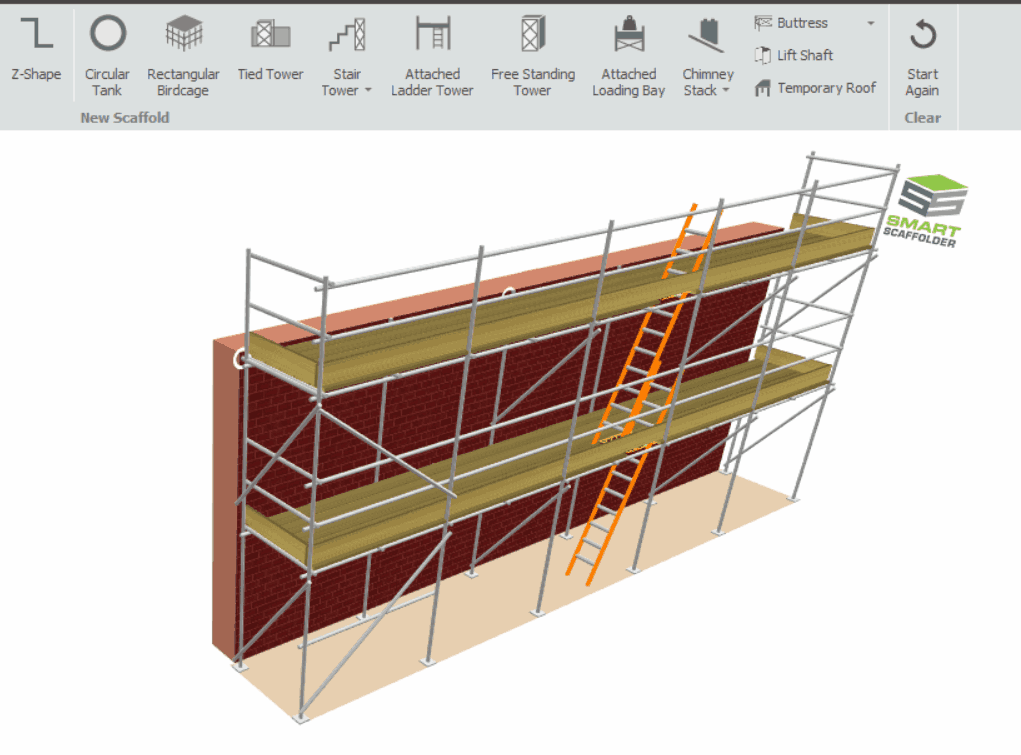
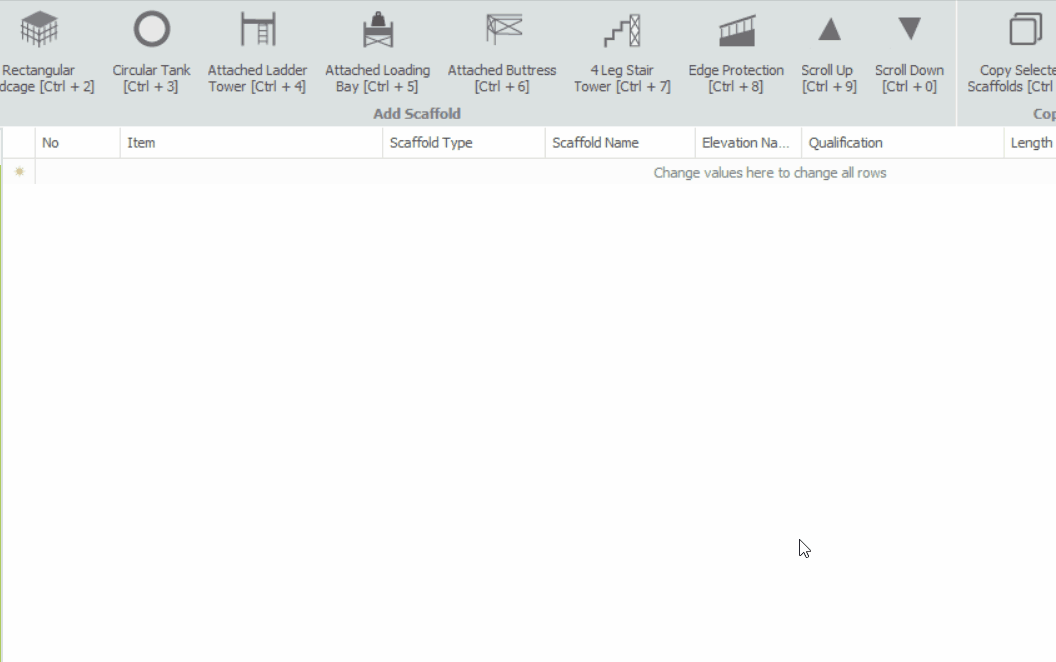
A loading bay can be added to an Independent or a Circular Tank scaffold by clicking on the Attached Loading Bay tool in Model IT. This can be found in the Scaffolds view. Then click on a bay of the independent or circular tank to attach the loading bay.

-
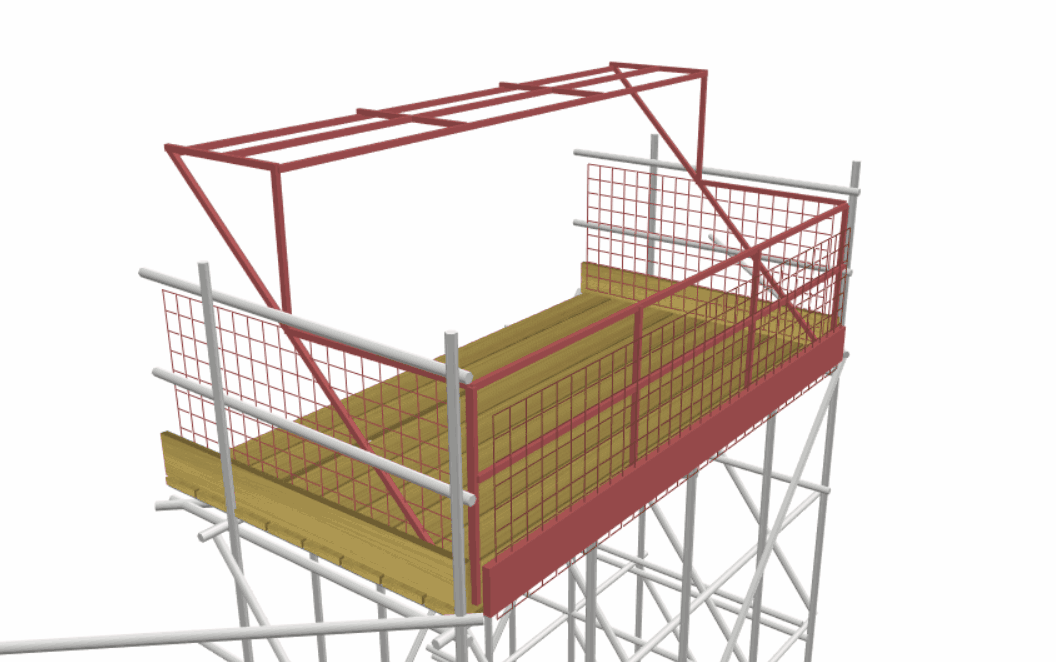
Adjusting the Loading Bay
With the 3D Model Controls, such as the Red Highlight and the Toolbox Dialog, we can now modify the loading bay you created just a moment ago.
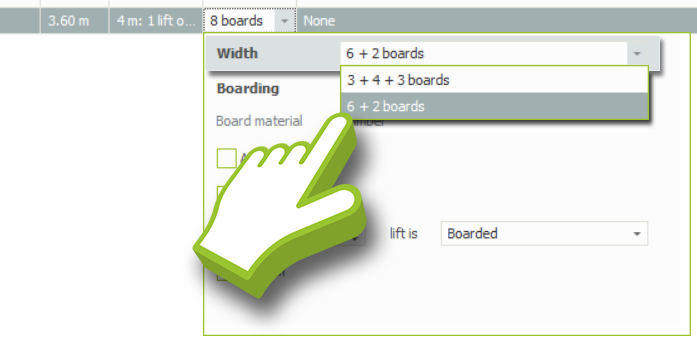
Width: 8 or 10 Boards
If you wish to adjust how many boards make up the width of the loading bay, hover your mouse over the toeboard or the gate of the loading bay. Using the toolbox dialog, you can cycle through either the 10 or the 6+2 Boards options. Pick one and press the Enter key.
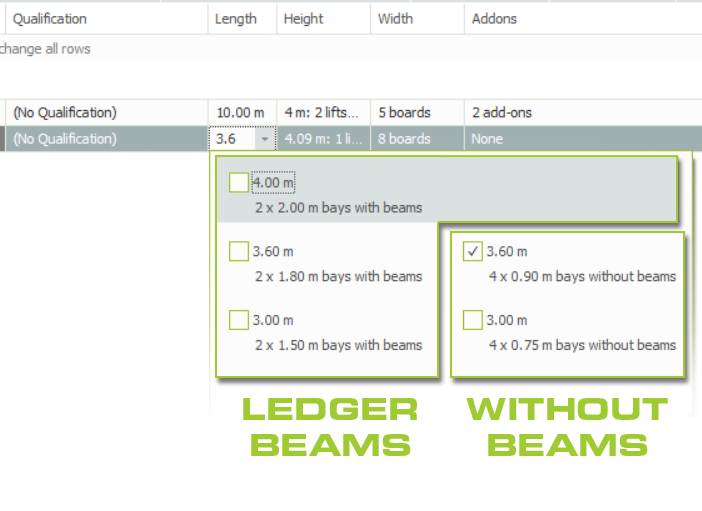
Schedule IT also allows you to customise the Loading Bay Width by selecting its Length from the Scaffolds view. There are several options to simultaneously adjust the Width and Ledger Beams of the loading bay. Simply tick one of the options and it’ll be adjusted.
Left and Right: Across the Bays
When hovering over the loading bay standards, you may click and drag your loading bay across the elevation. The loading bay will move across the bays incrementally, allowing you to position it precisely.
Up and Down: Lift heights
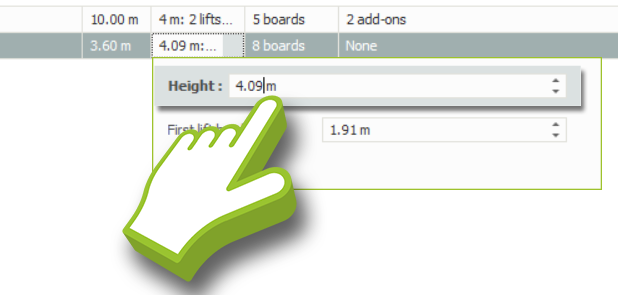
In order to adjust the height of the loading bay, hover your mouse over the loading bay until it is highlighted in a box. By clicking and dragging it up or down, or by manually typing in the Total Height value and pressing Enter, you can adjust the loading bay height.
It is also possible to manually adjust the Loading Bay lift height within Schedule IT. This is done by selecting the loading bay’s Height from the scaffold view, and then setting it manually from that view.
-
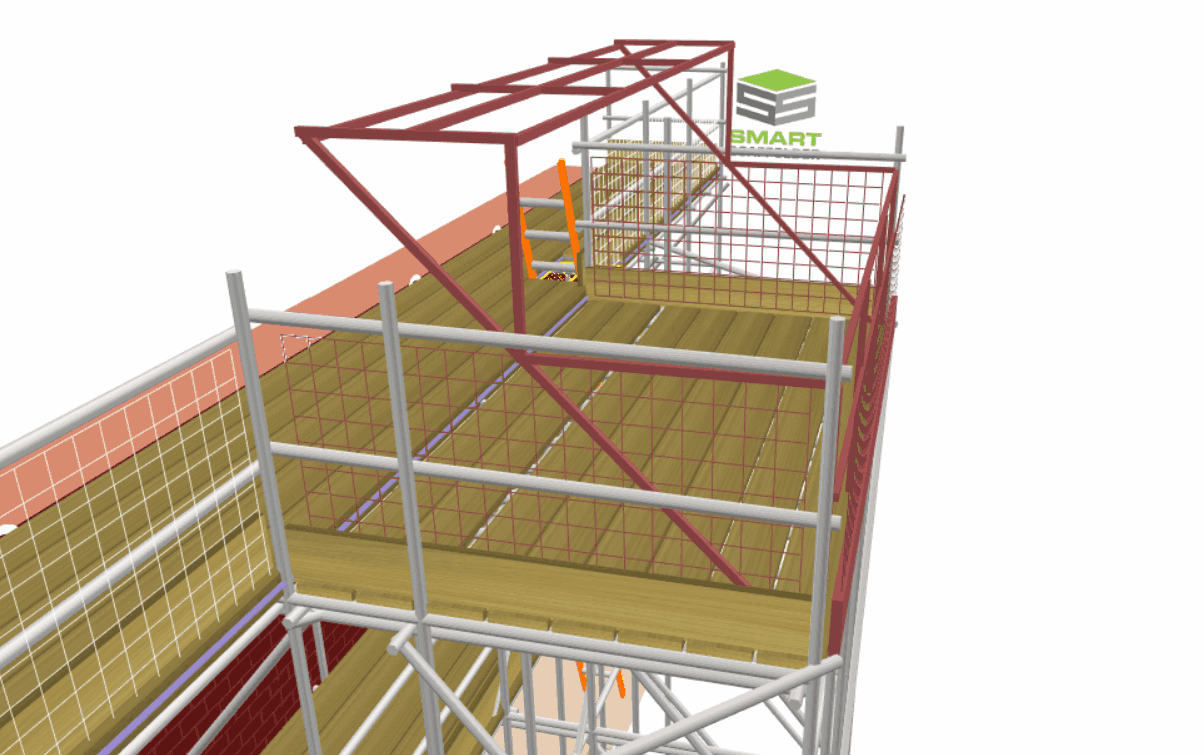
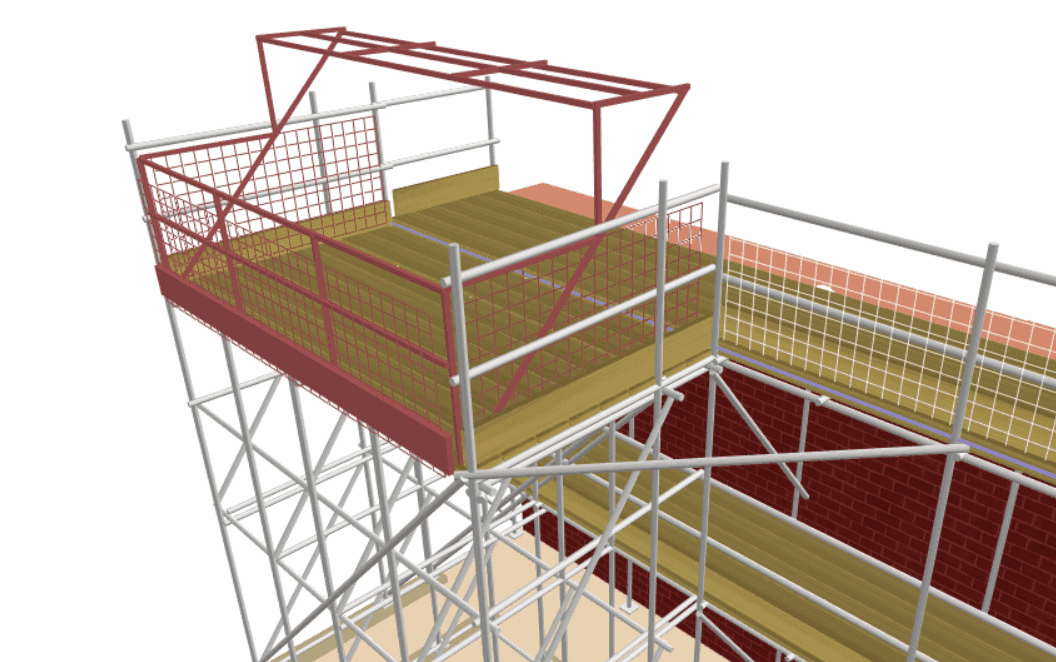
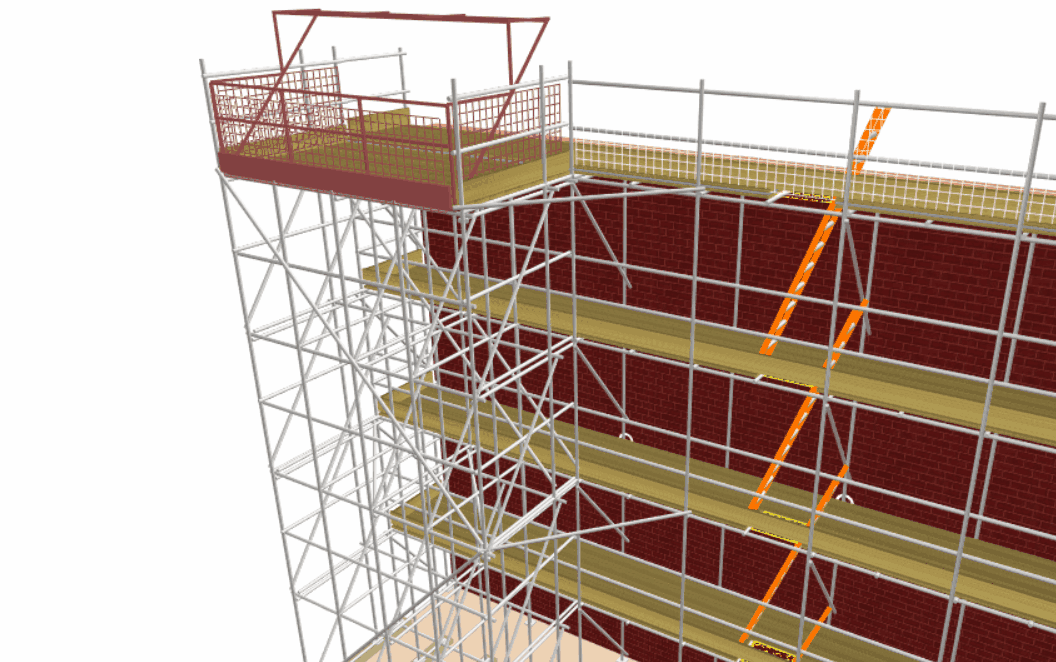
Modifying the Loading Bay
Ledger Beams
In order to add Ledger Beams to a loading bay or remove them from a loading bay, hover your mouse over the Toeboard or the Ledgers. By pressing the Tab key, you can cycle between Beams and No Beams, and then press Enter to add or remove them.
You can also specify whether the scaffold has ledger beams or not in Schedule IT by navigating to the Scaffolds View and selecting the Length of the Loading Bay. In the left-hand column, ledger beams are present, whereas in the right-hand column, they are absent.
Add-ons available for Loading Bays?
Using the Associated Tools, you can apply the Safety Standards, Safety Lamps, (Cladding) Sheeting and Debris Netting, Double Standards, and Banners to the Loading Bay within Model IT or Schedule IT.
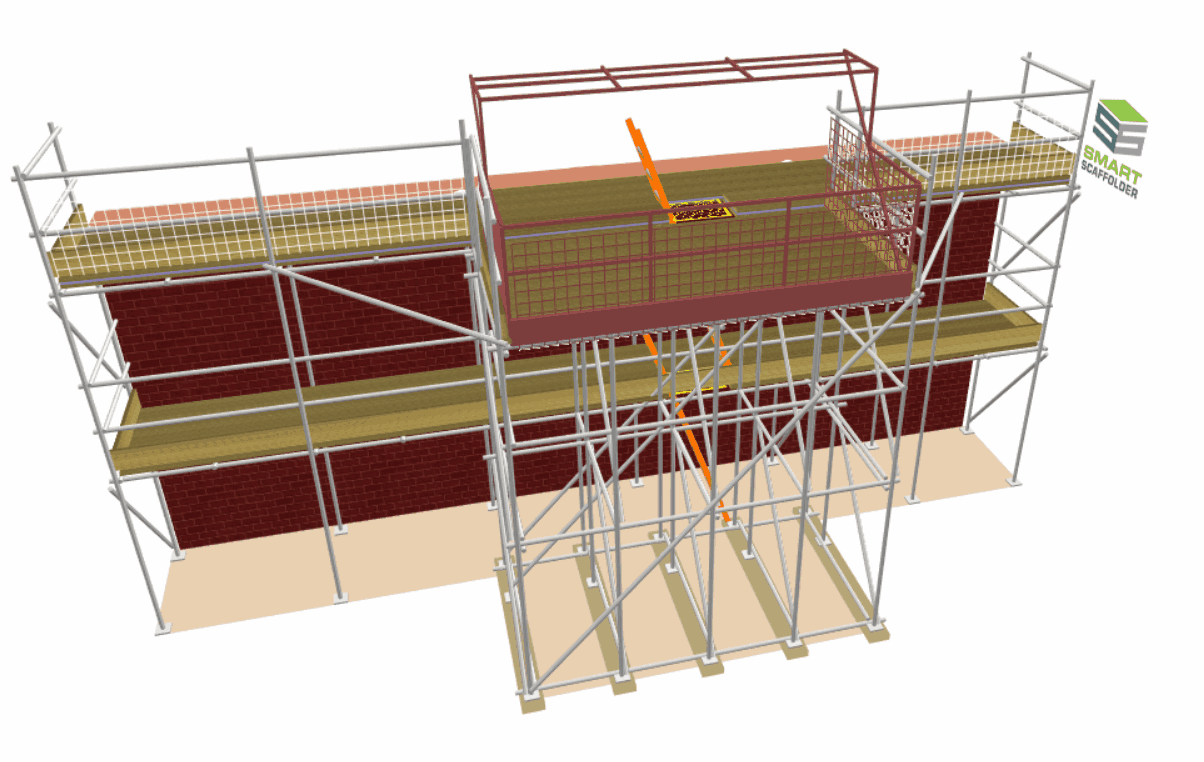
Boarding the Loading Bay Lifts
The Boards Tool can be used to quickly and easily board the unboarded lifts in the loading bay. Simply click on the button, then click on the lift you wish to board. Using this tool will also add an additional loading bay and gate to the lift that you have applied the Boards Tool to.
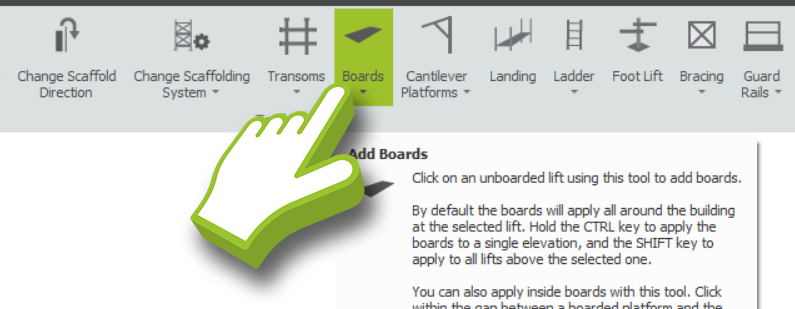
Alternatively you can utilise Schedule IT by navigating to the Scaffolds View and selecting the Loading bay’s Width. Underneath the Boarding section you have several options to board the loading bay. Simply make your changes and they’ll be applied in Model IT.

Opening and Closing the Gate
It is worth noting that although it is not particularly useful for estimation purposes, you can open and close the gate on the loading bay. In order to accomplish this, simply click and drag it upwards or downwards. This will cause the gate to be rotated along the pivot.
-
Adding a Non-Attached Loading Bay
Model IT does not currently support creating loading bays not attached to the scaffold. However, the Schedule IT module can be used to create Non-attached loading bays.
Simply navigate to it and click on the Scaffolds View. Then select the Add an Attached Loading Bay button by clicking on it or by pressing Ctrl + 4, from there you can edit the Scaffold Details such as the Dimensions.
Once you navigate over to Model IT, you can see that it’s completely detached. Generally, this should only be used for estimation purposes.
SMART Estimator
What’s new?
Getting Started
Setup and Configuration
-
Enterprise Server
-
Cloud Server Setup
Local Windows Server Setup
Adding Cloud server users
Server Back Up and Restore
Archiving Estimates from server
Migrating Local server to Cloud
Creating Folders in Enterprise Server
Using Server Tools from the Command Line
-
User software settings
User Address Settings and Yard
Scaffold Banner and Sheeting logo
Adding Watermarks
-
Setting up your Rates
Editing Shared Pricing Rates
Creating a rate setting template project
Importing and Exporting shared Rates
Creating an Estimate
Importing Drawings and Models
Scheduling Scaffolds
Creating 3D Scaffolds
-
3D Model Controls
Adding Independent scaffolds
Adding Circular Tank scaffolds
Adding Free Form Birdcages
Adding Birdcage & Lift shaft scaffolds
Adding Tied or Freestanding towers
Adding Stair towers, Ladders towers & Buttresses
Adding Loading bays
Adding Chimney scaffolds
Adding Temporary Roof
Adding Edge protection
Adding Pavement Gantry’s
System Scaffolds
Safety Decking
Using the Scaffold Library
Editing Scaffolds
Scaffold Add-ons & Options
-
Adding Gin wheels, Rubbish Chutes, Safety standards, Double standards and Lamps
Adding and Editing bridges/beam work
Adding Beams around Corners
Adding Cladding
Adding Cantilever protection fans
Adding Pavement Lifts
Adding Recesses and Infills
Building and Ground colour
Visual options (Tube, Ladder, System details and Grips)
Add a Pedestrian or Scaffolder
Copying pictures of the model
Material Lists and Drawings
Pricing and Estimation
Quotations
Enterprise Server
Troubleshooting


