-
Overview of the Scaffold View
In this documentation, we’ll cover almost all the prominent features in the Scaffold View. This section will discuss the most effective way to add scaffolds to Schedule IT. Additionally, we will discuss how to apply add-ons to scaffolds in Schedule IT, as well as how to precisely adjust scaffold elevations and lift heights.
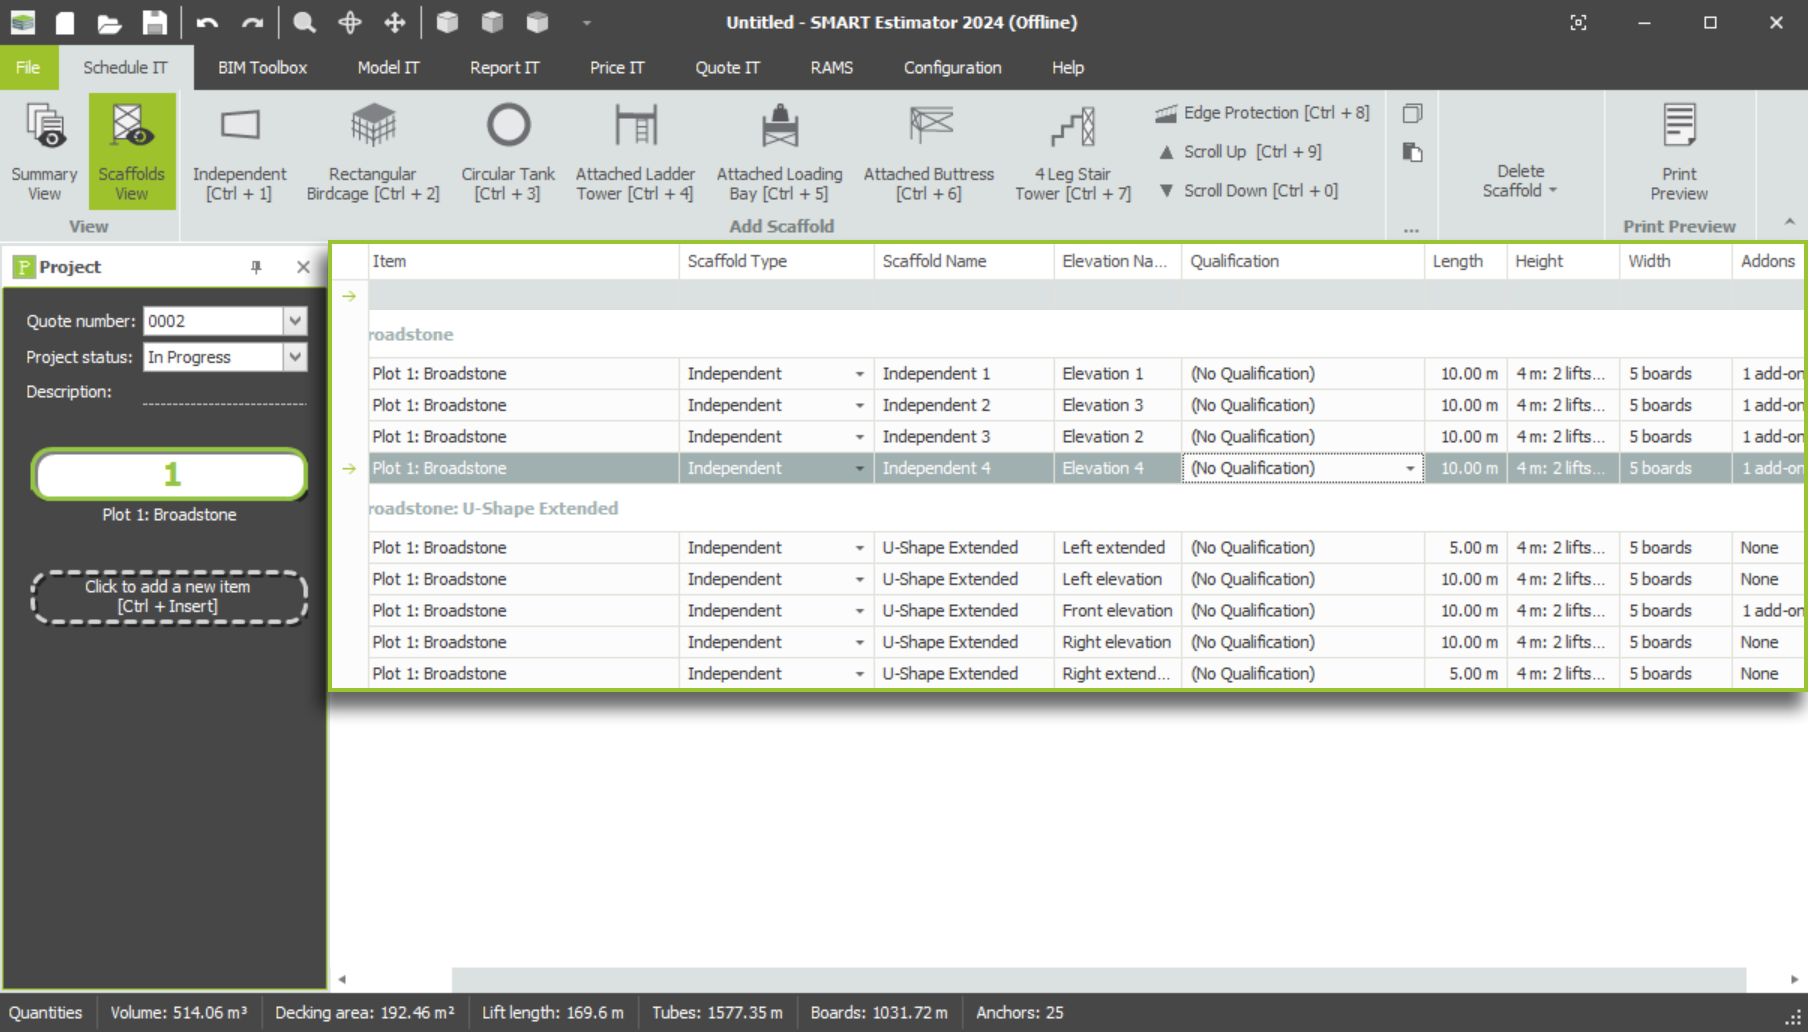
Within the Scaffold View, you’ll see the details of every scaffold within the item selected. This will include the dimensions of each elevation, alongside any add-ons included on the scaffold.
See Setting up Quotation Items for more information on the Summary View.
-
Understanding the Table
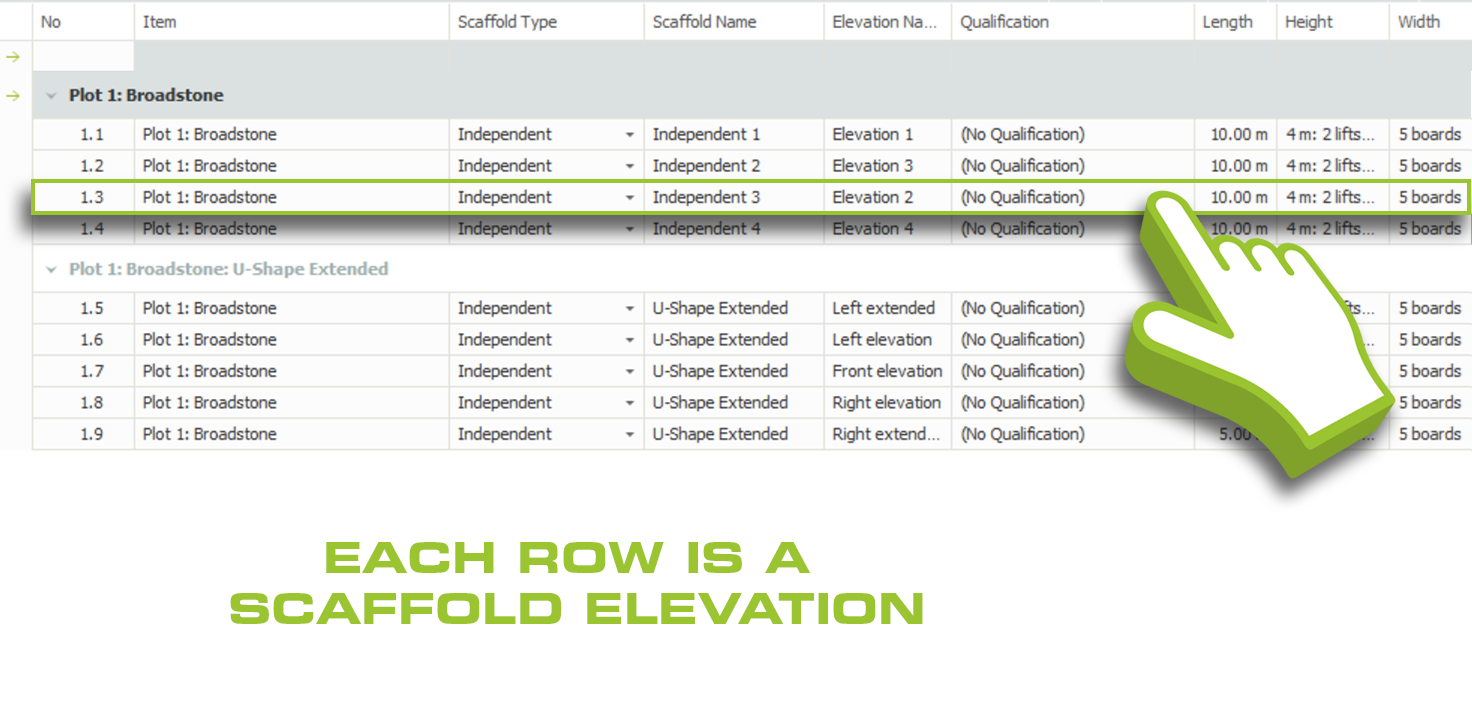
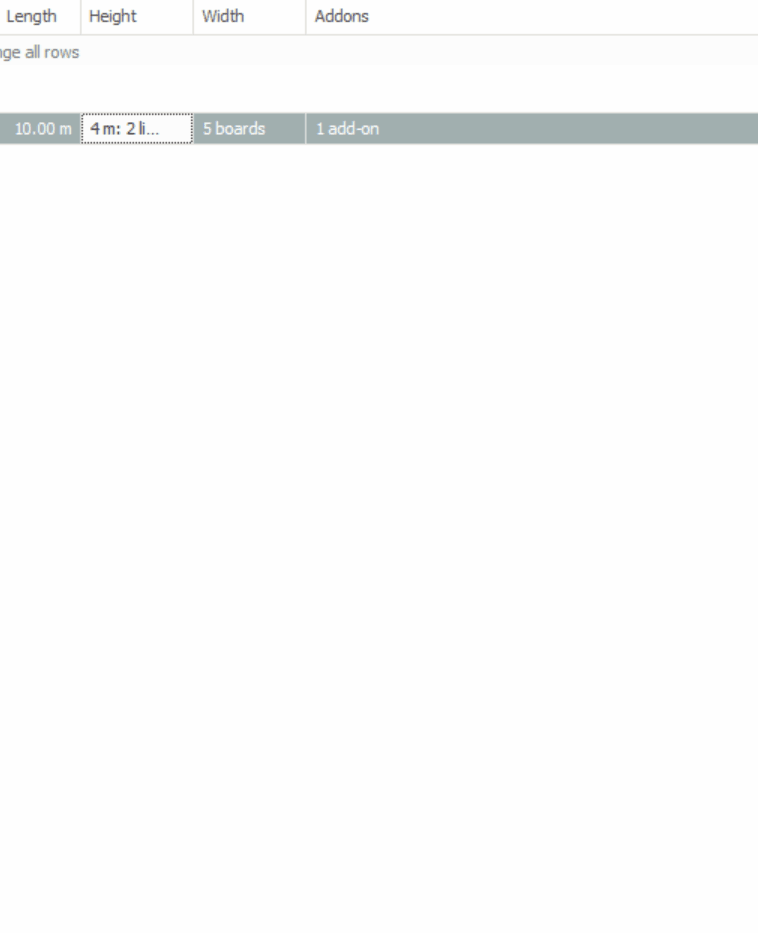
As you can see from the following table within the Schedule IT Scaffold View, each row represents a scaffold elevation. These elevations are then grouped by scaffold.
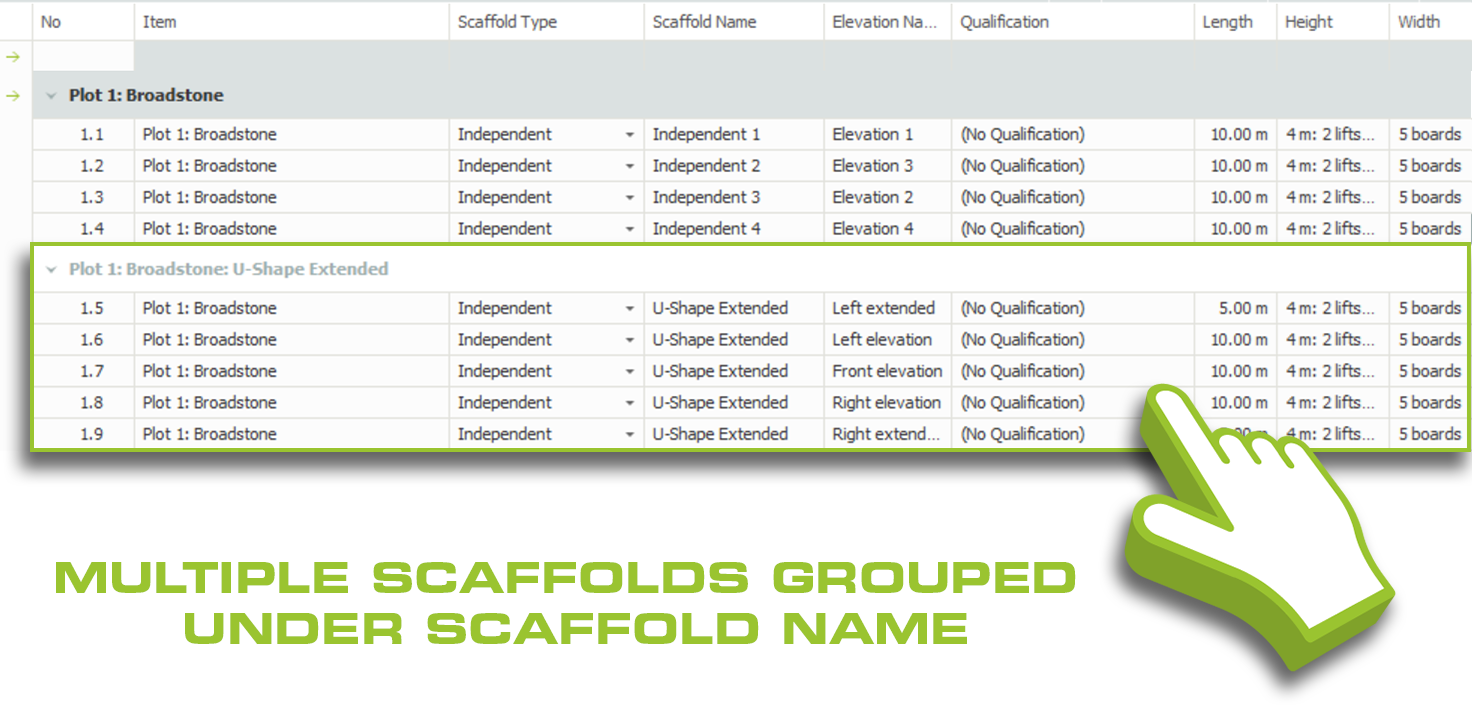
If a Scaffold has multiple elevations, these are grouped under the scaffold name, as in the example below. I’ve added a U-Shape Extended Scaffold from Model IT.
-
Creating Scaffolds in Schedule IT
You can create scaffolds in Schedule IT by clicking on any of the ‘Scaffold’ buttons on the Ribbon or by using a Key Combination. This will result in the scaffold appearing in the table.
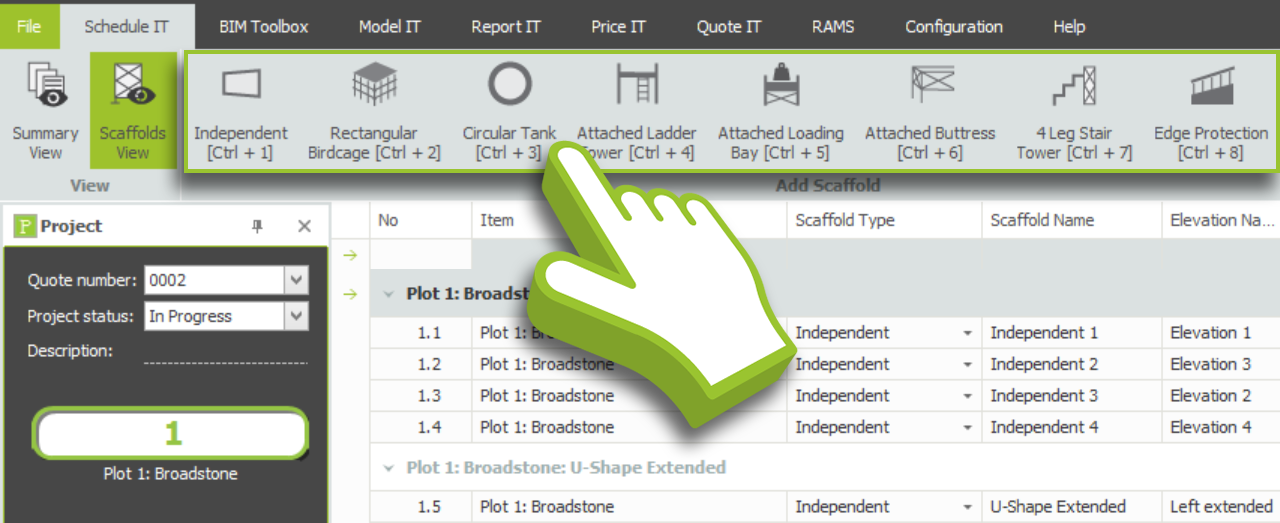
Additional Scaffold Types
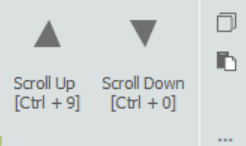
Additionally, a number of scaffold types are available hidden within the ribbon. Click on either the Scroll Up or the Scroll Down buttons to reveal additional scaffold types such as Chimney Stacks and Temporary Roofs.
-
Set the Details of your Scaffolds
As soon as you add your scaffold to the site, you can set the details by clicking the respective box and typing in the details. You can set the name of the scaffold (such as plots) and if it has multiple elevations, you can specify a name for each elevation (such as the cardinal direction).
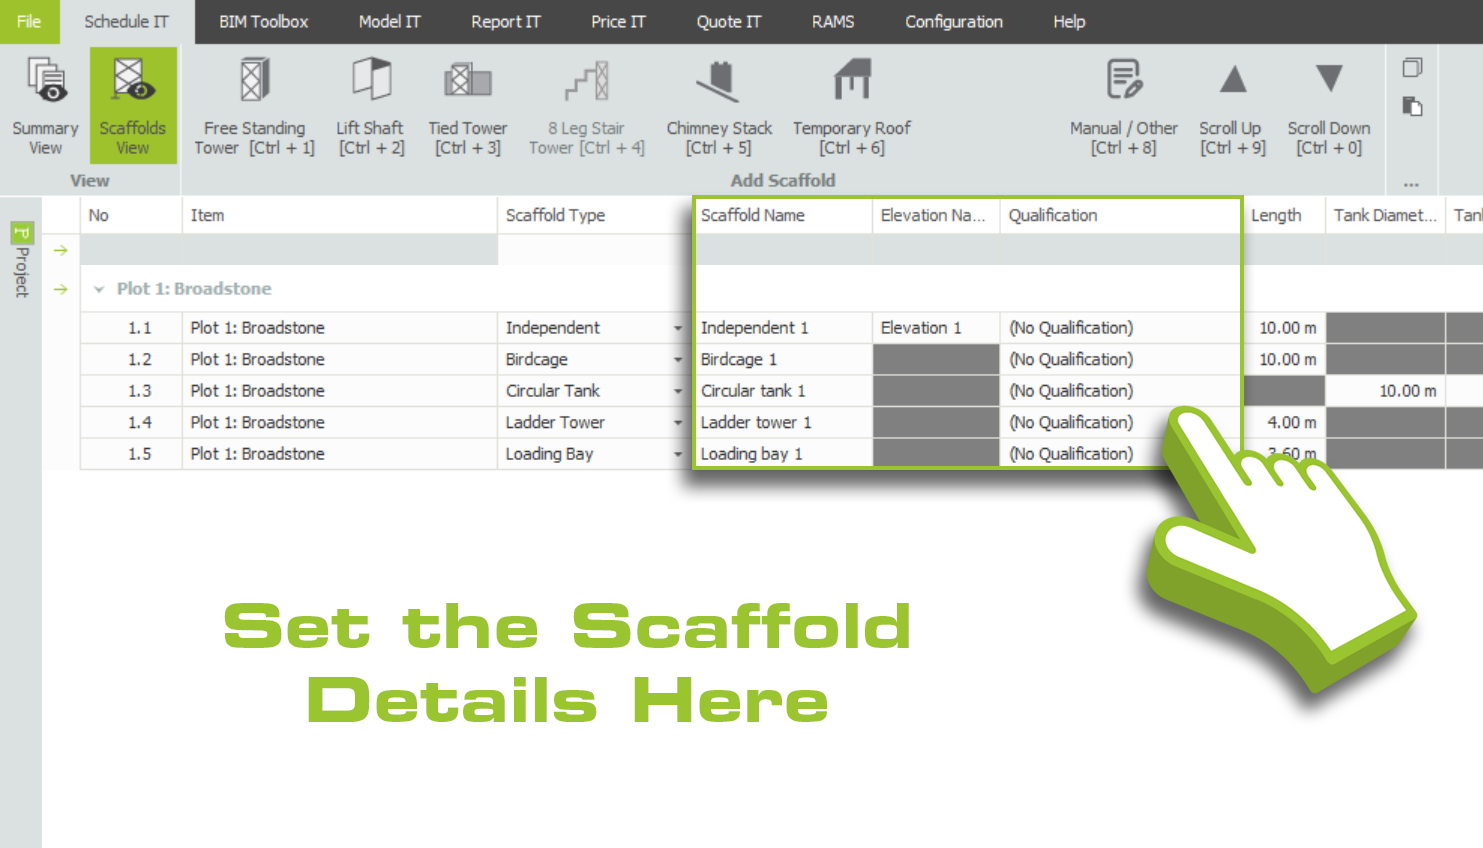
Lastly, you can specify the qualification for an individual scaffold by selecting an option from the respective drop-down menu. For example, being built off a roof or bridging a porch.
Mass editing Scaffold Items
In the Scaffold View of Schedule IT there is a clear master row along the top of the table. Clicking under the length, width, height or add-ons columns in the row will allow you to make changes to All scaffolds within the item.
-
Adjusting the Scaffold Dimensions
Length
You can enter the required length of your scaffold by clicking and typing into the length column for the respective scaffold row. When you have entered the desired length, press Enter on your keyboard to confirm, and the scaffold will be adjusted accordingly.

Chimneys and Temporary Roofs
You may notice that the Length column is ‘blacked out’ for Circular Tanks and Temporary Roofs. Circular tanks are measured in diameter, not length and have two separate columns labelled ‘Tank Diameter’ and ‘Tank Circumference’. A temporary roof scaffold and a chimney scaffold are edited separately. See the section on Chimneys and Temporary Roofs.
Height
When you click on a specific scaffold in this column, a pop-up will appear to allow you to set various height-related parameters (dimensions). At the top there is a box to enter the elevation or scaffold height. Simply enter the scaffold height and press Enter.
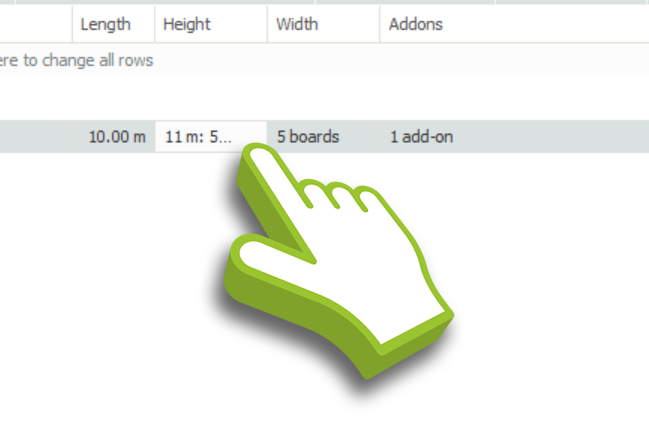
Furthermore, there are some quick edit tick box options available to you, such as lift height, foot lift and pavement lift. If you require custom lift heights you can click on the Custom tick box which enables you to edit each lift height directly. The allow short top lift tick box will enable an infill lift between the scaffold and top of elevation. For example, on an 11m elevation, it would produce 5 x 2m lifts and 1 x 1m lift. IF you don’t want the short top lift, uncheck the box.
It is always possible to set the first lift at a different height than the rest of the lifts, even if the custom height option is not used.
Making changes to all Elevations or Scaffolds
Several shortcut buttons are provided for applying these settings to all elevations in the selected scaffold, or to all scaffolds in the item as a whole. Choose the button that corresponds to the action you wish to take.


Preferred Drop-Height
If you enter the drop-height of your scaffold, you can specify how much of the top of the elevation does not require scaffolding.
Gable-Height
You can set the Gable-height for scaffolds that allow gables by clicking and typing into the box. Gable lifts are calculated and treated in the same manner as main lifts. If you select the Custom tickbox, you can choose to create and edit lift heights running along the Gable directly.
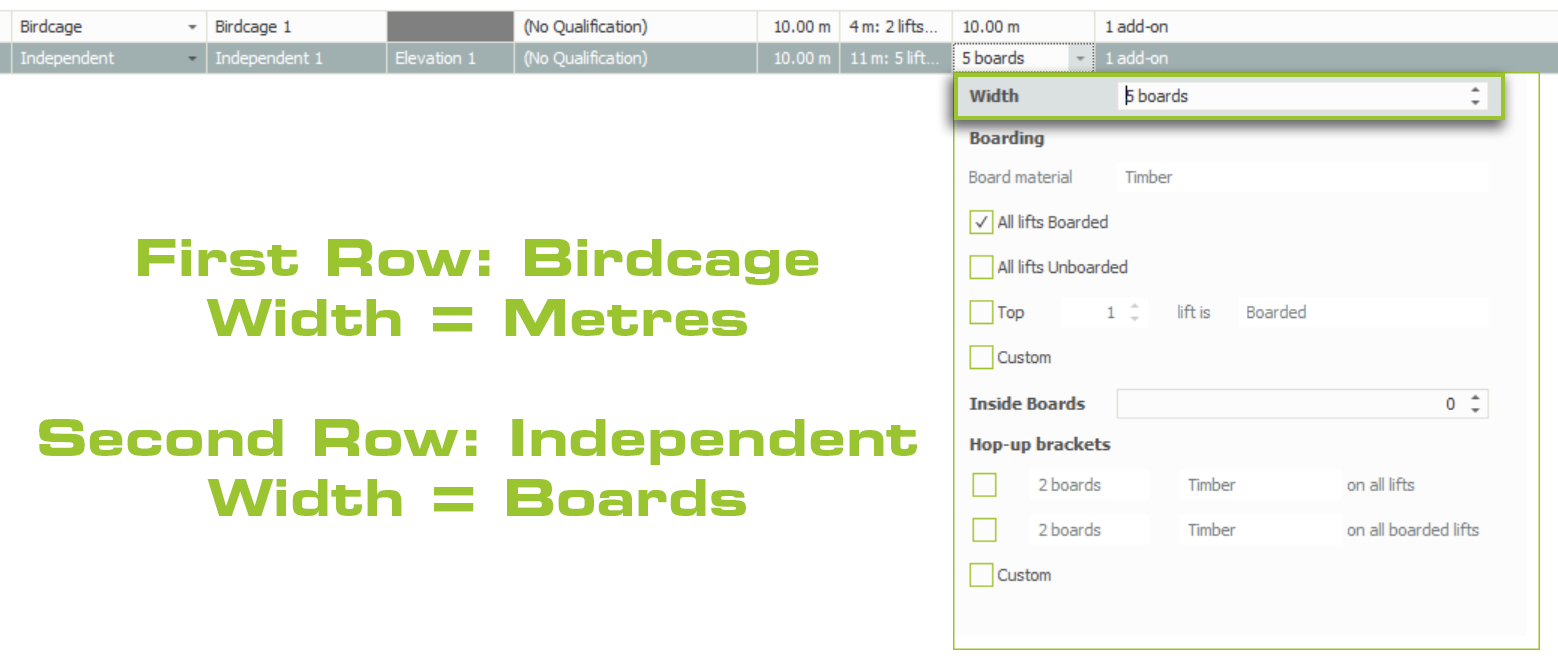
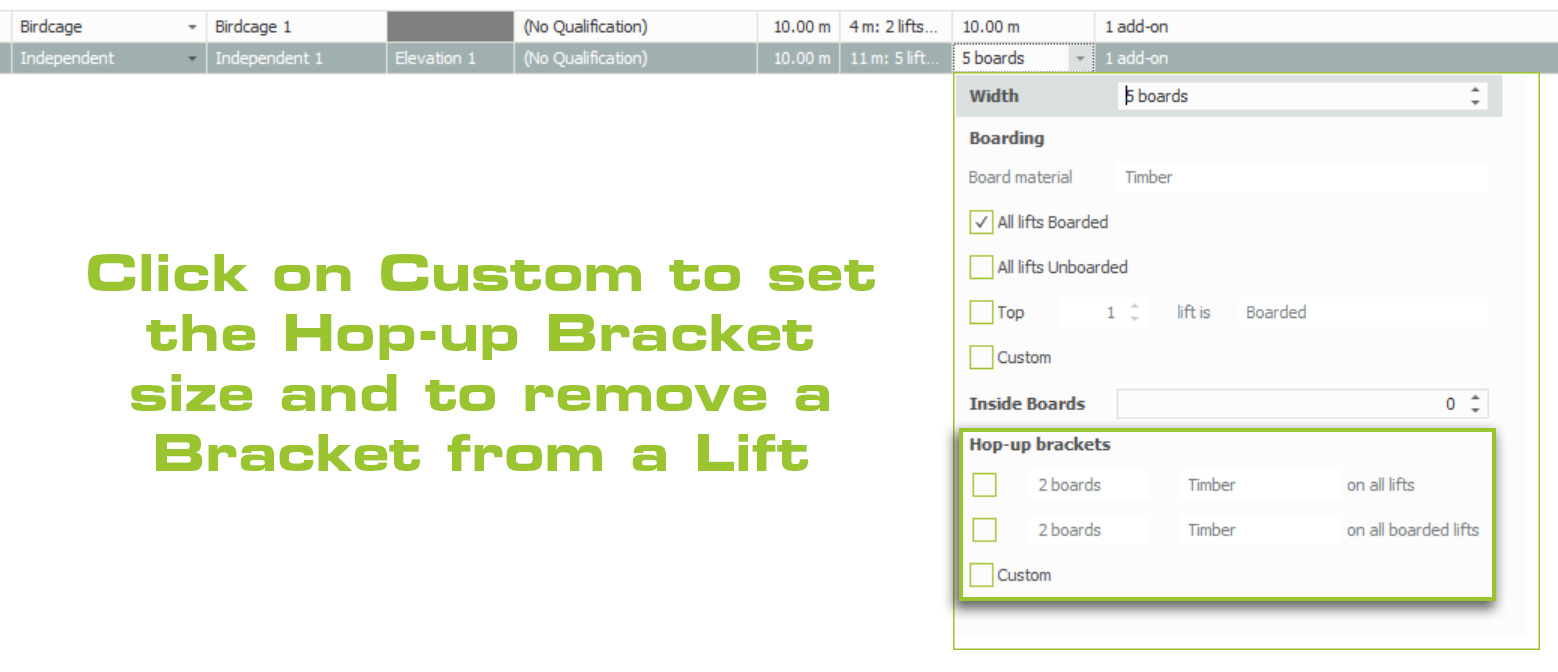
Width
In the width column when you click into a specific scaffold row on the table, a pop-up will open to enable you to set the various width related dimensions.

Located at the top of the pop-up is the main width of the scaffold or elevation. For independent scaffolds and similar scaffold types, this measurement represents the width of the main platform (inside boards appear lower on the width pop-up). For other scaffolds, such as birdcages, the measurement will be in metres.
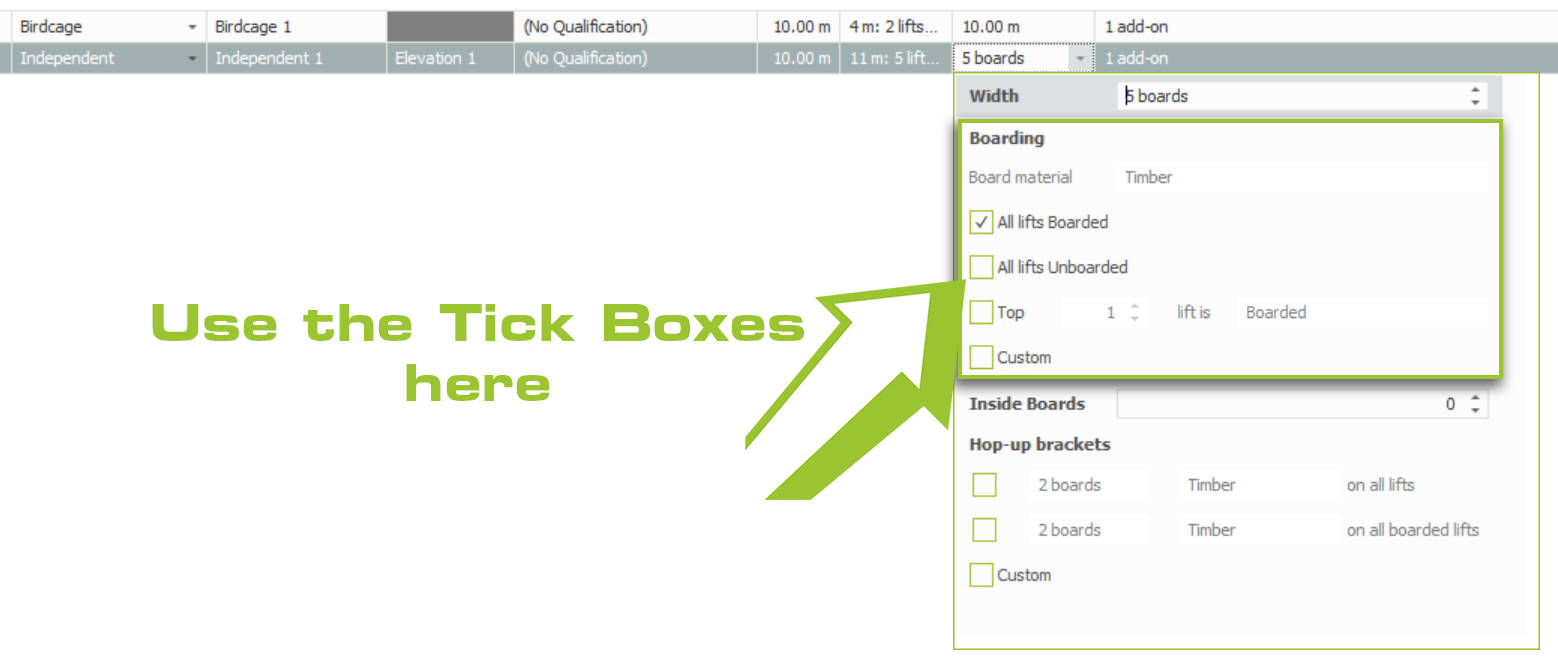
Boarding and Board Material
Next along the pop-up, you can set the board material, which is useful for scaffolding systems with steel, timber, or aluminium decks.
There are several quick edit tick boxes to choose your lift boarding , all lifts boarded, all lifts unboarded or top lift only (Note. Using the number entry, you can vary between top lift only or top 2 , 3 lifts etc.) There is also a custom option which enables you to set the boarding for each lift individually if desired.
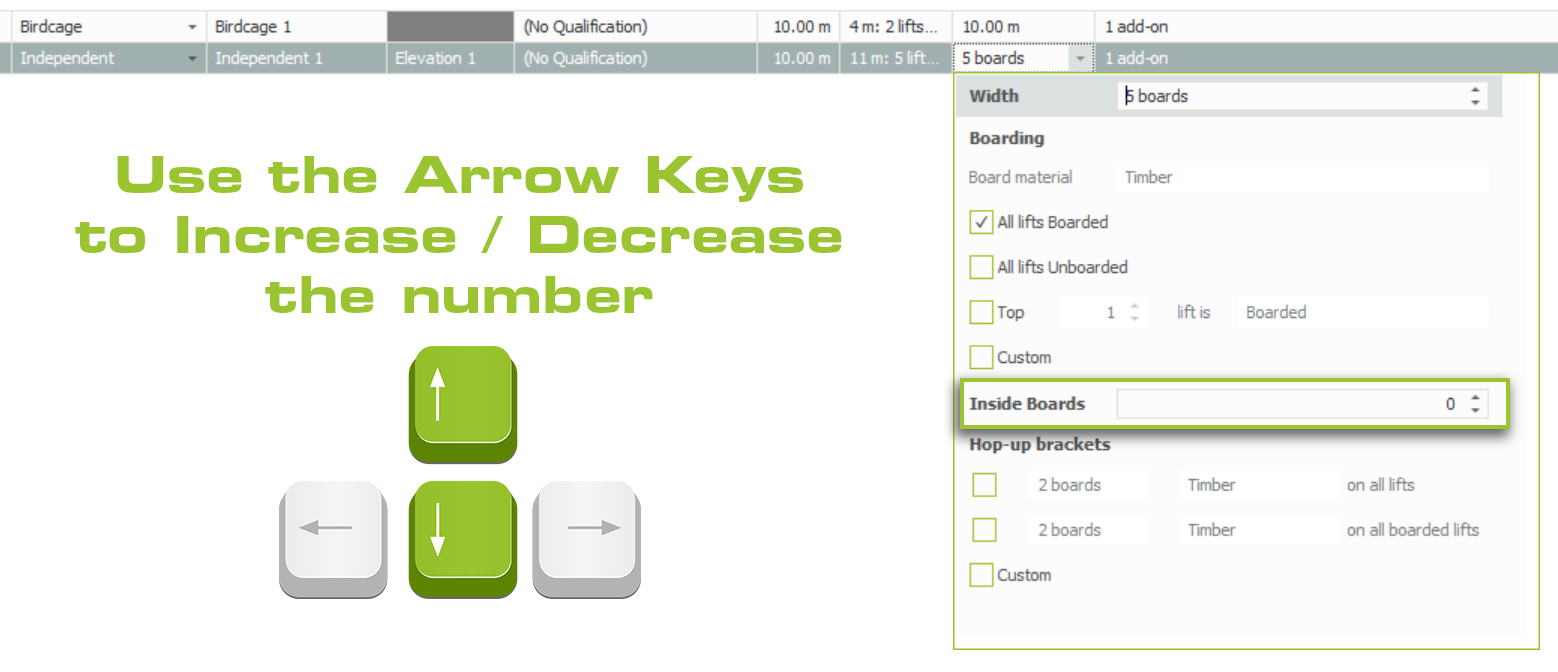
Inside Boards
Furthermore, in the case of independent scaffolds, it is possible to choose the number of inside boards between the standards and building façades.
Hop-up Brackets
There are also quick edit tick boxes for hop-up brackets and platforms for all lifts or boarded lifts as well as a custom option that allows you to set each lift’s hop-up requirement individually.
-
Applying Add-Ons to the Scaffold
You can now add add-Ons to the scaffold, such as ladders and cladding. Simply click on the add-On drop-down along the scaffold row to reveal the add-Ons column.
Select the add-Ons you wish to apply to your scaffold by clicking on the boxes or pressing the Tab key to scroll down the add-Ons and pressing the Enter key to apply the add-Ons.
Tips for working with Add-ons
By using Model IT, add-ons can be applied per scaffold elevation of the scaffold item. Additionally, Model IT allows you to edit the positioning of certain add-Ons and apply them per scaffold lift, such as ladders.
High-Visibility (Foam) Safety Standards, Safety Lamps, Gin Wheels and Rubbish Chutes
Some of these are easy to add, simply check the box to add them. For more information on these add-ons, see the associated Model IT section here.
Cladding add-ons
Brickguards, sheeting and debris netting. When you tick the box you can choose the cladding type and whether you wish to fully clad the scaffold or select the lifts that require cladding.
Double standards
Once checked you also need to specify a height for the double standards. Often these don’t run the full scaffold height depending on the design.
Cantilever Fans and Bridges
You will need to specify the lift you want to add it to, a start and end point on the scaffold and for bridges, a beam type before you can add them.
-
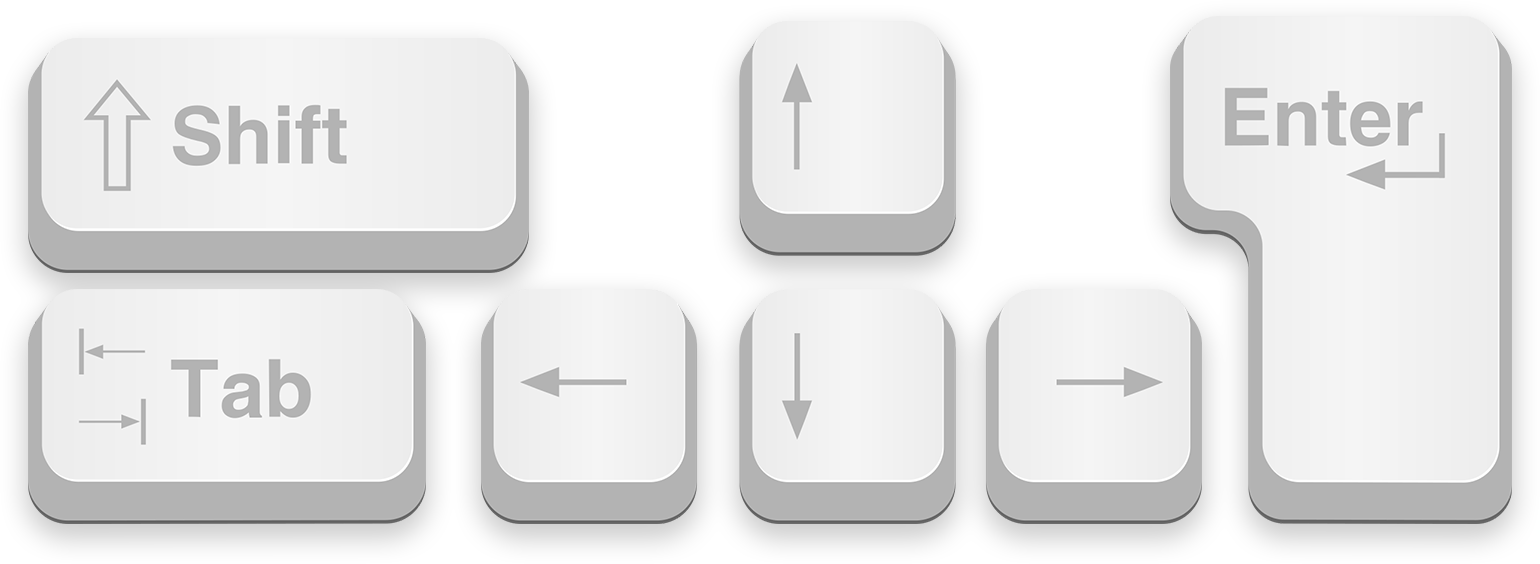
Keyboard accessibility
You can create a scaffold in the Schedule IT Summary View or scroll up and down using your keyboard. This is done by pressing Ctrl + the associated Number key below the button. As an example, if you wish to create an independent scaffold, press Ctrl + 1.
You can navigate to the next box by pressing the Tab key. The selected value will be applied before moving forward. When needed, you can move backwards by pressing Shift and Tab simultaneously. The Arrow keys 🠄🠅🠆🠇 are also available for moving along the grid, even up and down.
If you wish to set a text value or change a number, simply type the new value and press Enter.