Protecting your Intellectual Property
When using SMART Estimator to create material lists and drawings, you may have concerns regarding intellectual property protection. In addition, you may be concerned that your documents may be misused by other clients, contractors, or firms outside of your organisation.
SMART Estimator allows you to watermark text or brand documents and assets with your company’s logo. This allows you to protect your intellectual property and ensure the appropriate use of your documents.
-
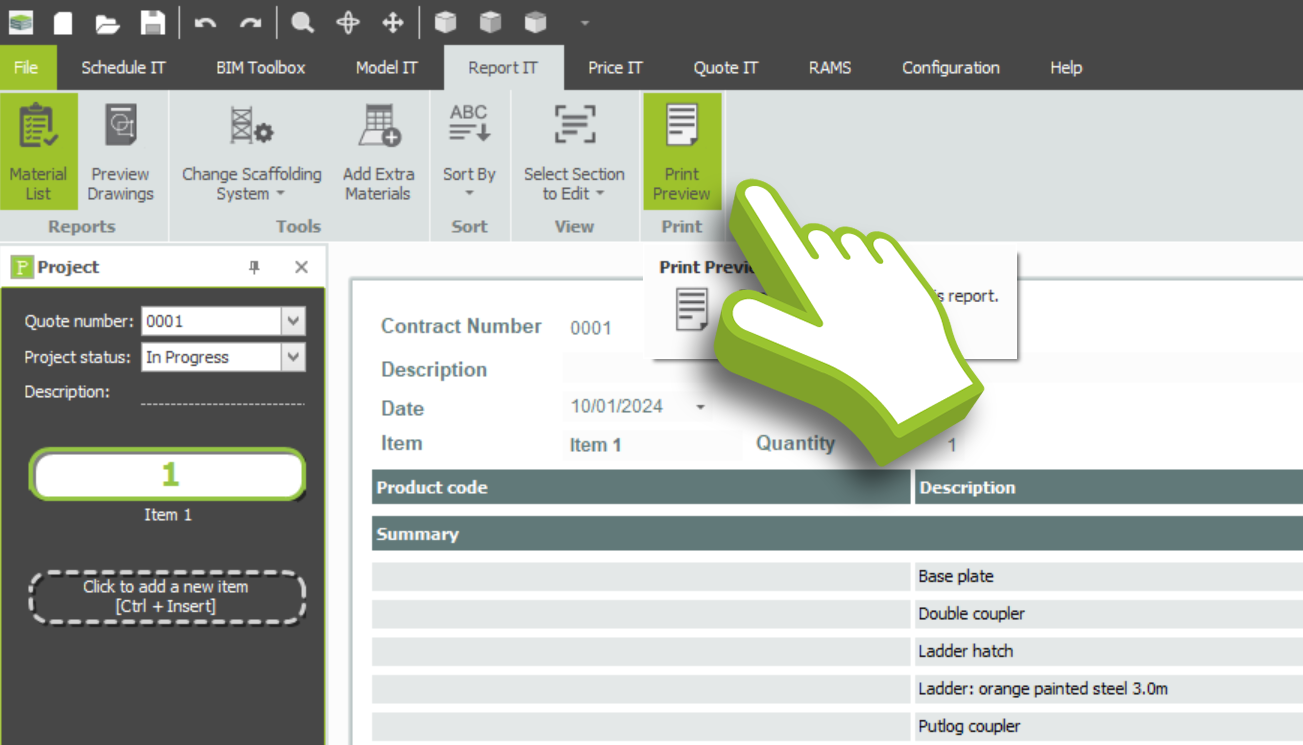
Click on the Print Preview button
Under the Report IT tab, select the ‘Print Preview’ button on either the Material List or Drawings. This will take you to the Print Preview window, where you can see a preview of what the material list or drawings will look like when printed or exported to PDF.
-
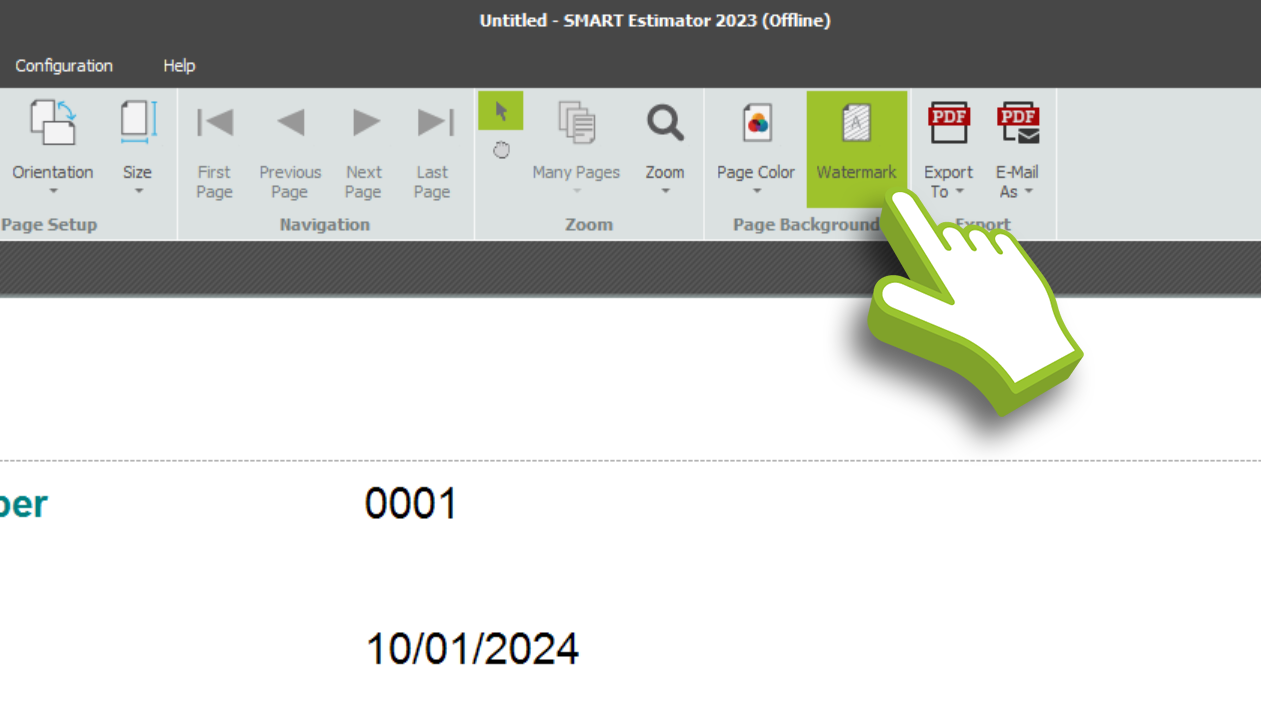
Select the Watermark Tool
Following this, you will need to navigate across the Toolbar Ribbon to the Page Background collection. Here you will see the option to change the ‘Page Color’ and add a ‘Watermark’ onto your document. To proceed to the next step, click the ‘Watermark’ option.
Once this has been done, the ‘Watermark Tool’ will open. You will be able to add a Text or an Image watermark, as well as change its positioning and range of display.

Customising the Page Colour
For branding purposes, you can also customise the page colour. However, this is only recommended if the document is exported to PDF, since printing the document would require a significant amount of ink.
Watermark Options for different modules
Furthermore, you can also add watermarks to your Schedule IT Scaffold List, Price IT Detailed Pricing Reports, Summary Pricing Reports, and Cost Analysis Summary Reports.
-
Inserting your Logo as a Picture Watermark
If you wish to insert your logo as a Picture Watermark, click on the Picture Watermark option and then click ‘Browse’. You will be prompted to select an image file from your computer. Select the image you wish to use as a watermark and select ‘Open’ to insert your image.
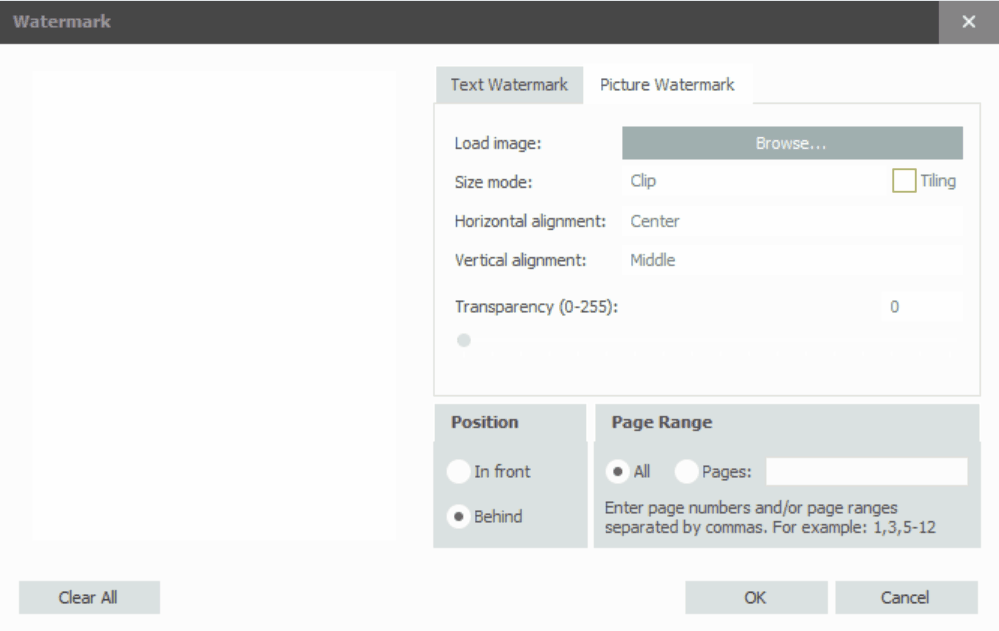
The next step involves modifying how the watermark is displayed. In the size modes, you can select whether the image is clipped off, stretched out, or zoomed in. In addition, you have the option of changing whether the logo is tiled across the document. Further down, you can also adjust the watermark alignment, as well as the transparency of the logo. You can adjust whether the watermark appears in front of or behind the document content, as well as whether it appears on all pages or on specific pages, such as the first page.
As soon as you are satisfied with the final appearance of the Watermark, click ‘OK’. Your document has now been watermarked with your Logo.
-
Inserting Text as a Watermark
To add a text watermark to your document, click on the Text Watermark option. You may either type the text for the Watermark or click on the drop-down next to the Text Input field to view a list of available Text Watermarks.

The font can now be repositioned, recoloured, resized, and restyled as desired. It is also possible to select whether the text should be bold or italicised. Finally, just like with an image watermark, you can adjust the visibility by changing the transparency. You can adjust whether the watermark appears in front of or behind the document content, as well as whether it appears on all pages or on specific pages, such as the first page.
As soon as you are satisfied with the final appearance of the Watermark, click ‘OK’. Your document has now been watermarked with a Text Watermark.


Tips for watermarking your documents
You can insert both your Logo and some Text on the same page of the document. Simply insert your Image and some Text, then click ‘OK’ and they’ll both appear simultaneously.
If you are not sure how the Watermark will appear in the document, you should press ‘OK’ in order to view your current modifications to the document. You can then return to the Watermark tool to make any further adjustments.
