-
Overview of the Item Pricing Sheet
The Item Pricing Sheet is an editable smart spreadsheet report that contains all the price figures associated with an estimation. When you correctly set up your rates, Price IT will automatically calculate your scaffolding project, generating a cost breakdown based on the Kit List and Rates, which is then included in the quotation.
Continuing down below, you will find an infographic providing a brief overview of the various sections within the item pricing sheet. To view it in full detail, please click on it.
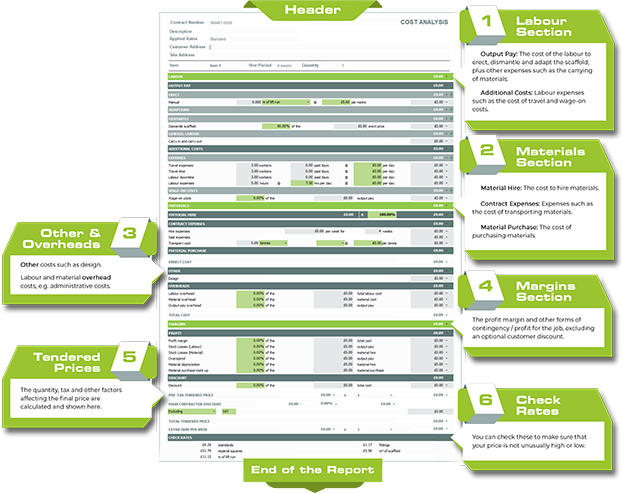
Item Pricing Sheet Header
The header section of the Item Pricing Sheet includes important modifiable details such as Contract Number, Description of Scaffold, Applied Rates, Customer Address and Site Address. You can also modify the item name, hire period and quantity. Furthermore, you can even modify the ‘Cost Analysis’ title at the top right of the Item Pricing Sheet.
Want to learn more about Price IT?
For a more in-depth explanation on the Price IT Functions, please click on this link to go to the Price IT Section of the Help Centre.
-
Modifying your Rates in Price IT
When modifying your rates, you will be primarily focusing on the green shaded text, as these are the rate settings. In this manner, future estimations and projects can be calculated accurately and quickly based on the settings saved.
Any of the figures in the shaded columns or rows of the report that are not white may be modified. Any column or row that is shaded in the report indicates that it can be edited. The white columns with black text, on the other hand, are locked and cannot be modified.
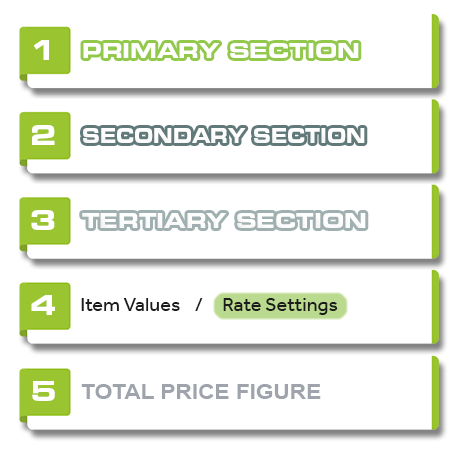
Sections of the Item Pricing Report are divided into rows. Each row contains a price figure on the right hand side and they’re arranged according to a colour hierarchy. It is calculated by adding up all price figures in the row below it.
Item valuesThe scaffold item values are represented by text on a light grey shaded background. You can change these values to suit the job, but they cannot be saved for future projects.
Rate settingsRate settings are represented by text on a green shaded background. The values can be used only for the current item, or they can be saved and used in future projects as well as in other items within this project.
Total Price FigureThere is an exception to this rule for Sections: The Total Price Figure sums up all of the price figures in a row or section above itself, you can identify it by a white background with Grey text.
-
Applying your Rates to the Project
Whenever you set a new value, you will notice the color of the text changes to red. This indicates that the value has been modified, but it has only been applied to one item within the project.
In order to save your Rate Settings for future projects, you will need to apply your modifications to all items within the project in order to save your adjustments. Thankfully, there are Three ways to do so.
- An advice popup panel will appear at the top of the report when a value has been modified. Click on it to save all your changes to the project.
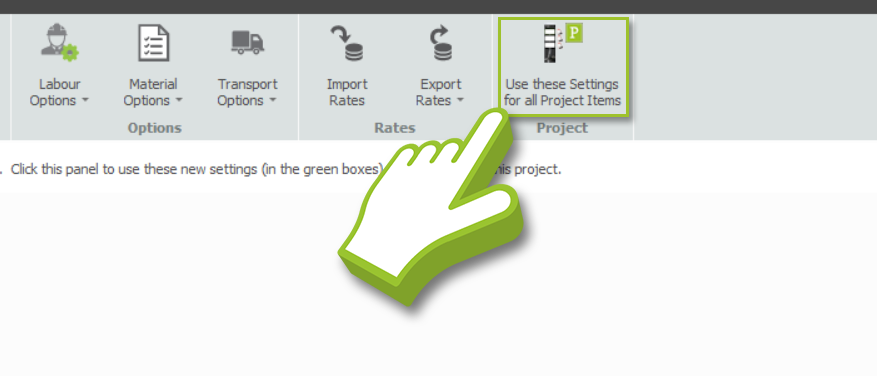
- Click on the “Use these settings for all Project Items” button along the ribbon.
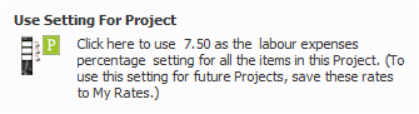
- Alternatively, you can save a single value by hovering your mouse over the setting you have just changed and then clicking on the ‘P’ button that appears beside it.


-
Saving Rates for Future Projects
As soon as all of your modifications have been added to the project and you are satisfied with the Rate Settings, you can save them as a Set of Rates for later use.
Your set of rates are stored in a dedicated folder called Shared Rates, which is shared by everyone on your network from the Enterprise Server. During offline use, your rates will be stored in a separate folder called My Rates.

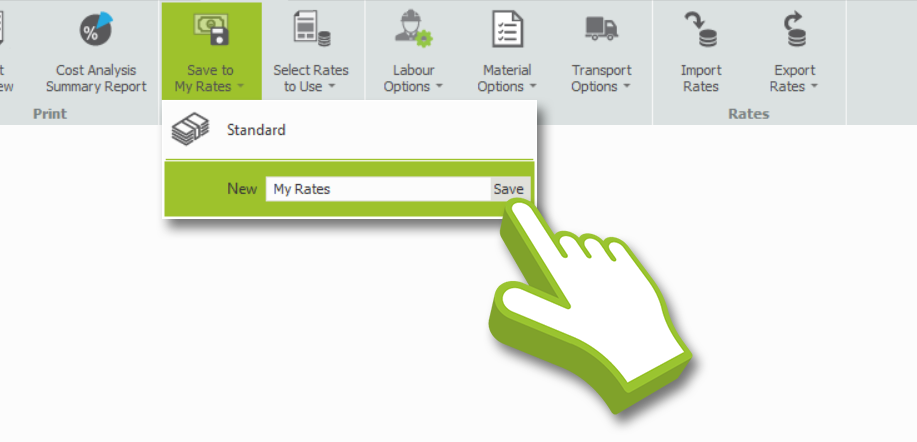
To create the shared rates, select the Save to Shared Rates drop-down menu, then enter a new relevant name for your rates so that you do not overwrite the “Standard Rates”, and then click Save.
Changing your Set of Rates
If you have multiple sets of rates available to you, you can change your rates by clicking on the Select Rates to Use button and then selecting the set of rates that you wish to use.
Deleting your Rates
If you wish to permanently delete one of your shared rates, click on Delete from My Rates. After that, click on the set of rates you want to get rid of.
Keep in mind, this button only appears if you have more than one set of rates.
Why can’t I save my rates?
It is only possible to save your rates once all of your rate settings have been applied to all items in the project. If the Save to My Rates button is missing, try pressing the Use these Settings for all Project Items button:
-
Rate setting template projects
You can find the Template Projects for setting up standard pricing or banded pricing here. Please click the appropriate button below based on what pricing rates you are using for your estimations:
Once you do, this will download the relevant SMART Estimator project (.mIT File), open the project file and from there you can set your rates for your future projects.


