-
Hiearchy of Editing Rates
When editing your Shared Pricing Rates, there are three distinct levels of modification available:
- Item Level:
- Project Level:
- Server Level:
This allows you to make specific adjustments on an item-by-item basis. Pricing rates for individual items can be modified without affecting other items in the project.
At this level, changes are applied across the entire project. This is useful when you need consistent pricing adjustments for all items within your estimation project, without affecting every estimation.
In contrast, the Server Level allows pricing rates to be saved, shared and applied across the Enterprise Server server infrastructure. This level is ideal for Initial Setup and consistent pricing rates per estimation project.
-
Rate Editing: What to consider?
There are a few things to keep in mind when modifying your price figures on SMART Estimator in Price IT.
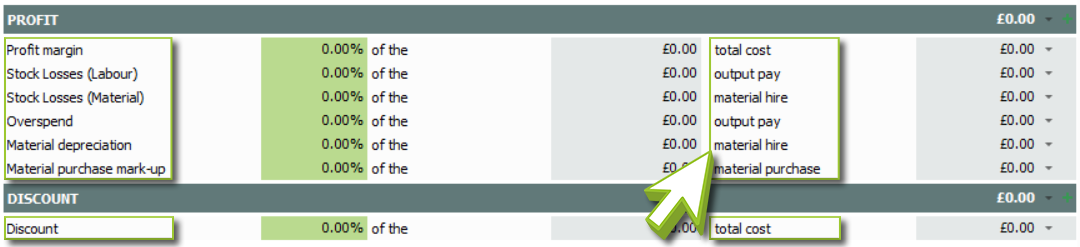
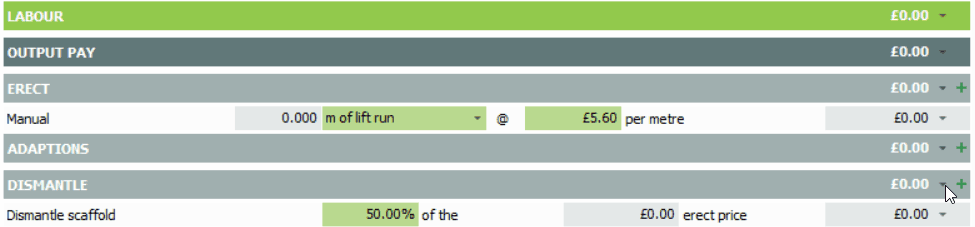
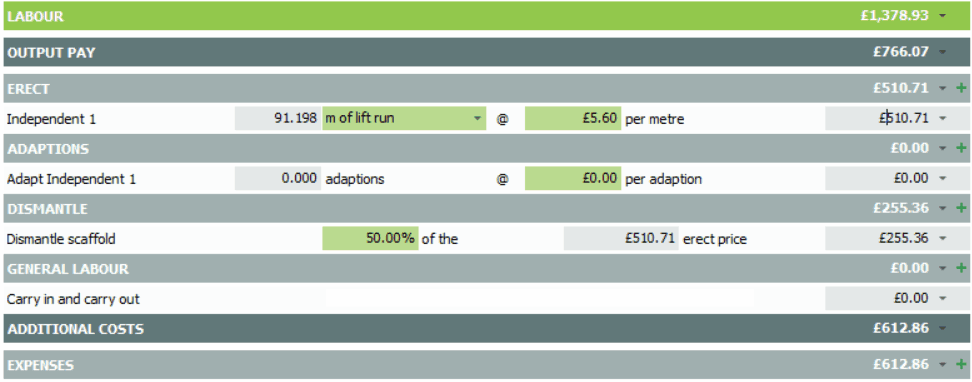
Firstly, any figures shaded with a green background are known as the Rate Settings. These settings can be saved for future estimations and projects later on. When editing your Shared Pricing Rates, these will be the values you’ll need to modify.
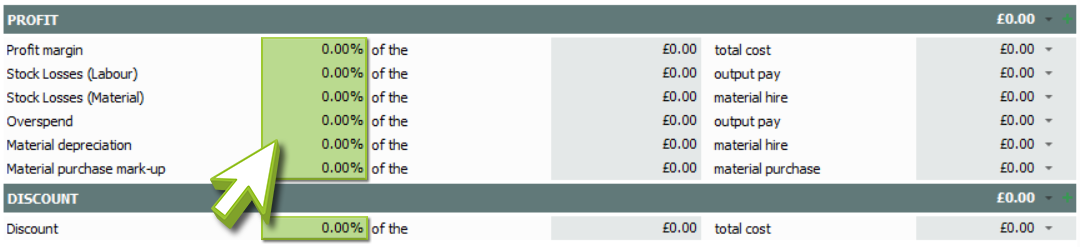
Secondly, any shaded columns or rows in the report may also be modified, but cannot be saved. This also differs from the Tendered Pricing section of the report which can be modified as it has a Grey Text. They represent values that you can change and modify on a job-by-job basis.
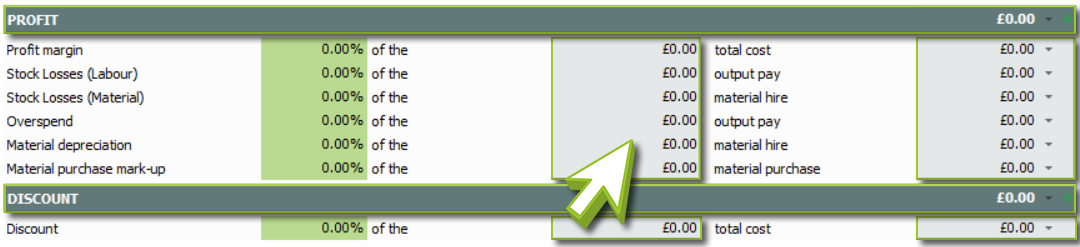
Finally but not least, any figures shaded with a white background and black Text are locked and cannot be modified.
-
Making changes to a Rate Setting
Changing a Rate Setting is as simple as clicking on the shaded box containing the value you wish to modify. This can be a drop-down or editable text.
As soon as the setting is selected, either choose from the available options from the drop-down menu or type the new value. This will replace the previous value.
-
How to apply your Modifications?
Now that you’ve adjusted the figure or setting, you will notice the text colour changes to red or orange. This indicates that the value has been modified, but only been applied to one item within the project.
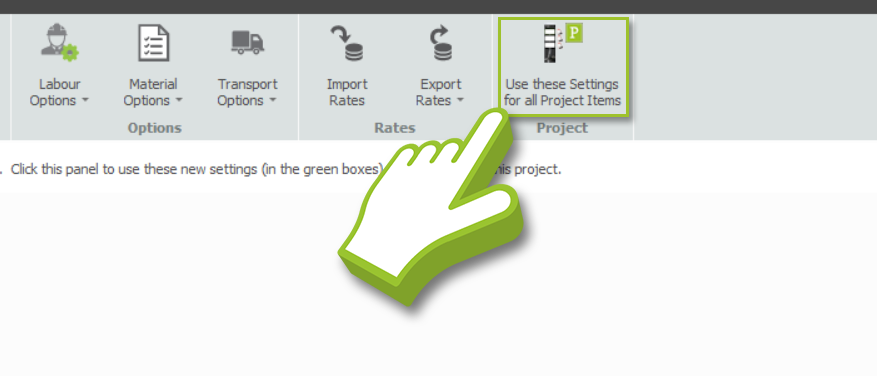
The next step is to apply the modifications so that they can later be saved. There are three ways to accomplish this.
- An advice popup panel will appear at the top of the report when a value has been modified. Click on it to save all your changes to the project.
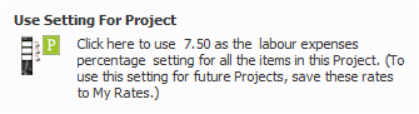
- Click on the “Use these settings for all Project Items” button along the ribbon.
- Alternatively, you can save a single value by hovering your mouse over the setting you have just changed and then clicking on the ‘P’ button that appears beside it.


-
Save your Modifications for Future Projects
Now that all of your modifications have been applied, select the Save to Shared Rates drop-down menu, choose the rates you are currently using, and click Save. As a result, you will be overwriting your existing shared rates with this change.
I cannot see the Save to Shared Rates button?
In order to save your Rate Settings for future projects, you will need to apply your modifications to all items within the project. If you do not see a Save to Shared Rates drop-down button. Click on the Use these Settings for all Project Items button.
SMART Estimator
What’s new?
Getting Started
Setup and Configuration
-
Enterprise Server
-
Cloud Server Setup
Local Windows Server Setup
Adding Cloud server users
Server Back Up and Restore
Archiving Estimates from server
Migrating Local server to Cloud
Creating Folders in Enterprise Server
Using Server Tools from the Command Line
-
User software settings
User Address Settings and Yard
Scaffold Banner and Sheeting logo
Adding Watermarks
-
Setting up your Rates
Editing Shared Pricing Rates
Creating a rate setting template project
Importing and Exporting shared Rates
Creating an Estimate
Importing Drawings and Models
Scheduling Scaffolds
Creating 3D Scaffolds
-
3D Model Controls
Adding Independent scaffolds
Adding Circular Tank scaffolds
Adding Free Form Birdcages
Adding Birdcage & Lift shaft scaffolds
Adding Tied or Freestanding towers
Adding Stair towers, Ladders towers & Buttresses
Adding Loading bays
Adding Chimney scaffolds
Adding Temporary Roof
Adding Edge protection
Adding Pavement Gantry’s
System Scaffolds
Safety Decking
Using the Scaffold Library
Editing Scaffolds
Scaffold Add-ons & Options
-
Adding Gin wheels, Rubbish Chutes, Safety standards, Double standards and Lamps
Adding and Editing bridges/beam work
Adding Beams around Corners
Adding Cladding
Adding Cantilever protection fans
Adding Pavement Lifts
Adding Recesses and Infills
Building and Ground colour
Visual options (Tube, Ladder, System details and Grips)
Add a Pedestrian or Scaffolder
Copying pictures of the model
Material Lists and Drawings
Pricing and Estimation
Quotations
Enterprise Server
Troubleshooting


