SMART Estimator
What’s new?
Getting Started
Setup and Configuration
-
Enterprise Server
-
Cloud Server Setup
Local Windows Server Setup
Adding Cloud server users
Server Back Up and Restore
Archiving Estimates from server
Migrating Local server to Cloud
Creating Folders in Enterprise Server
Using Server Tools from the Command Line
-
User software settings
User Address Settings and Yard
Scaffold Banner and Sheeting logo
Adding Watermarks
-
Setting up your Rates
Editing Shared Pricing Rates
Creating a rate setting template project
Importing and Exporting shared Rates
Creating an Estimate
Importing Drawings and Models
Scheduling Scaffolds
Creating 3D Scaffolds
-
3D Model Controls
Adding Independent scaffolds
Adding Circular Tank scaffolds
Adding Birdcage & Lift shaft scaffolds
Adding Tied or Freestanding towers
Adding Stair towers, Ladders towers & Buttresses
Adding Loading bays
Adding Chimney scaffolds
Adding Temporary Roof
Adding Edge protection
Adding Pavement Gantry’s
System Scaffolds
Safety Decking
Using the Scaffold Library
Editing Scaffolds
Scaffold Add-ons & Options
-
Adding Gin wheels, Rubbish Chutes, Safety standards, Double standards and Lamps
Adding and Editing bridges/beam work
Adding Beams around Corners
Adding Cladding
Adding Cantilever protection fans
Adding Pavement Lifts
Adding Recesses and Infills
Building and Ground colour
Visual options (Tube, Ladder, System details and Grips)
Add a Pedestrian or Scaffolder
Copying pictures of the model
Material Lists and Drawings
Pricing and Estimation
Quotations
Enterprise Server
Troubleshooting
-
Why and how do we create a template project?
In order to setup our pricing rates within the software, we must create a rate setting template project. This is necessary since Price IT will only display pricing lines for scaffolds included within the item.

A rate setting template project can be obtained in two ways. The first method involves manually entering scaffold items and add-ons into an item. As for the second method, you may import a template project into SMART Estimator..
-
Creating your own template project
The first step in creating your own rate setting template project is to go to Schedule IT. On the Summary view, make sure the Tube and Fitting scaffolding system is selected.
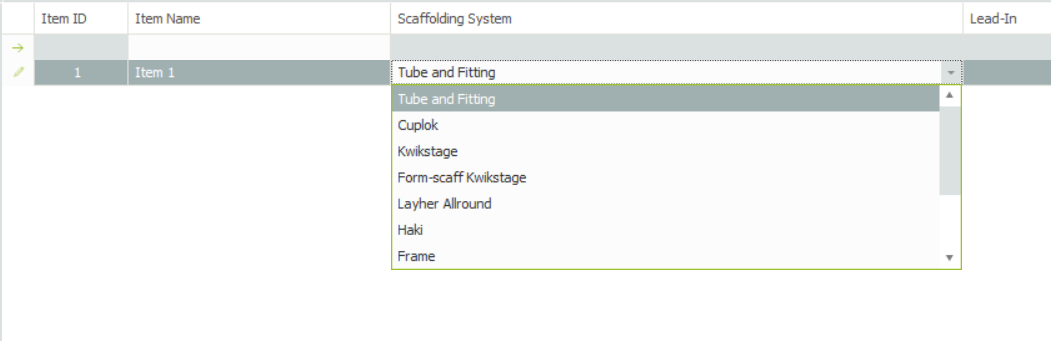
Tube and Fitting is usually on by default and contains all Scaffold Types and Add-ons, however you can choose a different system if you wish. Let’s now take a look at the Scaffolds View to set up the scaffold template.
-
Adding one of each Scaffold Type
To begin, you must add one of each scaffold type to the Schedule using the Ribbon. Some of the scaffold types might be greyed out as they’re not available in the system.
-
Add one of each add-on
You must also include one of each add-on from the drop-down selection. Ideally, this should be the Independent Scaffold since it is compatible with all add-ons. Last but not least, certain add-ons have additional configuration options when selected. Please review these instructions below.
- Cantilever Fans:
- Select the first lift from the menu and leave it as is.
- Brick Guards:
- Leave as default (Boarded Lifts).
- Cladding:
- Select the first option, Fully Sheeted.
- Bridges:
- From the bottom-left menu, choose the first lift, set the Start and End points (2.00 for Start, 4.00 for End), and then add a Ladder Beam.
- Cantilever Fans:
-
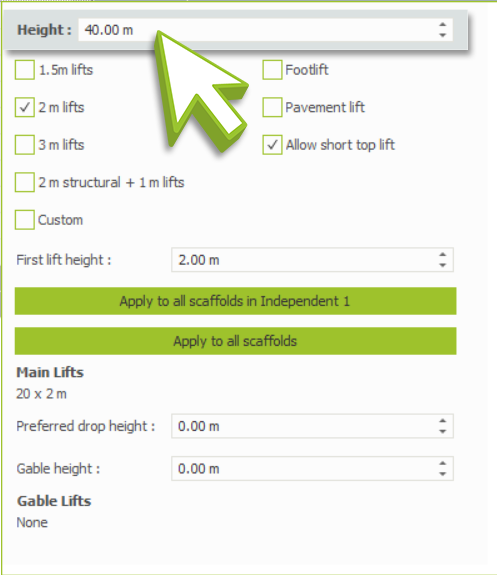
Banded Pricing
If you’re calculating banded pricing, click onto the Independent and set the height to 40 metres, then go over to Price IT. You can set the Banded Pricing option and setup your rates from there.