-
Overview of the Local Enterprise Server
The Local Windows Enterprise Server acts as one of the two primary backbones of your project management hub. The Enterprise Server is a separate shared server, which provides an external central point of access to save your project estimations, variations, configurations, etc.
This documentation will cover the Local Installation of a shared server within your own network. If you wish to utilise the SMART Scaffolder Cloud, please see the following documentation.

-
Select the Data Settings Tab
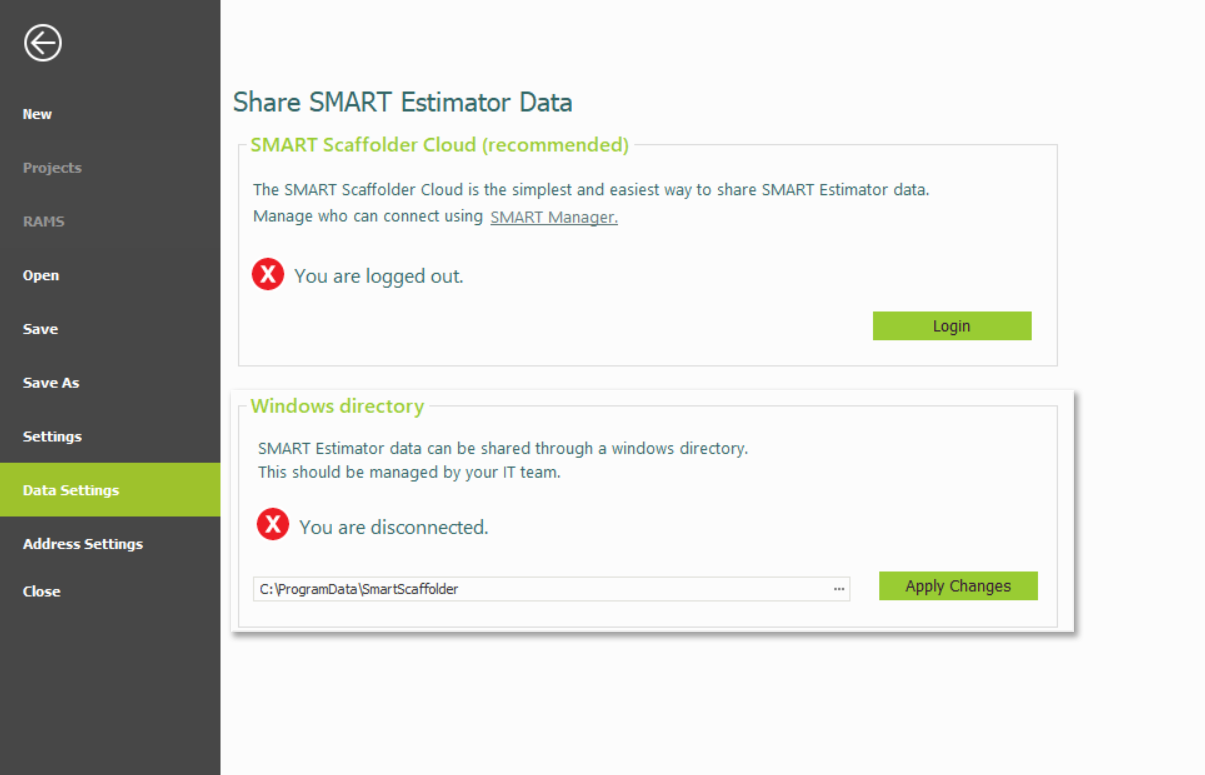
To begin, open SMART Estimator and navigate to the Data Settings tab located on the left side of the application. On the Data Settings page, you will find two options: the SMART Scaffolder Cloud box and the Local Windows Directory box.
If an Enterprise Server connection has not been established, both options will appear crossed off.
-
Creating the Enterprise Server Folder
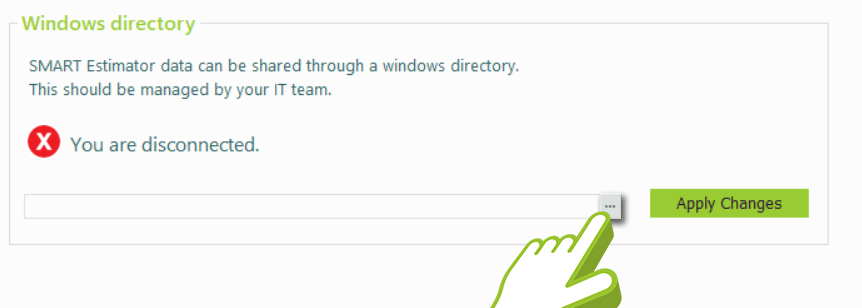
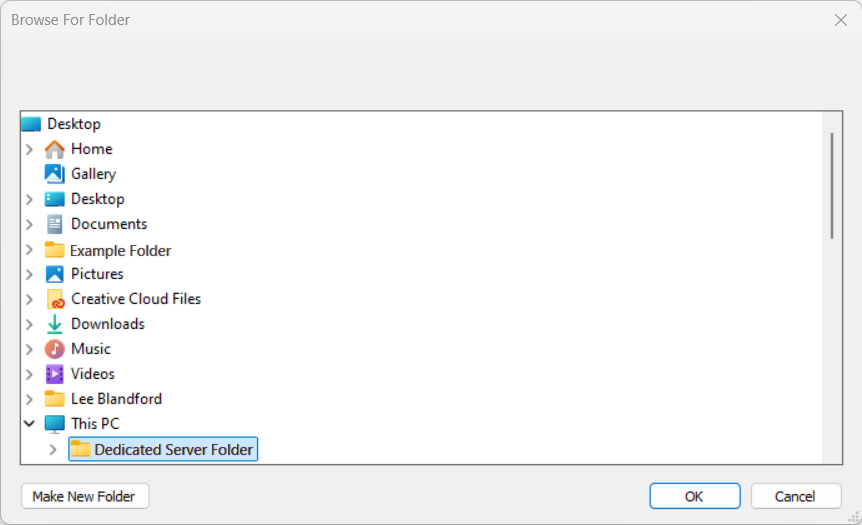
Begin by clicking on the triple-dot icon within the Windows Directory box to open File Explorer. It is recommended to create a dedicated folder in a ‘Shared’ directory in order to ensure that all estimators will have access to it. Once the folder is created, select it and click “OK.”
Now the file path will be displayed in the Directory box, as shown below.

-
Installing the Enterprise Server
As soon as you have set up the directory for your Enterprise Server, click the Apply Changes button located on the right side of the Windows Directory box. Upon clicking the button, the Local Enterprise Server will be created and installed in the dedicated folder you specified.

-
Sharing the Enterprise Directory
The next step is to make the folder you created shareable with other estimators. Start by navigating to the directory where the dedicated folder is located. Right-click on the folder and select Properties at the bottom of the list.
In the Properties window, go to the Sharing tab and click the Advanced Sharing… button. Tick the Share this folder box, then click on the Permissions button.
Ensure the Everyone option is selected and tick the Full Control box and then apply your changes by clicking on the Apply Button. Close the permissions dialog by clicking OK, then press the OK button again to close the sharing dialog, and finally press Close to close the properties dialog.
-
Connected to the Local Server
Now that the Local Server has been set up, other Estimators are able to make use of the dedicated folder. Ensure that they are able to access the shared folder by navigating to its network location and that the directory in SMART Estimator links to the dedicated folder.

SMART Estimator
What’s new?
Getting Started
Setup and Configuration
-
Enterprise Server
-
Cloud Server Setup
Local Windows Server Setup
Adding Cloud server users
Server Back Up and Restore
Archiving Estimates from server
Migrating Local server to Cloud
Creating Folders in Enterprise Server
Using Server Tools from the Command Line
-
User software settings
User Address Settings and Yard
Scaffold Banner and Sheeting logo
Adding Watermarks
-
Setting up your Rates
Editing Shared Pricing Rates
Creating a rate setting template project
Importing and Exporting shared Rates
Creating an Estimate
Importing Drawings and Models
Scheduling Scaffolds
Creating 3D Scaffolds
-
3D Model Controls
Adding Independent scaffolds
Adding Circular Tank scaffolds
Adding Birdcage & Lift shaft scaffolds
Adding Tied or Freestanding towers
Adding Stair towers, Ladders towers & Buttresses
Adding Loading bays
Adding Chimney scaffolds
Adding Temporary Roof
Adding Edge protection
Adding Pavement Gantry’s
System Scaffolds
Safety Decking
Using the Scaffold Library
Editing Scaffolds
Scaffold Add-ons & Options
-
Adding Gin wheels, Rubbish Chutes, Safety standards, Double standards and Lamps
Adding and Editing bridges/beam work
Adding Beams around Corners
Adding Cladding
Adding Cantilever protection fans
Adding Pavement Lifts
Adding Recesses and Infills
Building and Ground colour
Visual options (Tube, Ladder, System details and Grips)
Add a Pedestrian or Scaffolder
Copying pictures of the model
Material Lists and Drawings
Pricing and Estimation
Quotations
Enterprise Server
Troubleshooting


