-
Copy and Paste Overview
You can copy screenshots of the scaffold image from Model IT and use them in your proposals, quotations, risk assessments, and e-mails to customers. In addition, you can use them in other documents.

-
Making a copy of an image
Before copying an image of your scaffold, you should set the appropriate camera angle, then use the rotate, zoom, and pan tools to align it correctly.
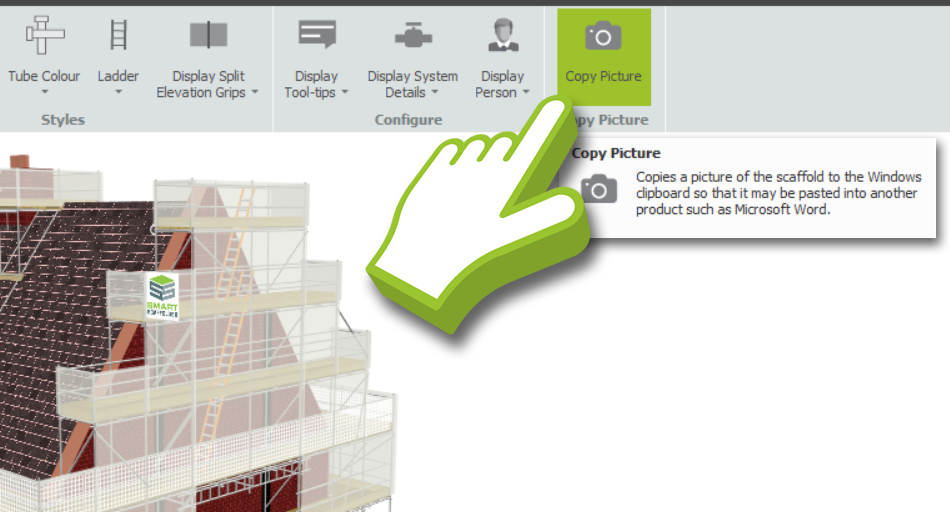
After you have aligned the angle properly in Model IT, click the Copy Picture button on the Options toolbar. The scaffold image will be successfully copied to the clipboard.

Using the Snipping Tool to Copy
As an alternative, you may also use the Snipping Tool. To begin a new capture, open the Snipping Tool application and select the New button or use the Windows + Shift + S shortcut.
By using your mouse, draw a rectangle around the scaffold image you wish to copy, and then save or copy the image so that it can be pasted into your desired document.
-
Adding the image to the document
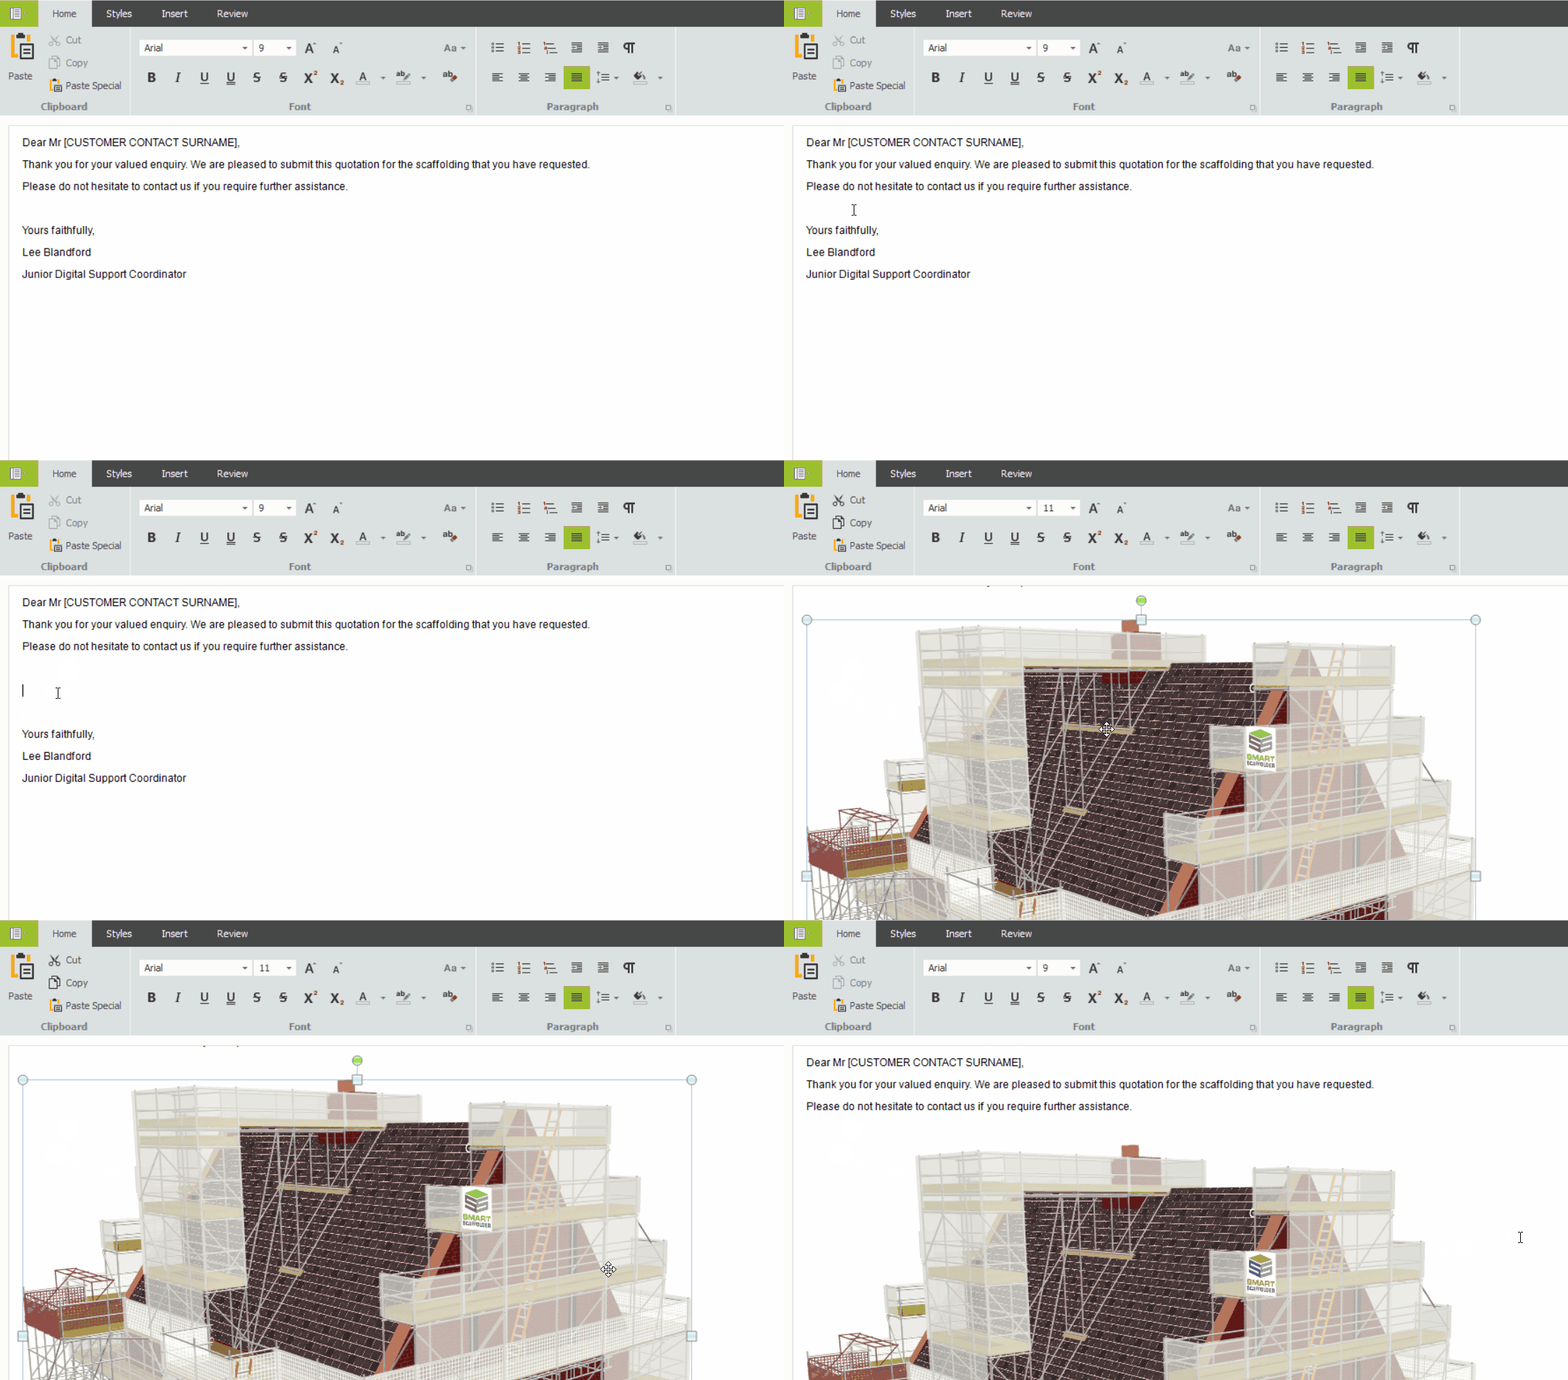
Once you have copied the image using either method, open the document where you wish to insert the image. Simply click to place your cursor where you want the image to appear, and press Ctrl + V to paste it. The image will be inserted into your document at your cursors location.

-
Modifying and Resizing the Image
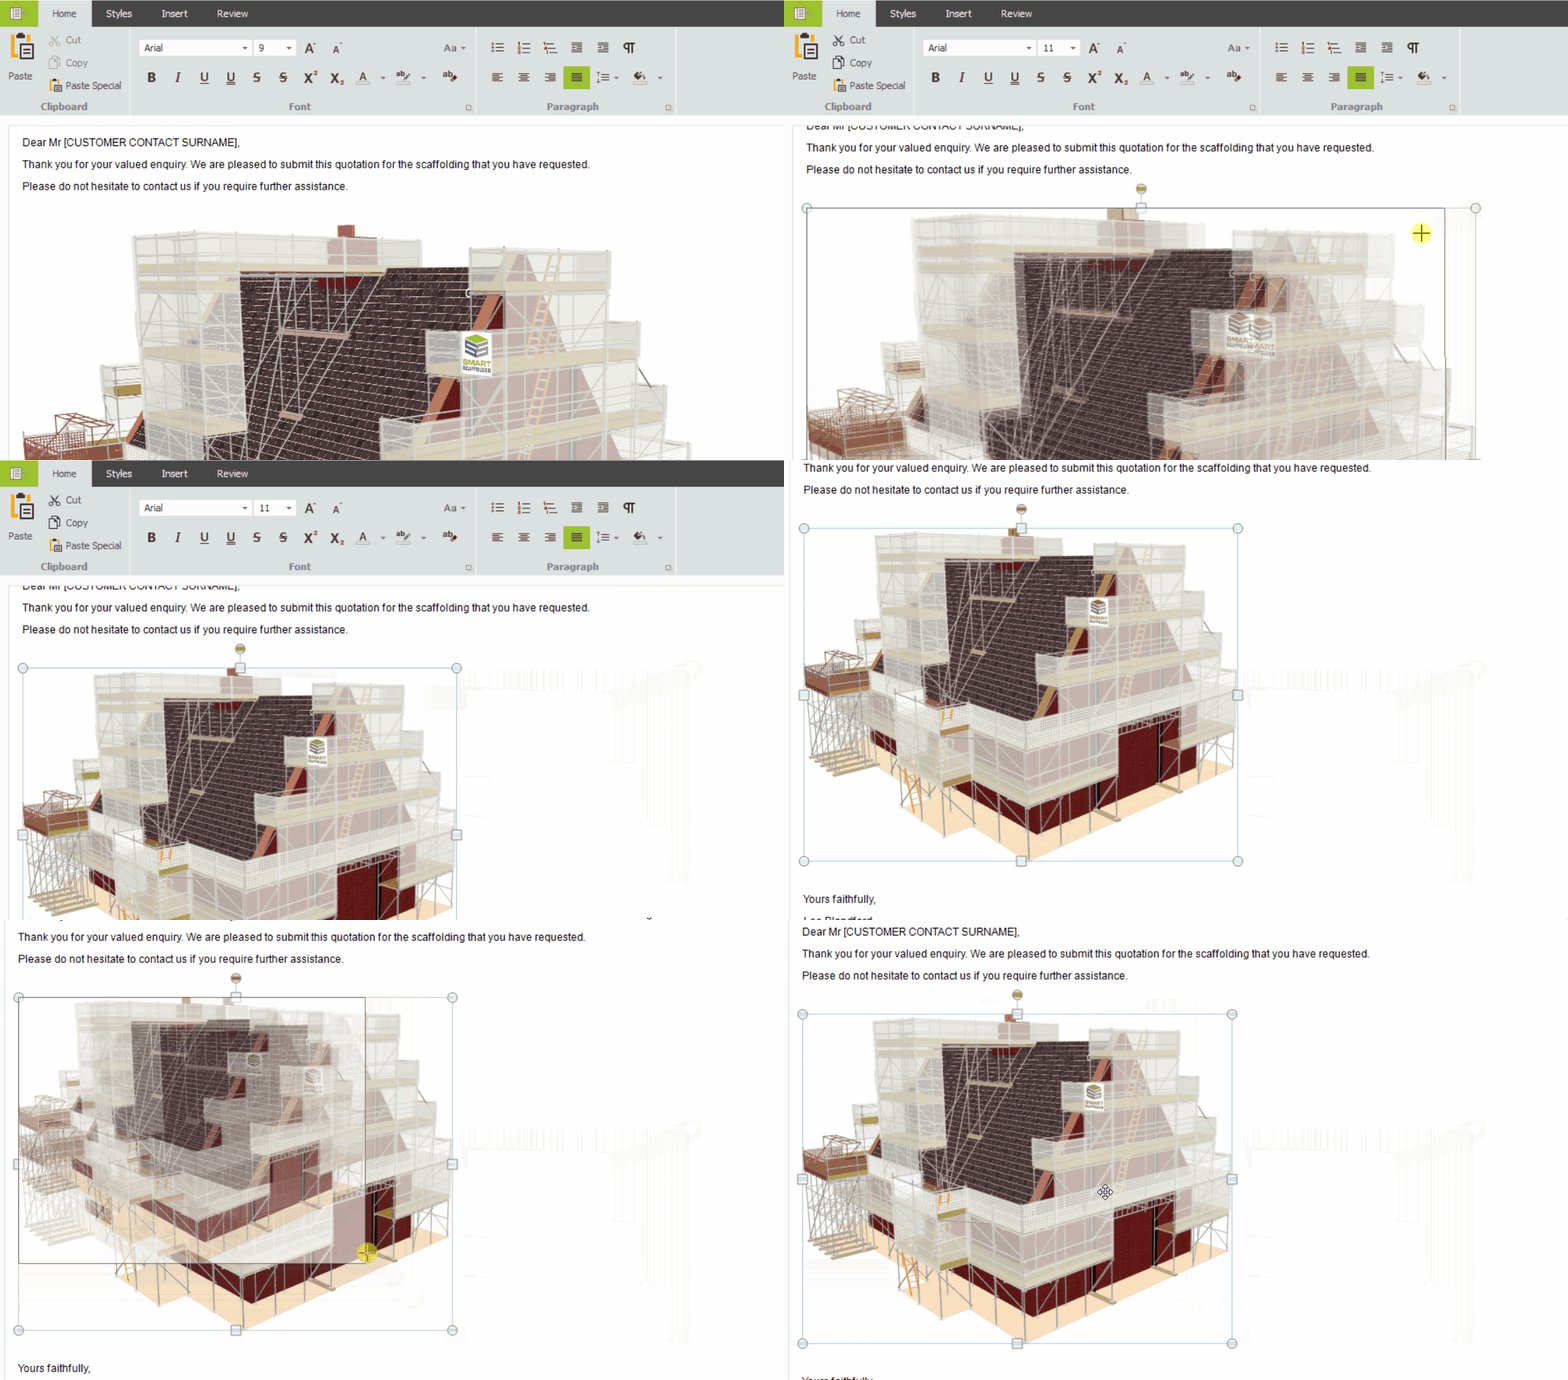
If you wish to resize the scaffold image, click on the image to select it, then drag the corners inward or outward to adjust its size while maintaining the aspect ratio.

SMART Estimator
What’s new?
Getting Started
Setup and Configuration
-
Enterprise Server
-
Cloud Server Setup
Local Windows Server Setup
Adding Cloud server users
Server Back Up and Restore
Archiving Estimates from server
Migrating Local server to Cloud
Creating Folders in Enterprise Server
Using Server Tools from the Command Line
-
User software settings
User Address Settings and Yard
Scaffold Banner and Sheeting logo
Adding Watermarks
-
Setting up your Rates
Editing Shared Pricing Rates
Creating a rate setting template project
Importing and Exporting shared Rates
Creating an Estimate
Importing Drawings and Models
Scheduling Scaffolds
Creating 3D Scaffolds
-
3D Model Controls
Adding Independent scaffolds
Adding Circular Tank scaffolds
Adding Birdcage & Lift shaft scaffolds
Adding Tied or Freestanding towers
Adding Stair towers, Ladders towers & Buttresses
Adding Loading bays
Adding Chimney scaffolds
Adding Temporary Roof
Adding Edge protection
Adding Pavement Gantry’s
System Scaffolds
Safety Decking
Using the Scaffold Library
Editing Scaffolds
Scaffold Add-ons & Options
-
Adding Gin wheels, Rubbish Chutes, Safety standards, Double standards and Lamps
Adding and Editing bridges/beam work
Adding Beams around Corners
Adding Cladding
Adding Cantilever protection fans
Adding Pavement Lifts
Adding Recesses and Infills
Building and Ground colour
Visual options (Tube, Ladder, System details and Grips)
Add a Pedestrian or Scaffolder
Copying pictures of the model
Material Lists and Drawings
Pricing and Estimation
Quotations
Enterprise Server
Troubleshooting


