-
Where do I Locate the Colour Tools?
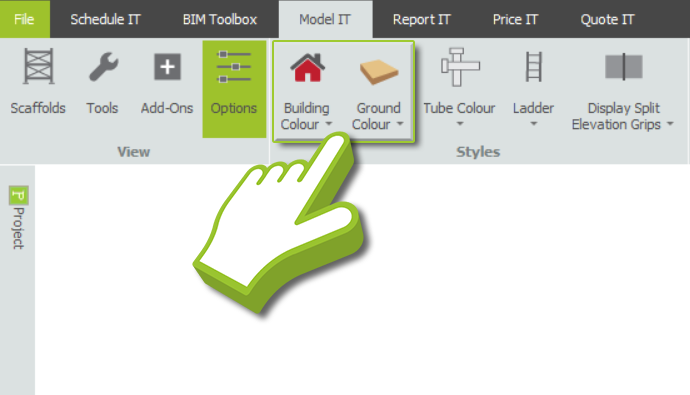
You can find the Building and Ground Colour tools in Model IT by navigating to the Options View on the Toolbar. These are both Dropdown Menus, and you may select a colour tool by clicking on the respective dropdown menu in order to view the options and choose one of them.

-
Applying the Building Colour
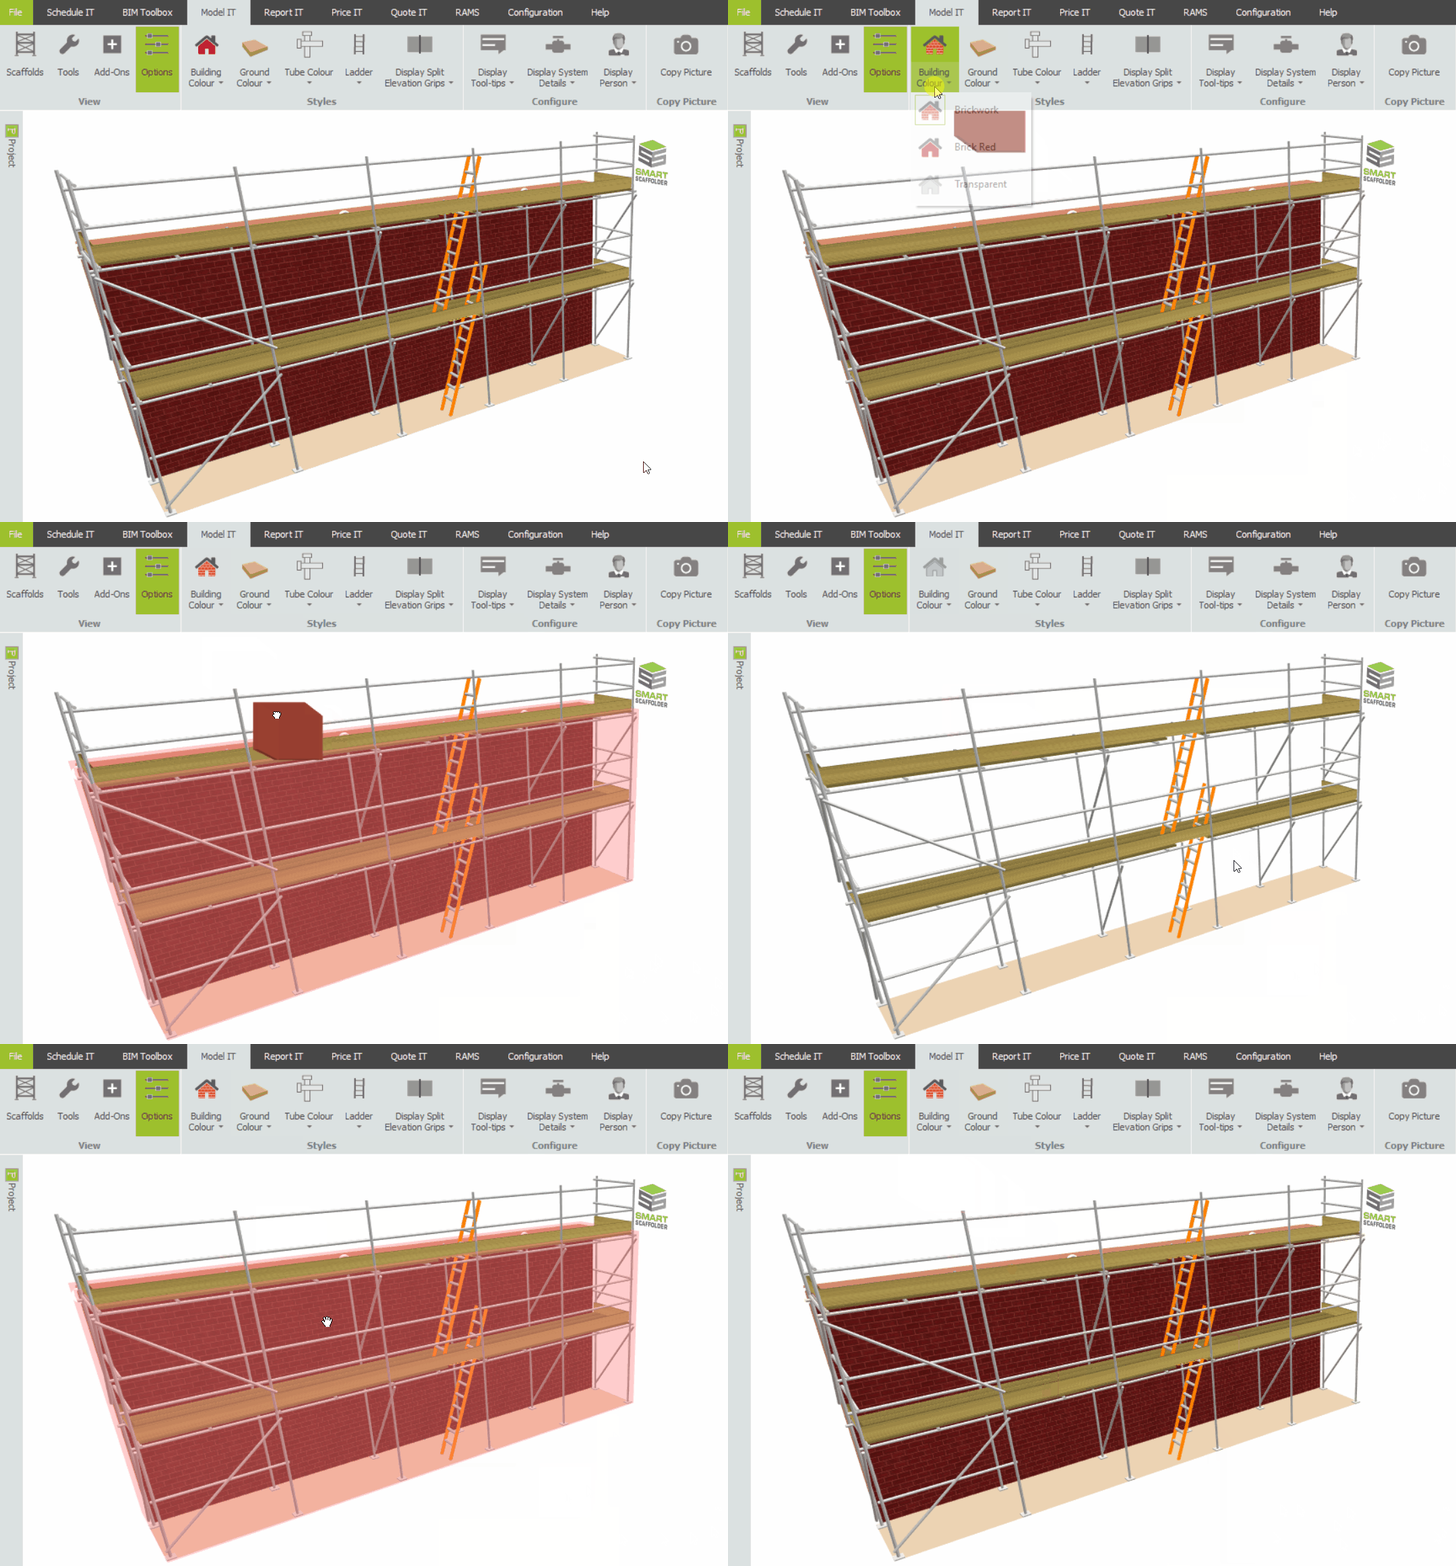
Now to apply a different Building Colour to your scaffold, select one of the options from the Building Colour drop-down menu. Afterwards, apply it to the elevation. It is possible to have the elevation textured with brickwork, coloured brick red, or made transparent.

Model IT: Hiding the building elements
If you wish, you can hide the brickwork elevations and attached rooftops by simply applying the Transparent Tool instead. This will leave only the scaffold elements visible, making it useful for screenshots.
Transparent buildings cannot be modified
While a building is transparent, you cannot modify its dimensions through the Red Highlight or Toolbox Dialog. You must first make the building’s colour visible again by applying either the Brickwork or Brick Red tool.
-
Applying the Ground Colour
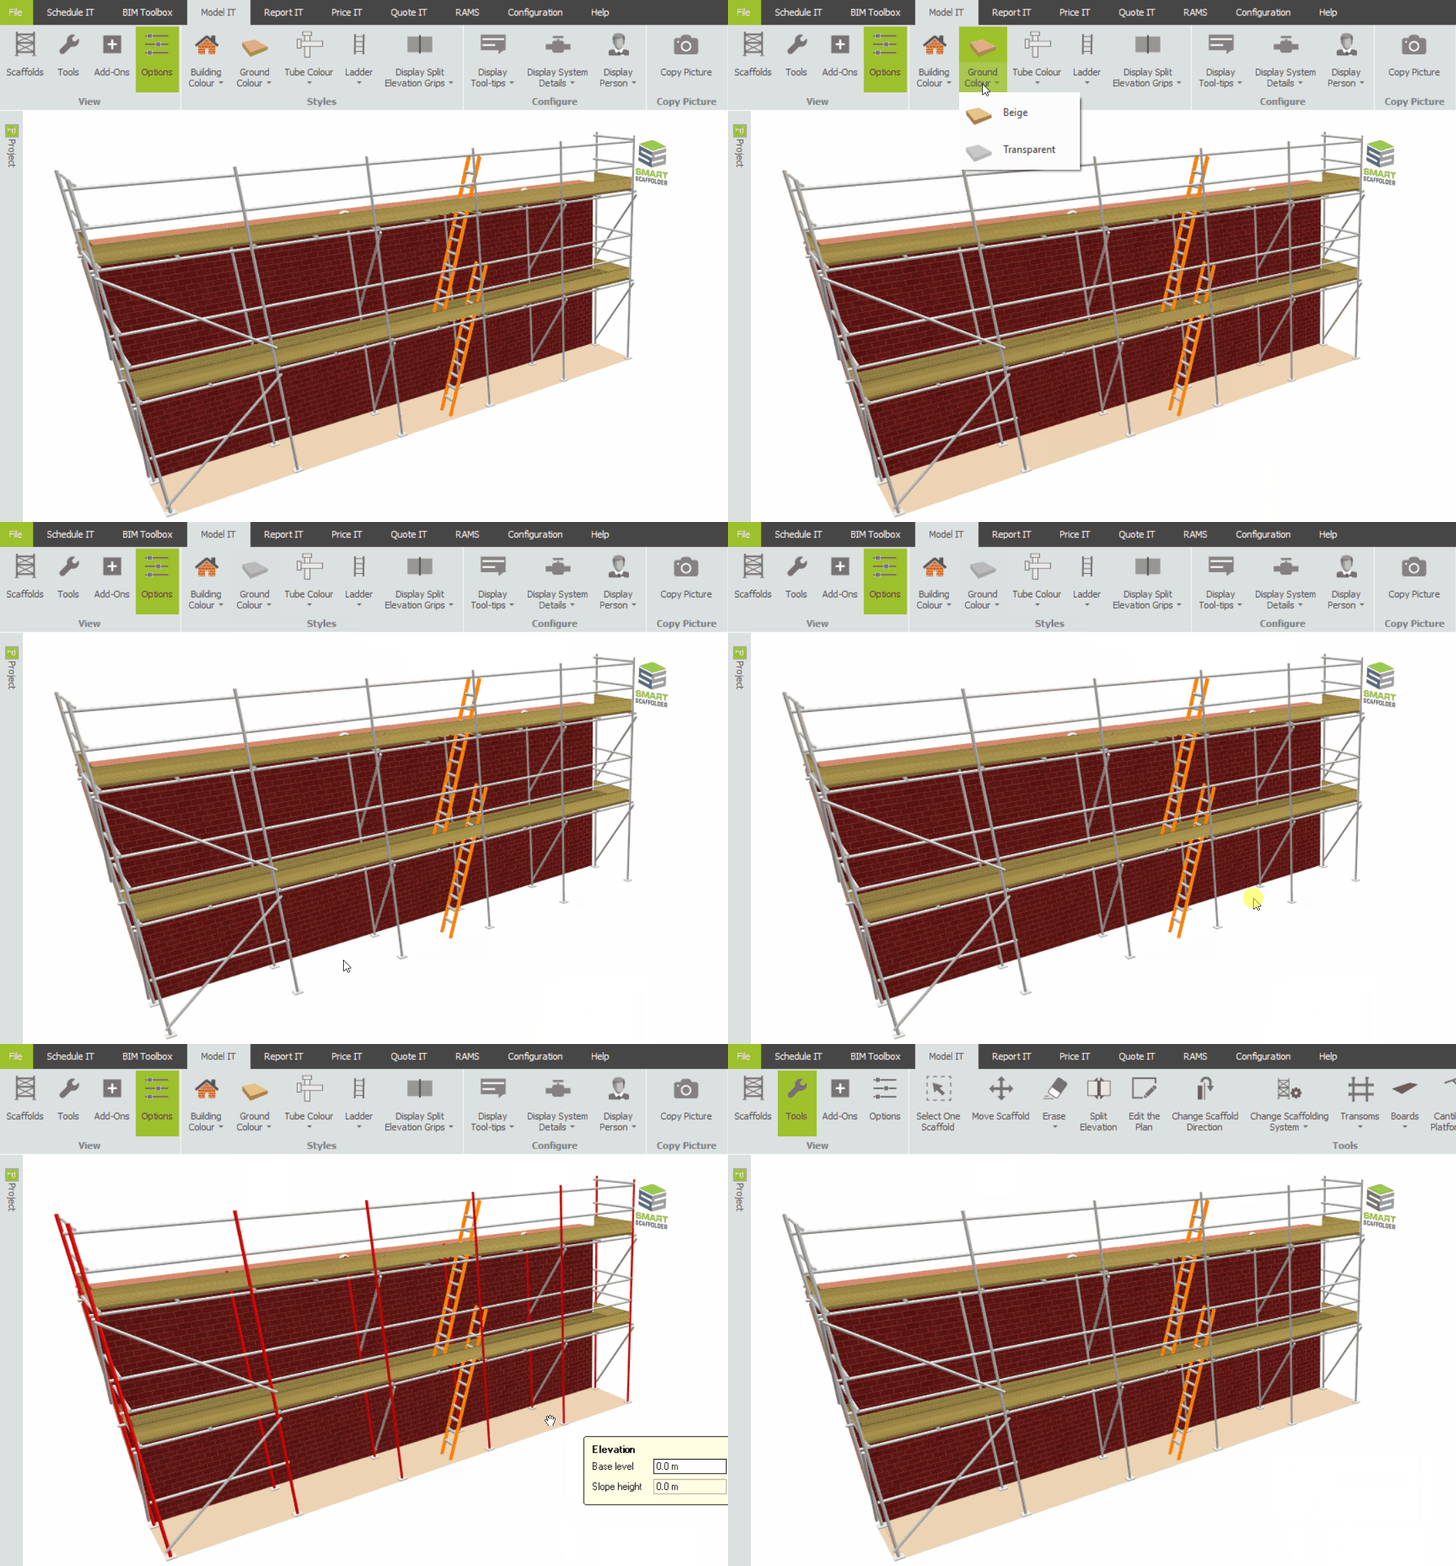
The ground colour is available in Transparent or Beige by default. You can alternate between the two colours by selecting the tool from the Ground Colour dropdown menu and applying it to the Ground Condition.
Advanced Tips for Ground Conditions
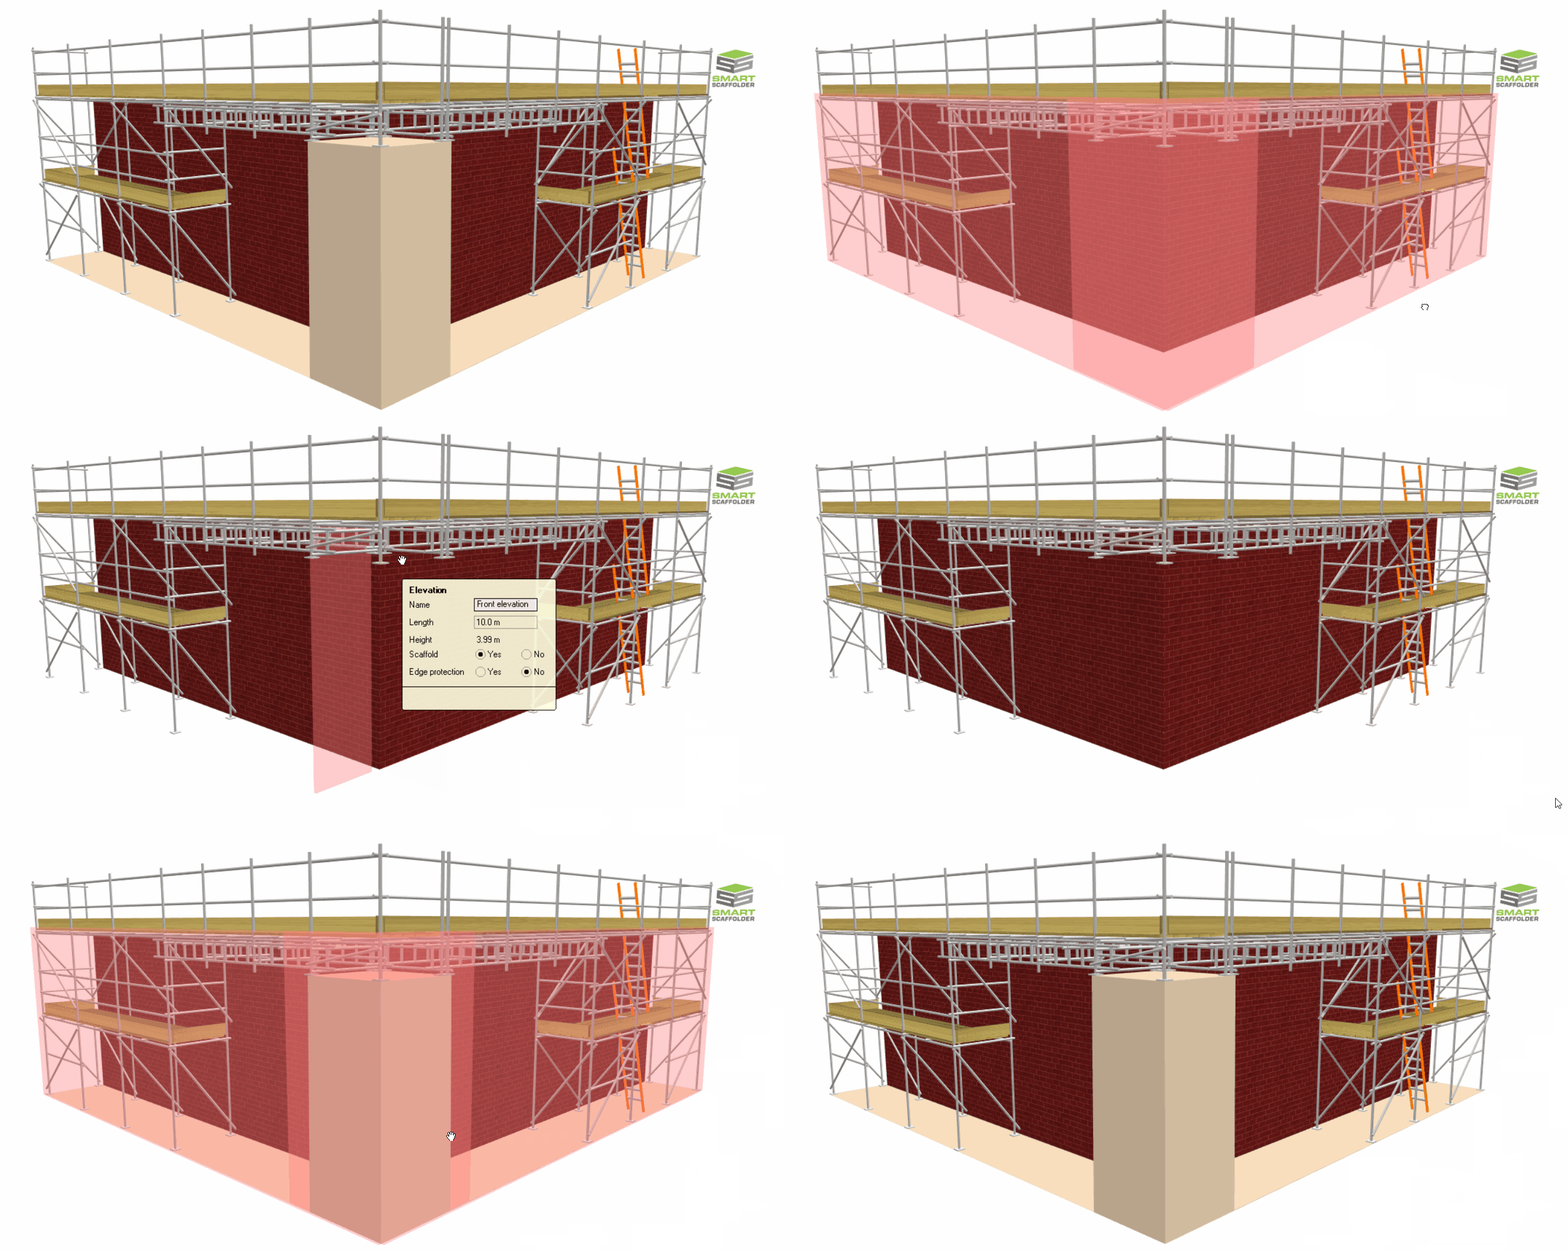
Since you can hide the Ground conditions, there are various tricks you can do. You can use it to estimate scaffolding at a higher elevation such as a Pavement Gantry or to restrict parts of the scaffold, such as the following Cantilevered Bridge around a corner.
Transparent ground conditions cannot be modified
Much like the Building Colour, you cannot modify the ground conditions through the Red Highlight or Toolbox Dialog whilst it’s transparent. Use the Beige Tool to restore visibility of the ground conditions.
SMART Estimator
What’s new?
Getting Started
Setup and Configuration
-
Enterprise Server
-
Cloud Server Setup
Local Windows Server Setup
Adding Cloud server users
Server Back Up and Restore
Archiving Estimates from server
Migrating Local server to Cloud
Creating Folders in Enterprise Server
Using Server Tools from the Command Line
-
User software settings
User Address Settings and Yard
Scaffold Banner and Sheeting logo
Adding Watermarks
-
Setting up your Rates
Editing Shared Pricing Rates
Creating a rate setting template project
Importing and Exporting shared Rates
Creating an Estimate
Importing Drawings and Models
Scheduling Scaffolds
Creating 3D Scaffolds
-
3D Model Controls
Adding Independent scaffolds
Adding Circular Tank scaffolds
Adding Birdcage & Lift shaft scaffolds
Adding Tied or Freestanding towers
Adding Stair towers, Ladders towers & Buttresses
Adding Loading bays
Adding Chimney scaffolds
Adding Temporary Roof
Adding Edge protection
Adding Pavement Gantry’s
System Scaffolds
Safety Decking
Using the Scaffold Library
Editing Scaffolds
Scaffold Add-ons & Options
-
Adding Gin wheels, Rubbish Chutes, Safety standards, Double standards and Lamps
Adding and Editing bridges/beam work
Adding Beams around Corners
Adding Cladding
Adding Cantilever protection fans
Adding Pavement Lifts
Adding Recesses and Infills
Building and Ground colour
Visual options (Tube, Ladder, System details and Grips)
Add a Pedestrian or Scaffolder
Copying pictures of the model
Material Lists and Drawings
Pricing and Estimation
Quotations
Enterprise Server
Troubleshooting


