-
Overview of Cantilevered Bridges
In the previous documentation, you have learned how to apply bridges to a scaffold. This documentation will take this a step further and show you how to model a scaffold on a cornered access point.

Producing an accurate estimation
Please remember you’ll need to modify your beam lengths in the material list and the cost analysis to get an accurate estimation of materials and expenses. Furthermore, you’ll also need to modify your item descriptions so that it’s clear what the scaffold item is and how it contributes to the overall quote.
SMART Estimator is for estimation modelling only
While SMART Estimator allows you to create a Cantilevered Bridge around a corner, this will not produce an accurate drawing as corner beams are not supported. However, it will allow you to estimate its materials requirements. A design will be required to accompany the estimate and tender.
-
Create an L-Shaped Corner
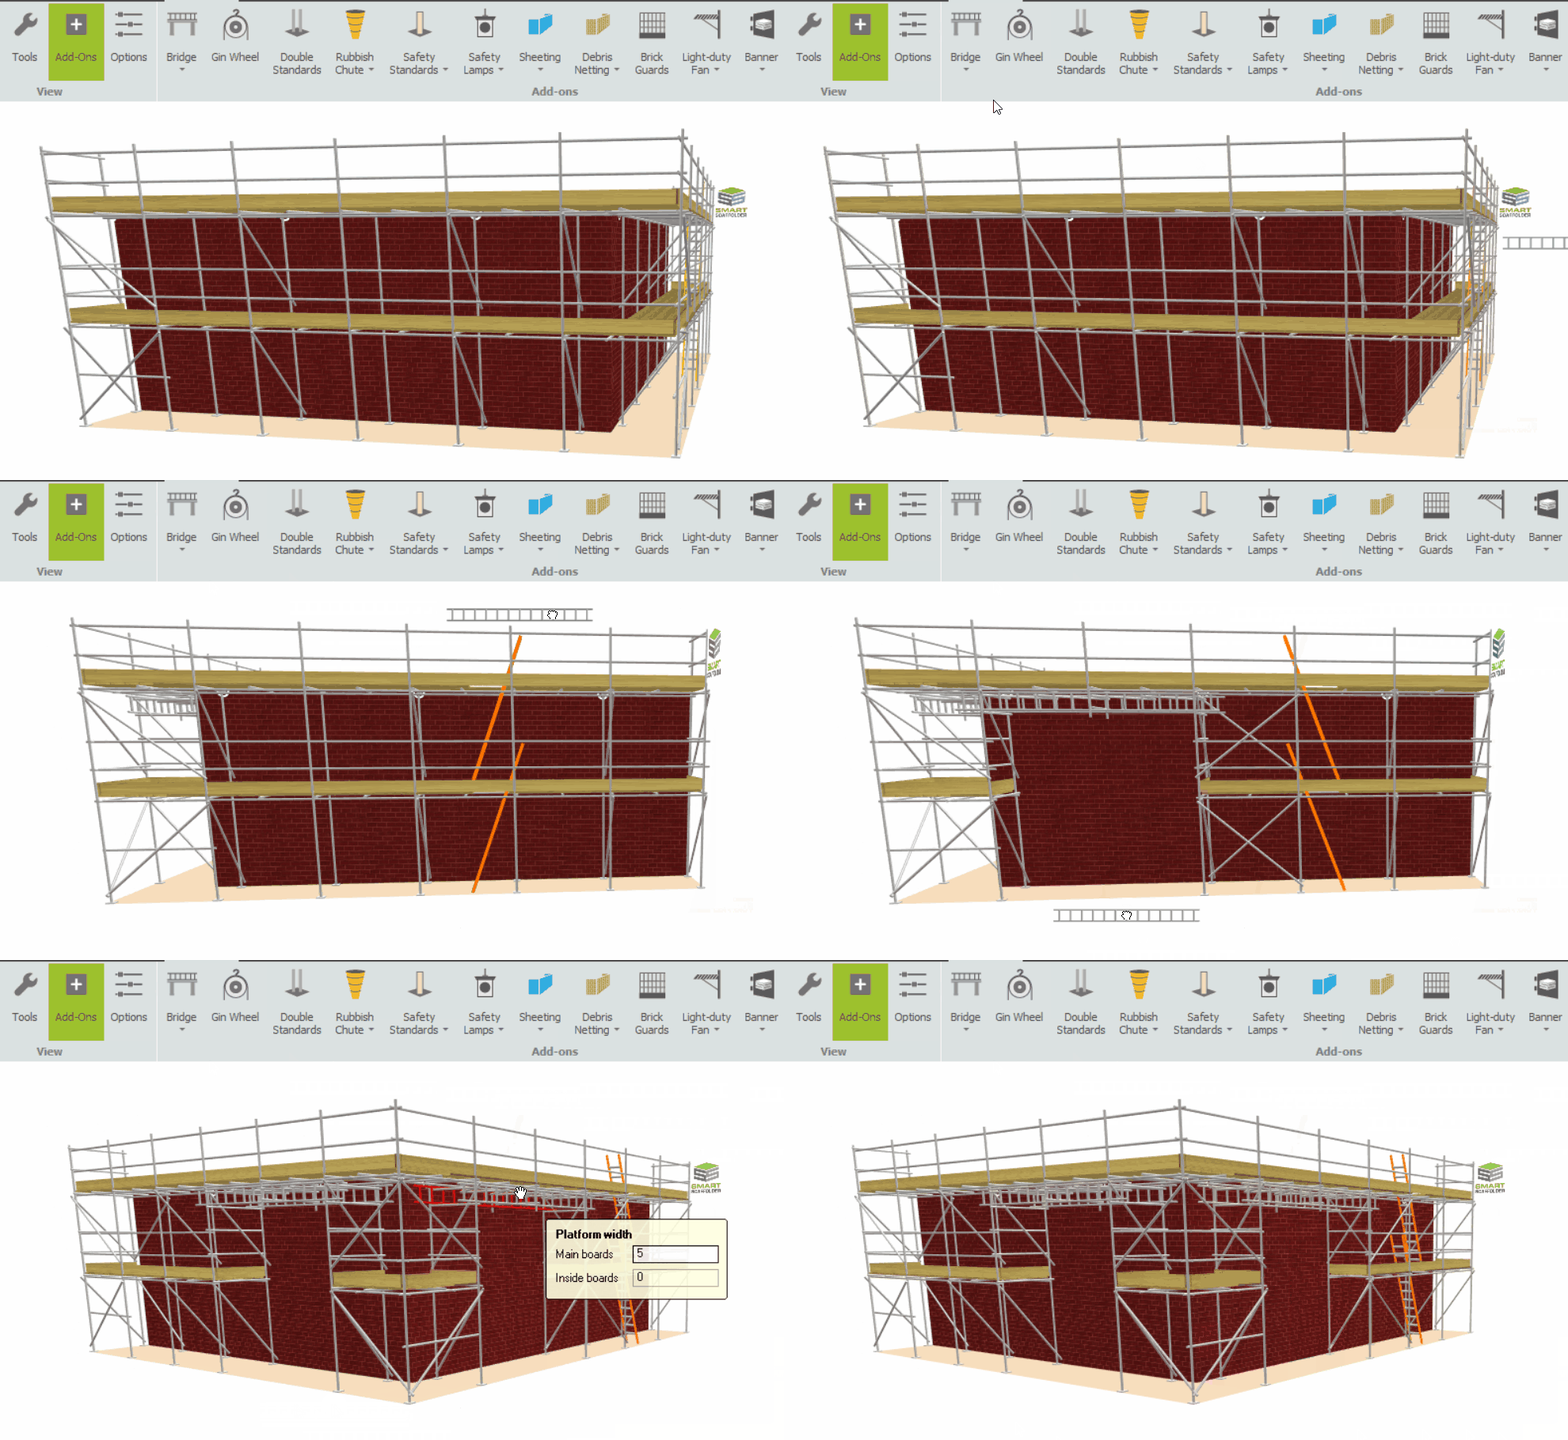
The first thing you need to do is create or designate a corner where you’ll build the Cantilevered Bridge. As part of this documentation, I will create an L-Shape scaffold by navigating to the Scaffolds View in Model IT and clicking the L-Shape button. You may choose to do this on your pre-existing scaffold project or on another scaffold type that has a corner.
-
Placing the Bridge Beams
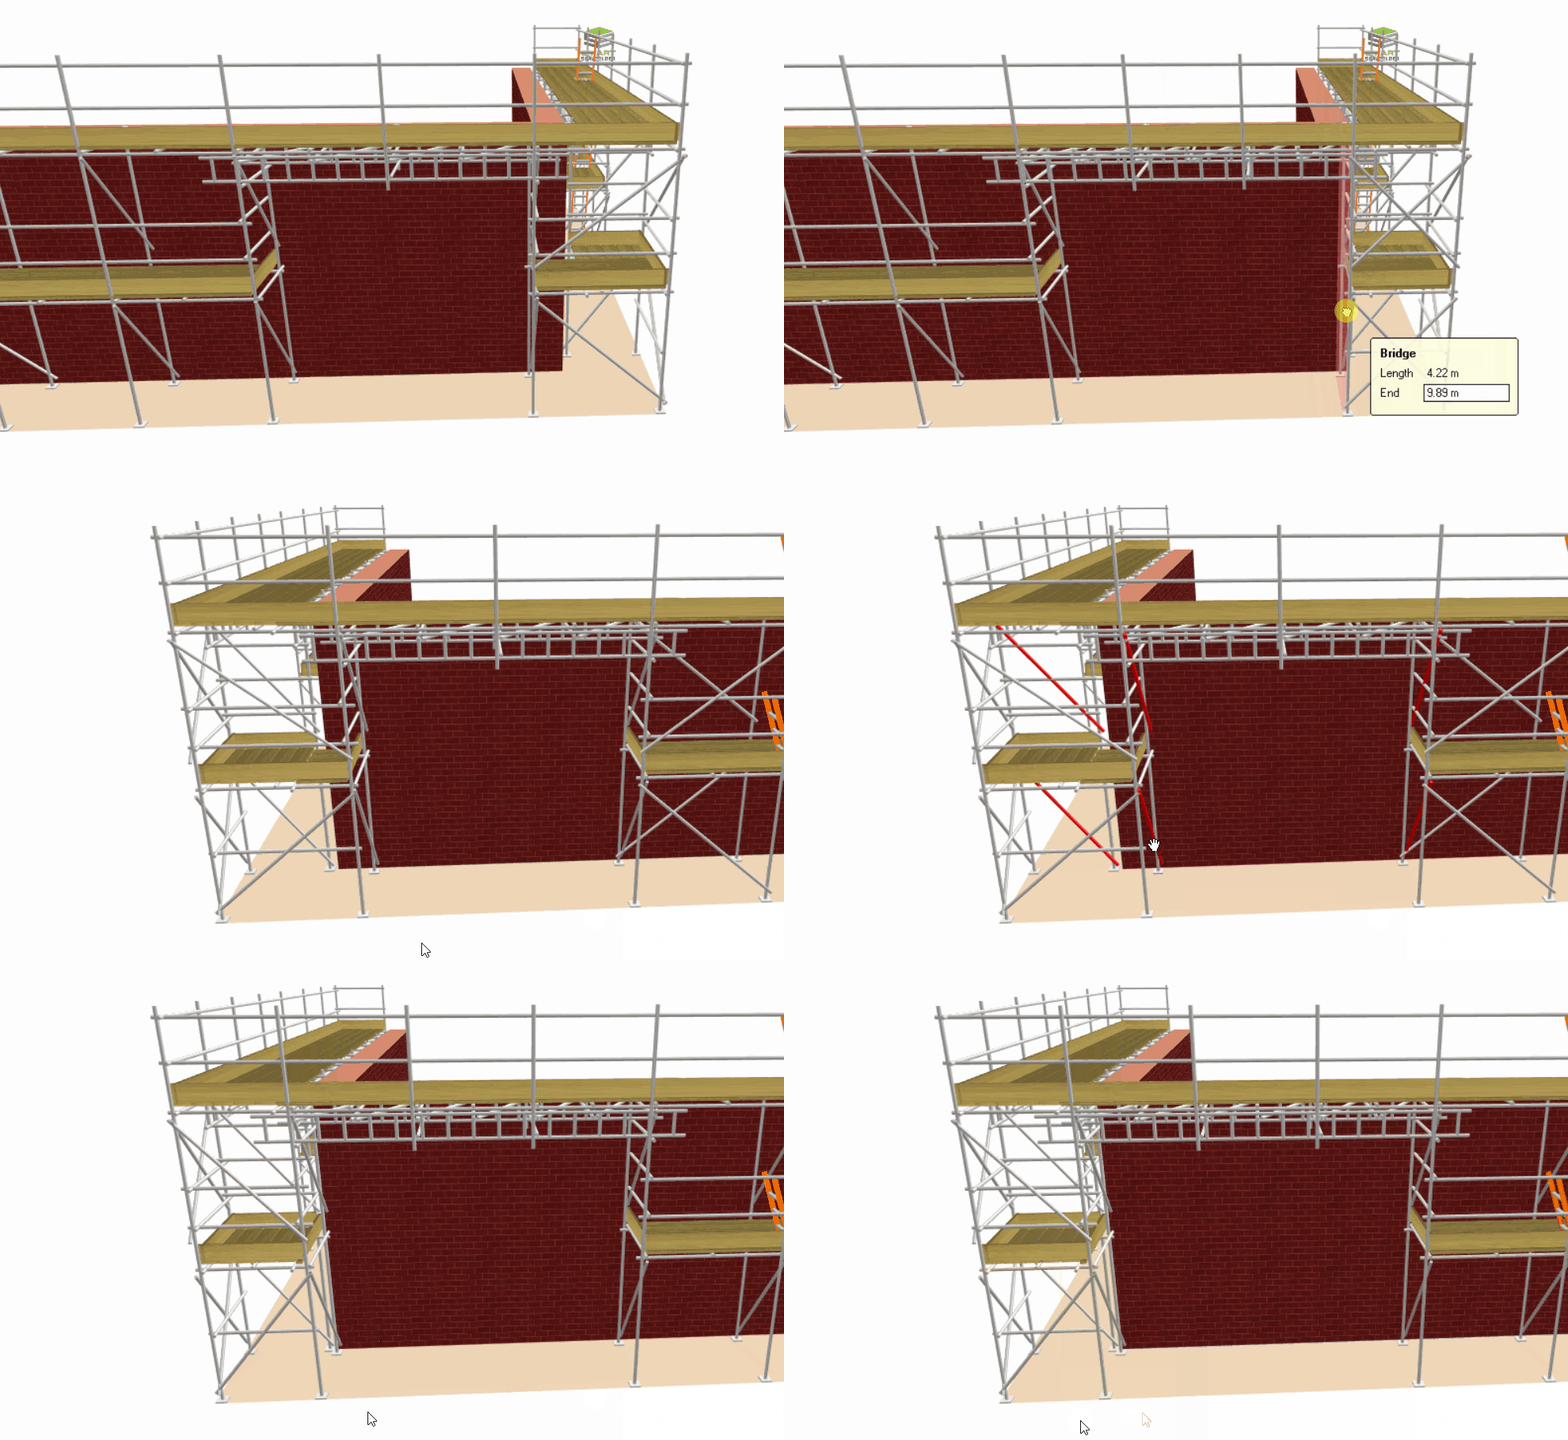
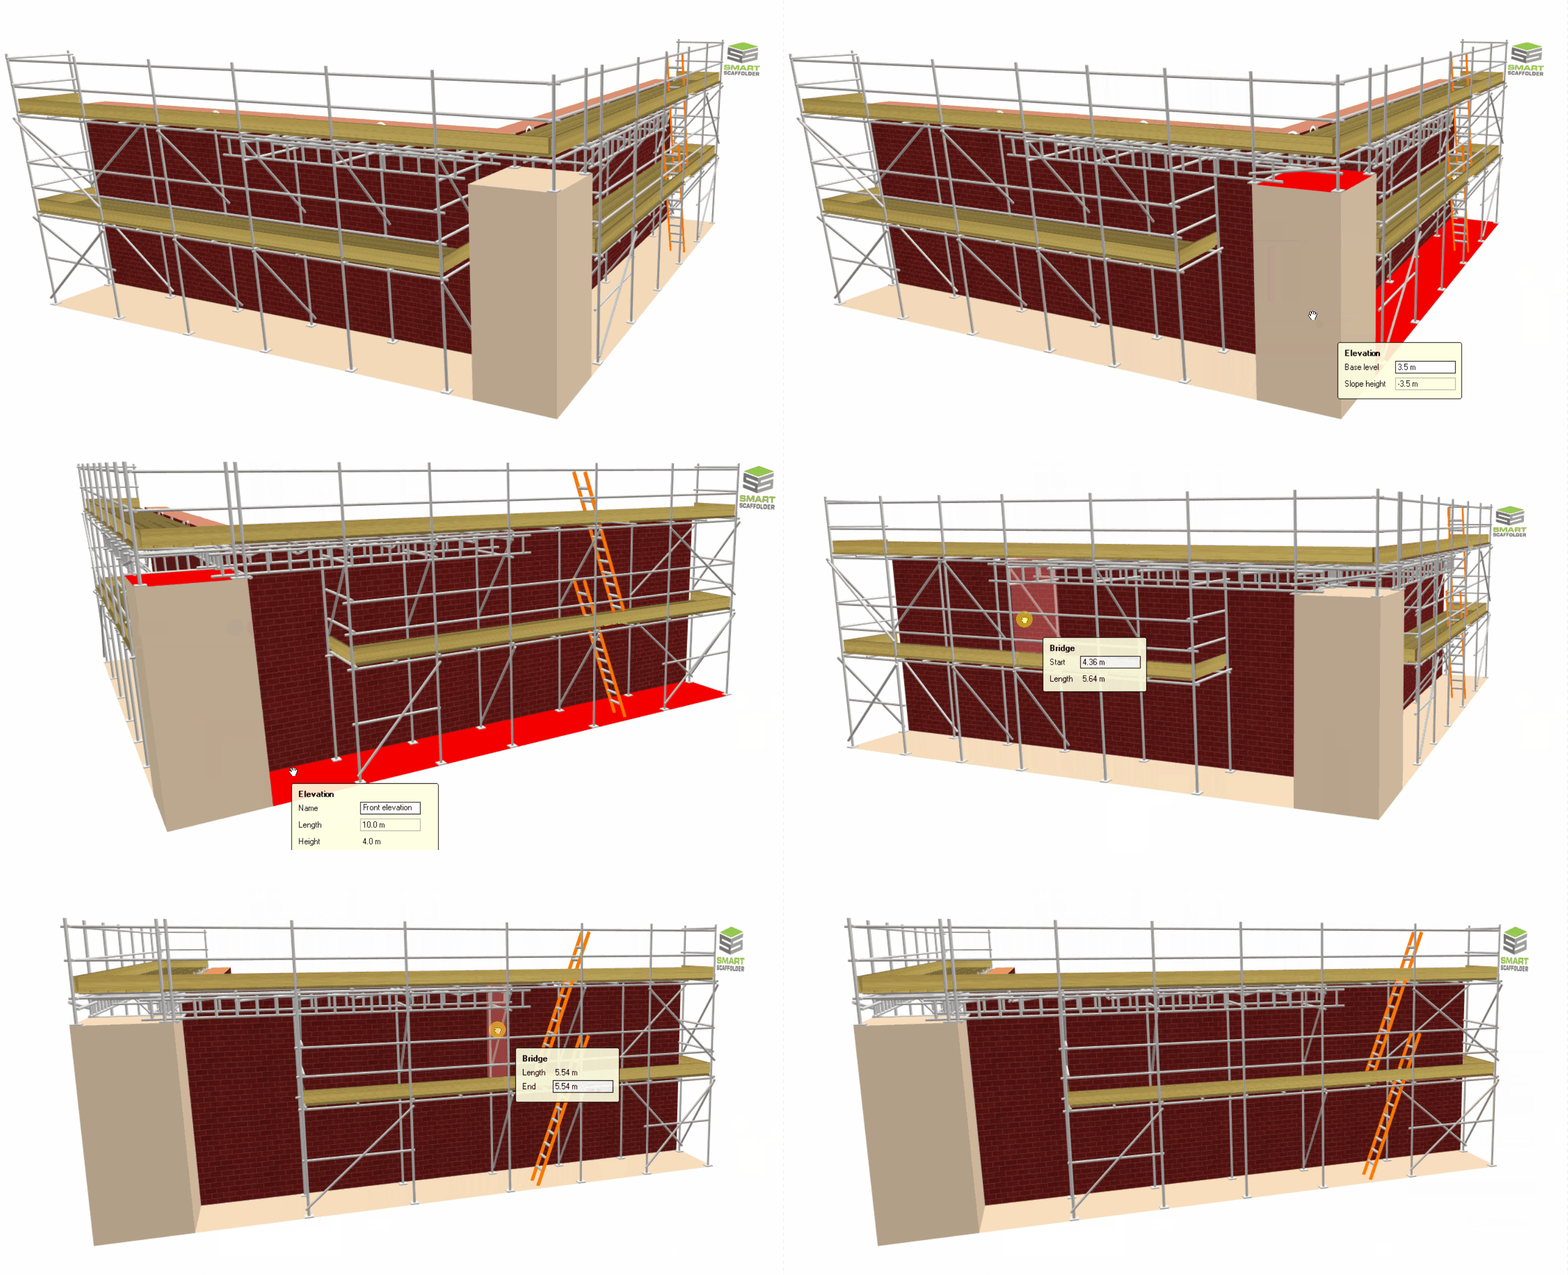
Now the next step is to apply a bridge beam across the left and right sides of the corner. Once this has been accomplished, you will need to adjust the ends of both bridges in accordance with the distance the bridge will span across the bays to the corner.
The next step is to reinstate the working lift by hovering your mouse over the highlight above the elevation ground conditions, then clicking and dragging it upwards to restore it. As soon as you have completed all the steps, you will have a bridge spanning across the working lift.
-
Raise and Adjust the Corner
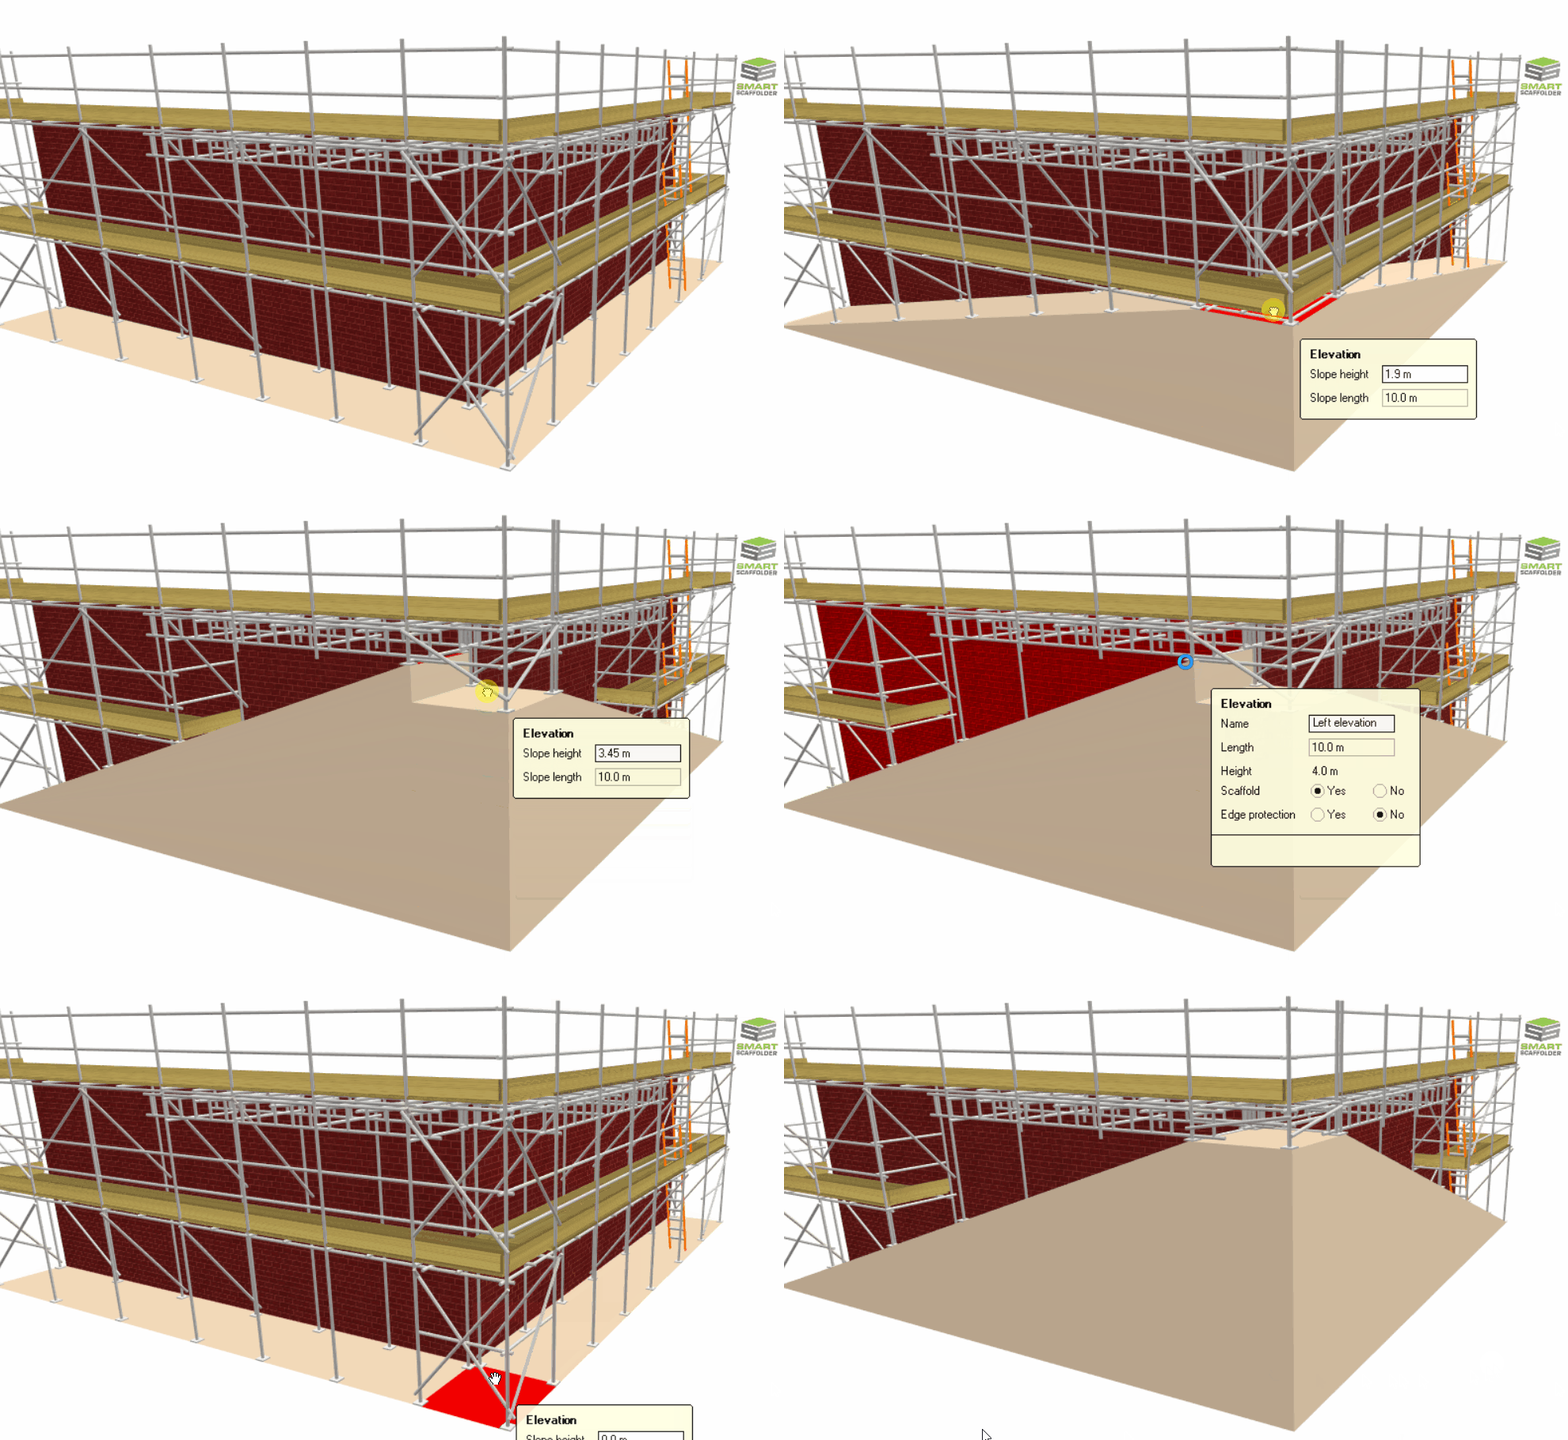
After placing the bridge beams, you will need to raise the Corner Ground Condition until it is just below the bridge beam. You can do this by dragging the corner or typing its height. Once you’ve done this there will be a slope extending either side from the corner to the edges.
The next step is to drag the Start and End Position controllers towards the corner in order to extend a Pillar of Beige Ground from the corner. In this way, the scaffold is prevented from generating and the bridge is suspended from the ground. You can view this more clearly by setting the ground conditions to be transparent.
-
Adjust the Bridge Controllers
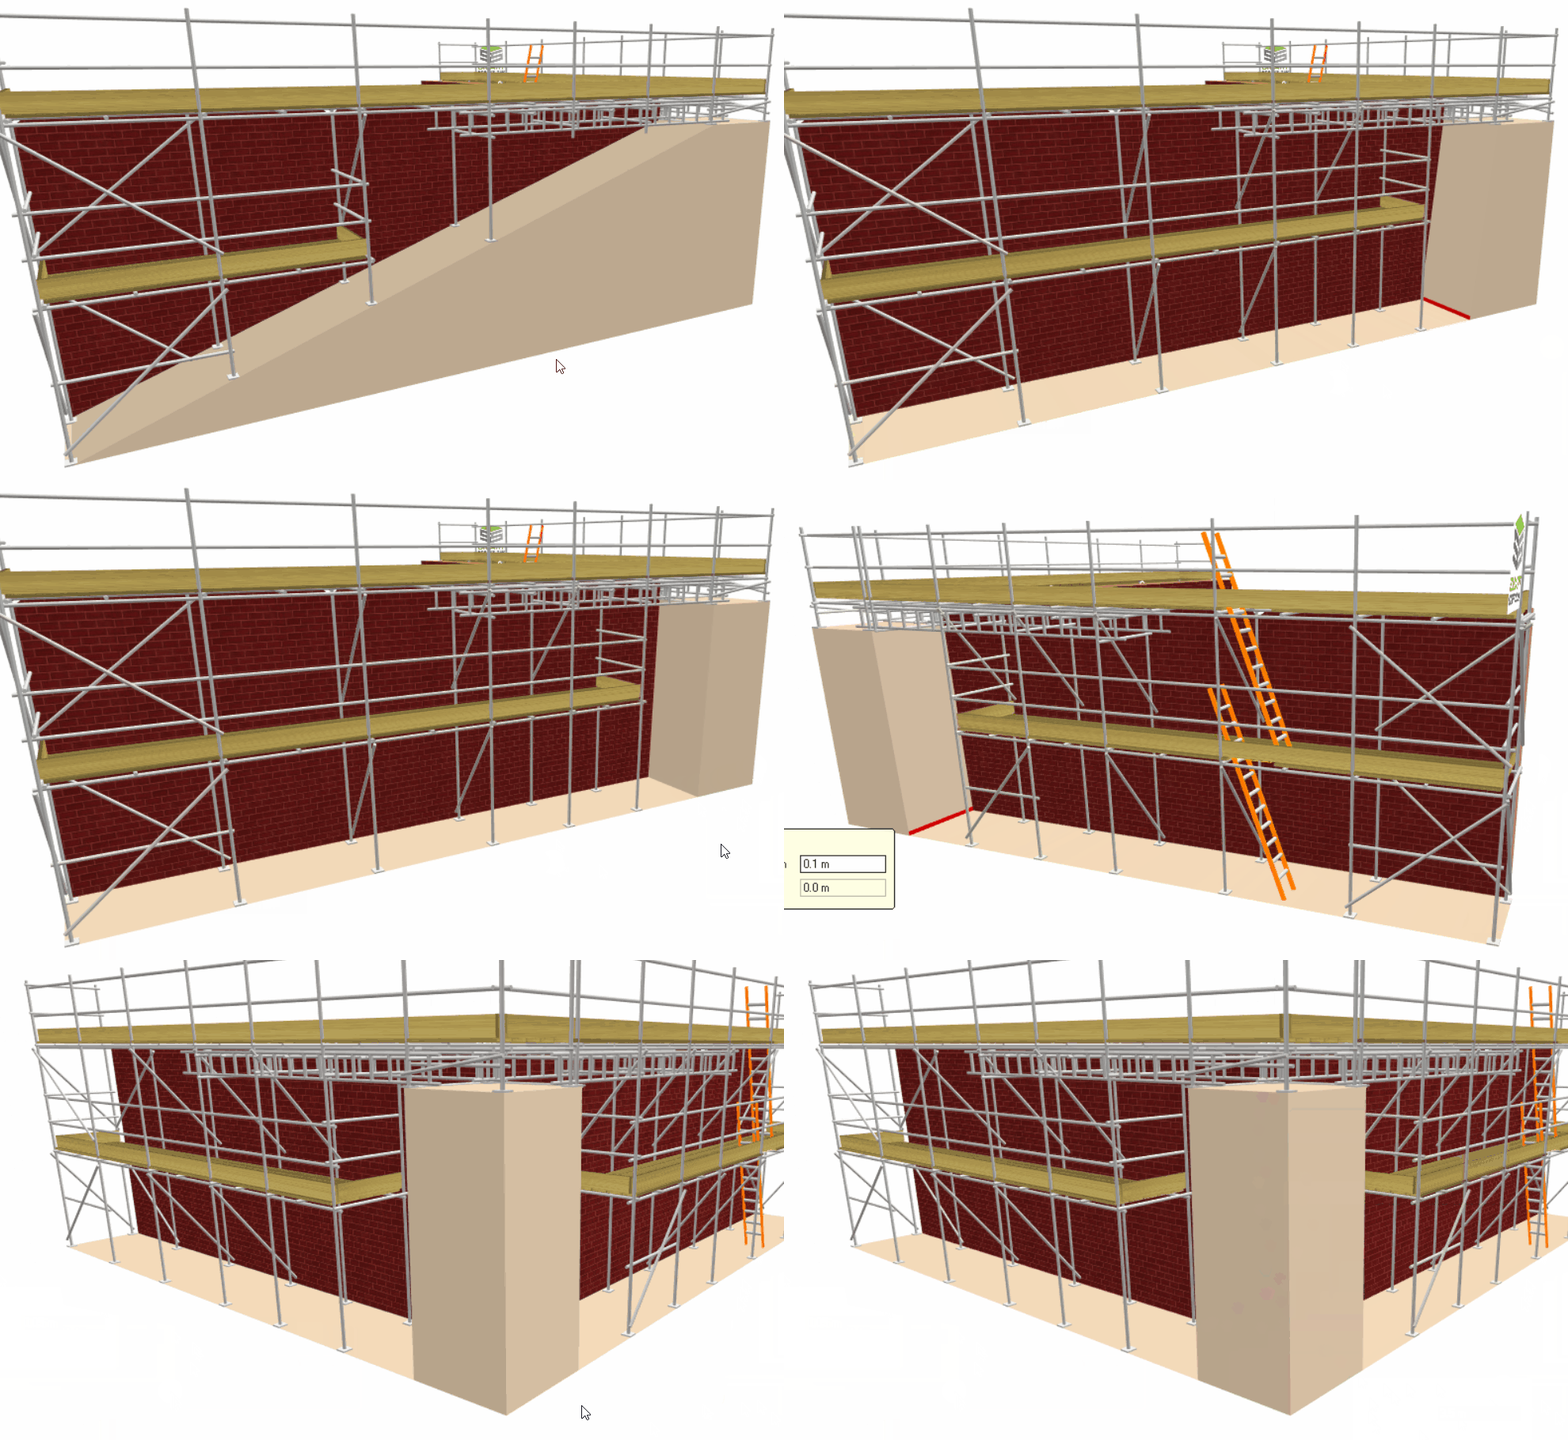
Lastly for the final step in modelling the Cantilevered bridge around the corner is to adjust the Bridge Controllers along the start and end of the Bridge. If you hover your mouse along the middle of the First and Second working lifts, you will see a floating highlight.
If applicable, drag the innermost highlight towards the corner until the bridge extends across the corner and the bay disappears. Next, drag the outermost highlight to adjust the bridge’s length accordingly.
Hiding the Beige Ground Conditions
For a quote, you can use the Ground Colour tool to make the ground conditions transparent to show the bridge is suspended in mid-air.
SMART Estimator
What’s new?
Getting Started
Setup and Configuration
-
Enterprise Server
-
Cloud Server Setup
Local Windows Server Setup
Adding Cloud server users
Server Back Up and Restore
Archiving Estimates from server
Migrating Local server to Cloud
Creating Folders in Enterprise Server
Using Server Tools from the Command Line
-
User software settings
User Address Settings and Yard
Scaffold Banner and Sheeting logo
Adding Watermarks
-
Setting up your Rates
Editing Shared Pricing Rates
Creating a rate setting template project
Importing and Exporting shared Rates
Creating an Estimate
Importing Drawings and Models
Scheduling Scaffolds
Creating 3D Scaffolds
-
3D Model Controls
Adding Independent scaffolds
Adding Circular Tank scaffolds
Adding Birdcage & Lift shaft scaffolds
Adding Tied or Freestanding towers
Adding Stair towers, Ladders towers & Buttresses
Adding Loading bays
Adding Chimney scaffolds
Adding Temporary Roof
Adding Edge protection
Adding Pavement Gantry’s
System Scaffolds
Safety Decking
Using the Scaffold Library
Editing Scaffolds
Scaffold Add-ons & Options
-
Adding Gin wheels, Rubbish Chutes, Safety standards, Double standards and Lamps
Adding and Editing bridges/beam work
Adding Beams around Corners
Adding Cladding
Adding Cantilever protection fans
Adding Pavement Lifts
Adding Recesses and Infills
Building and Ground colour
Visual options (Tube, Ladder, System details and Grips)
Add a Pedestrian or Scaffolder
Copying pictures of the model
Material Lists and Drawings
Pricing and Estimation
Quotations
Enterprise Server
Troubleshooting
