-
Ground Conditions Overview
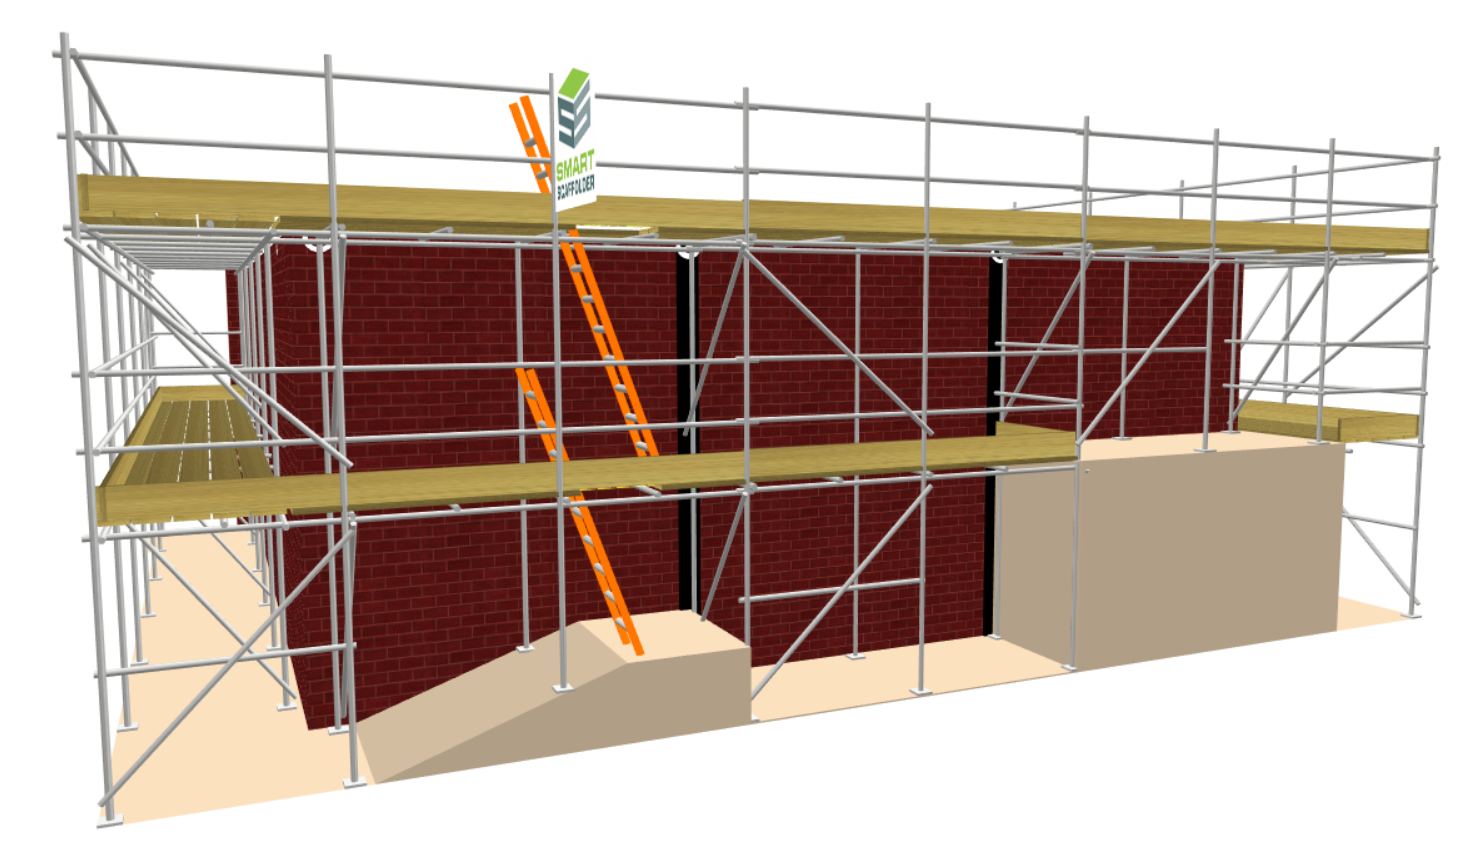
In SMART Estimator, all scaffolds are situated on a foundation, which is represented by a beige ground level underneath the elevation. These ground conditions consist of two sections: the Corner and the Elevation Ground, along with their respective start and end position controllers.
-
Adjusting the ground conditions
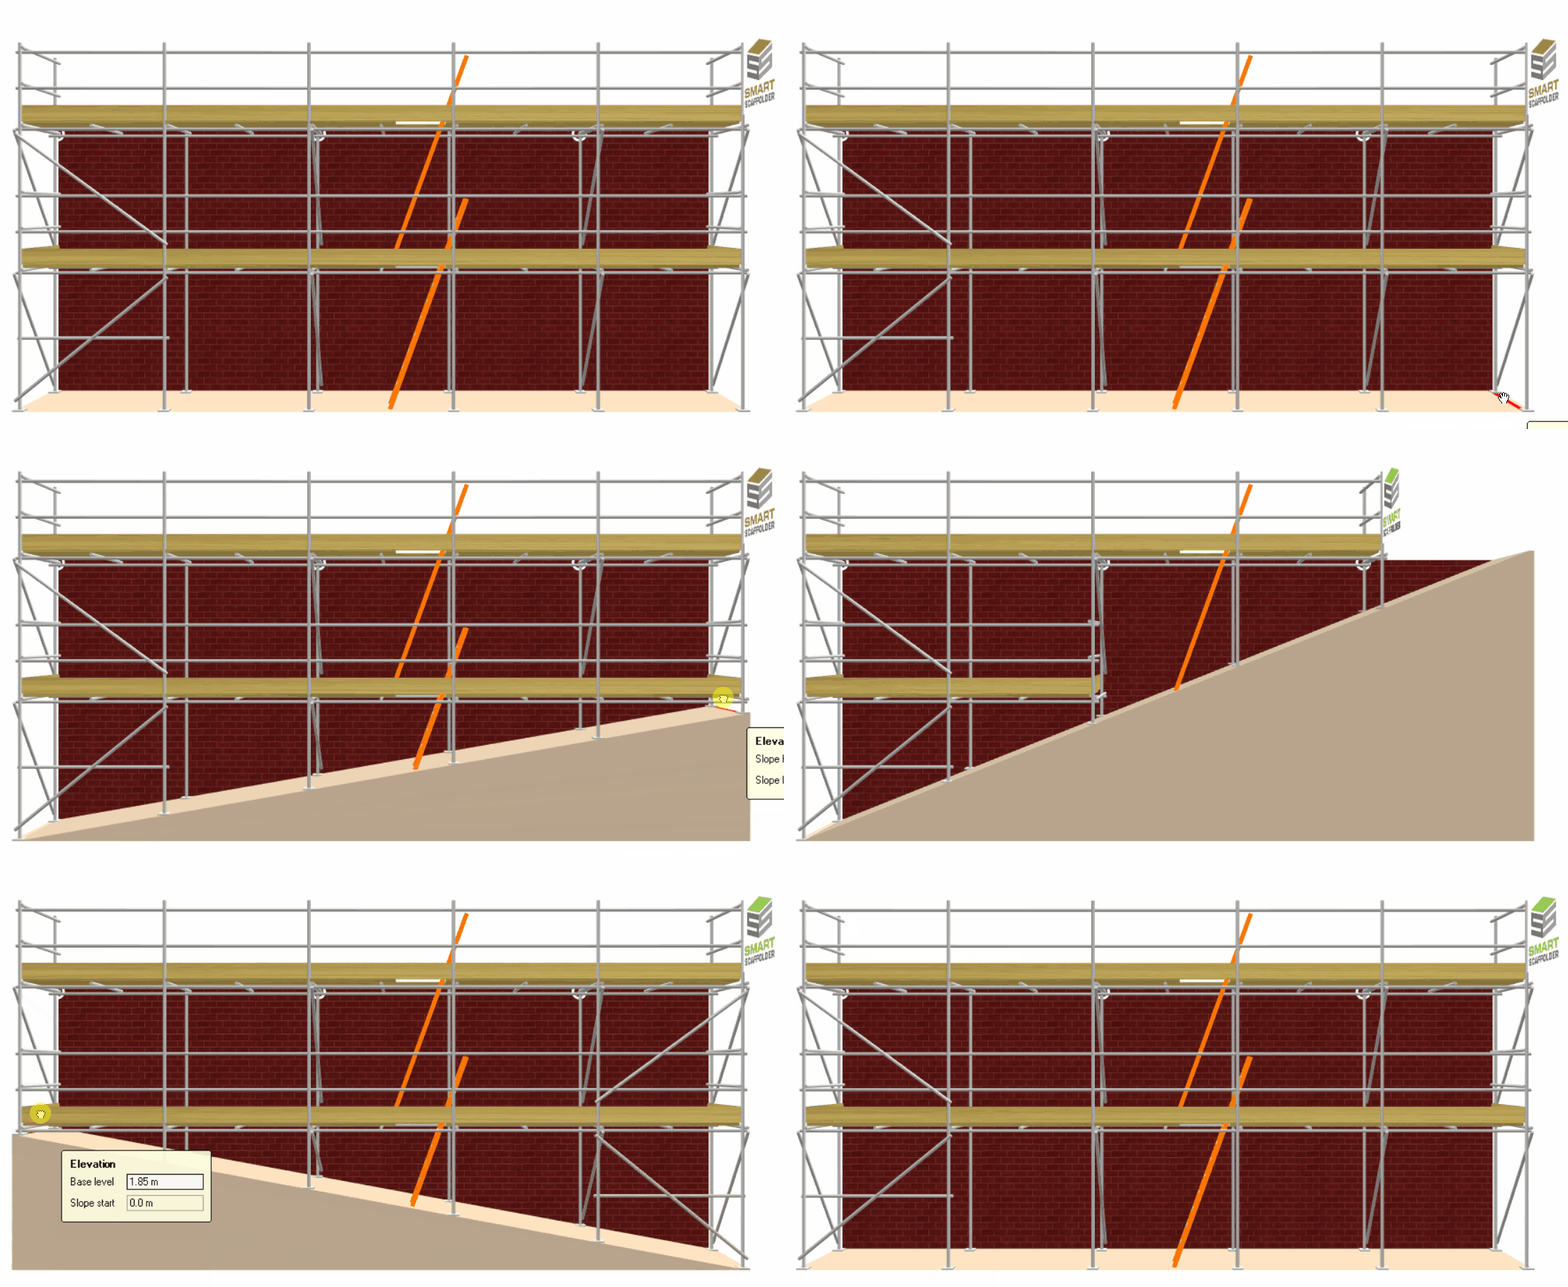
As you move your mouse along the ground conditions on a scaffold elevation, you’ll see these sections and controllers highlighted in red. Each of these sections and controllers can be modified either by Click and Dragging them or through the Toolbox Dialog.
Which ground conditions are which?
On an Independent Scaffold or Birdcage, if you hover your mouse around the far left or right sides of the ground conditions you’ll find two small strips of ground will be highlightable. The outermost strip is the Corner, whilst the innermost strips are the start and end position controllers. The highlightable ground between these strips is the Elevation Ground.
Raising / Lowering the Ground
There are two ways to raise or lower the ground: either by using the Toolbox Dialog or by clicking and dragging the Corner or Elevation Ground upwards or downwards. As soon as you do so, the ground will be raised or lowered accordingly.
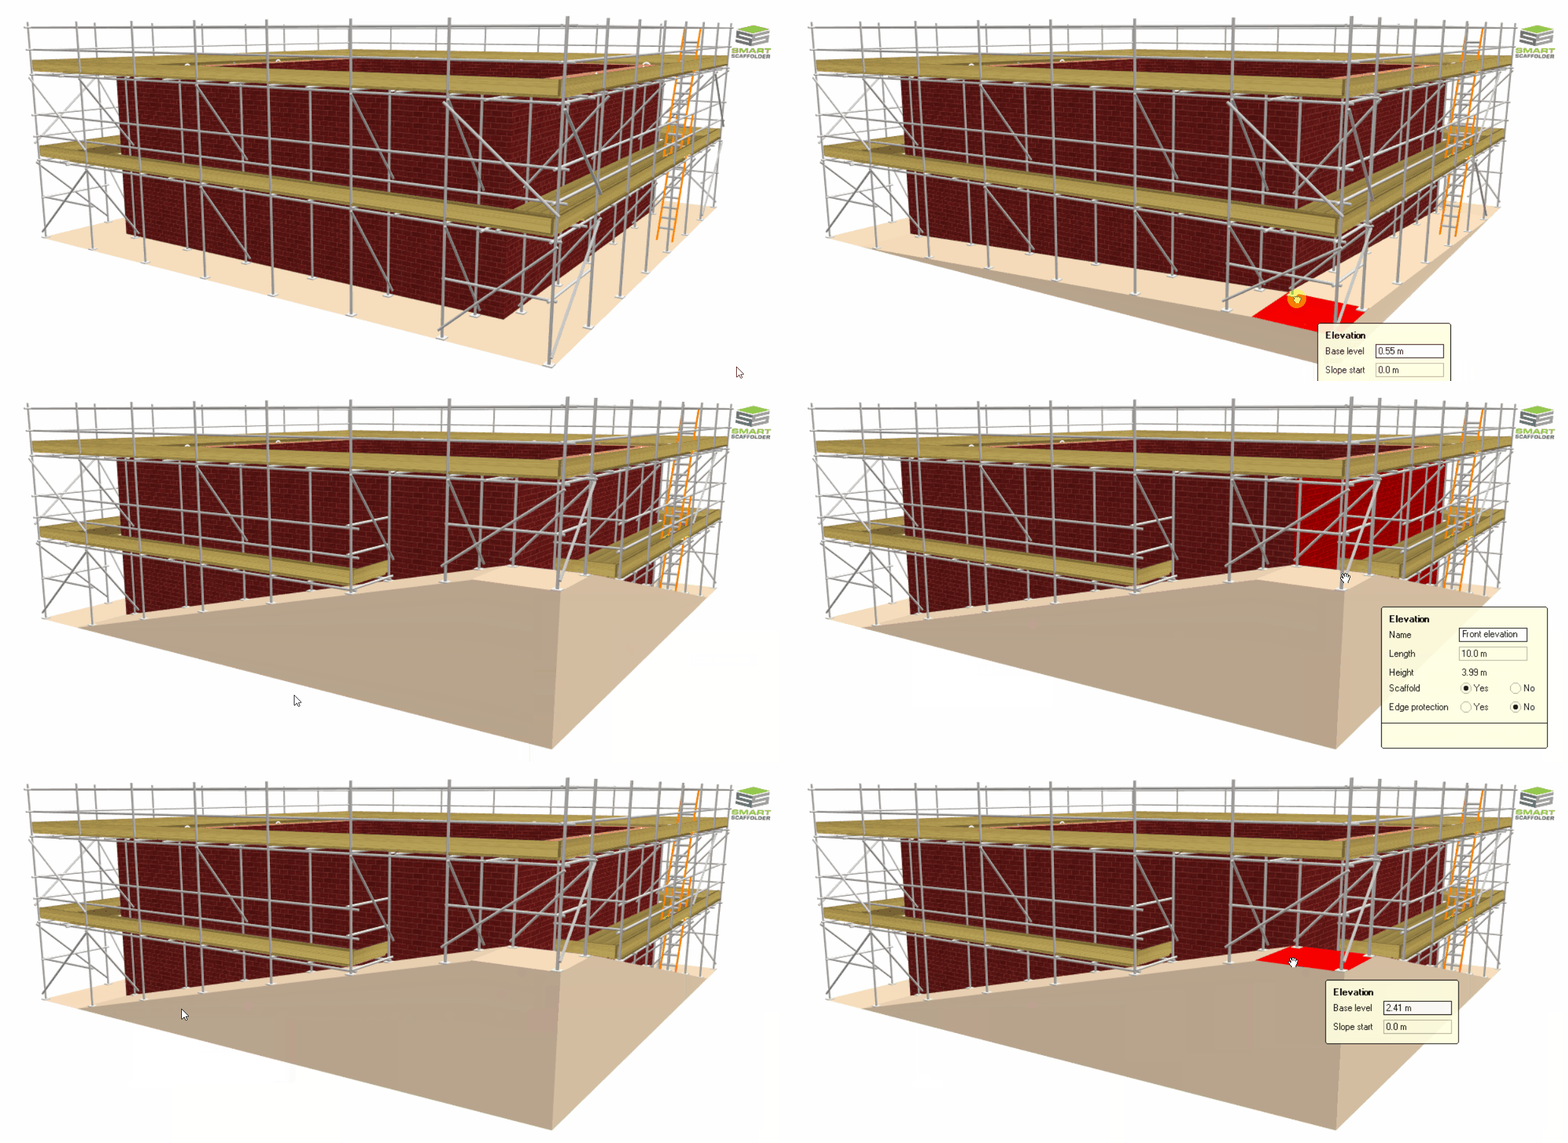
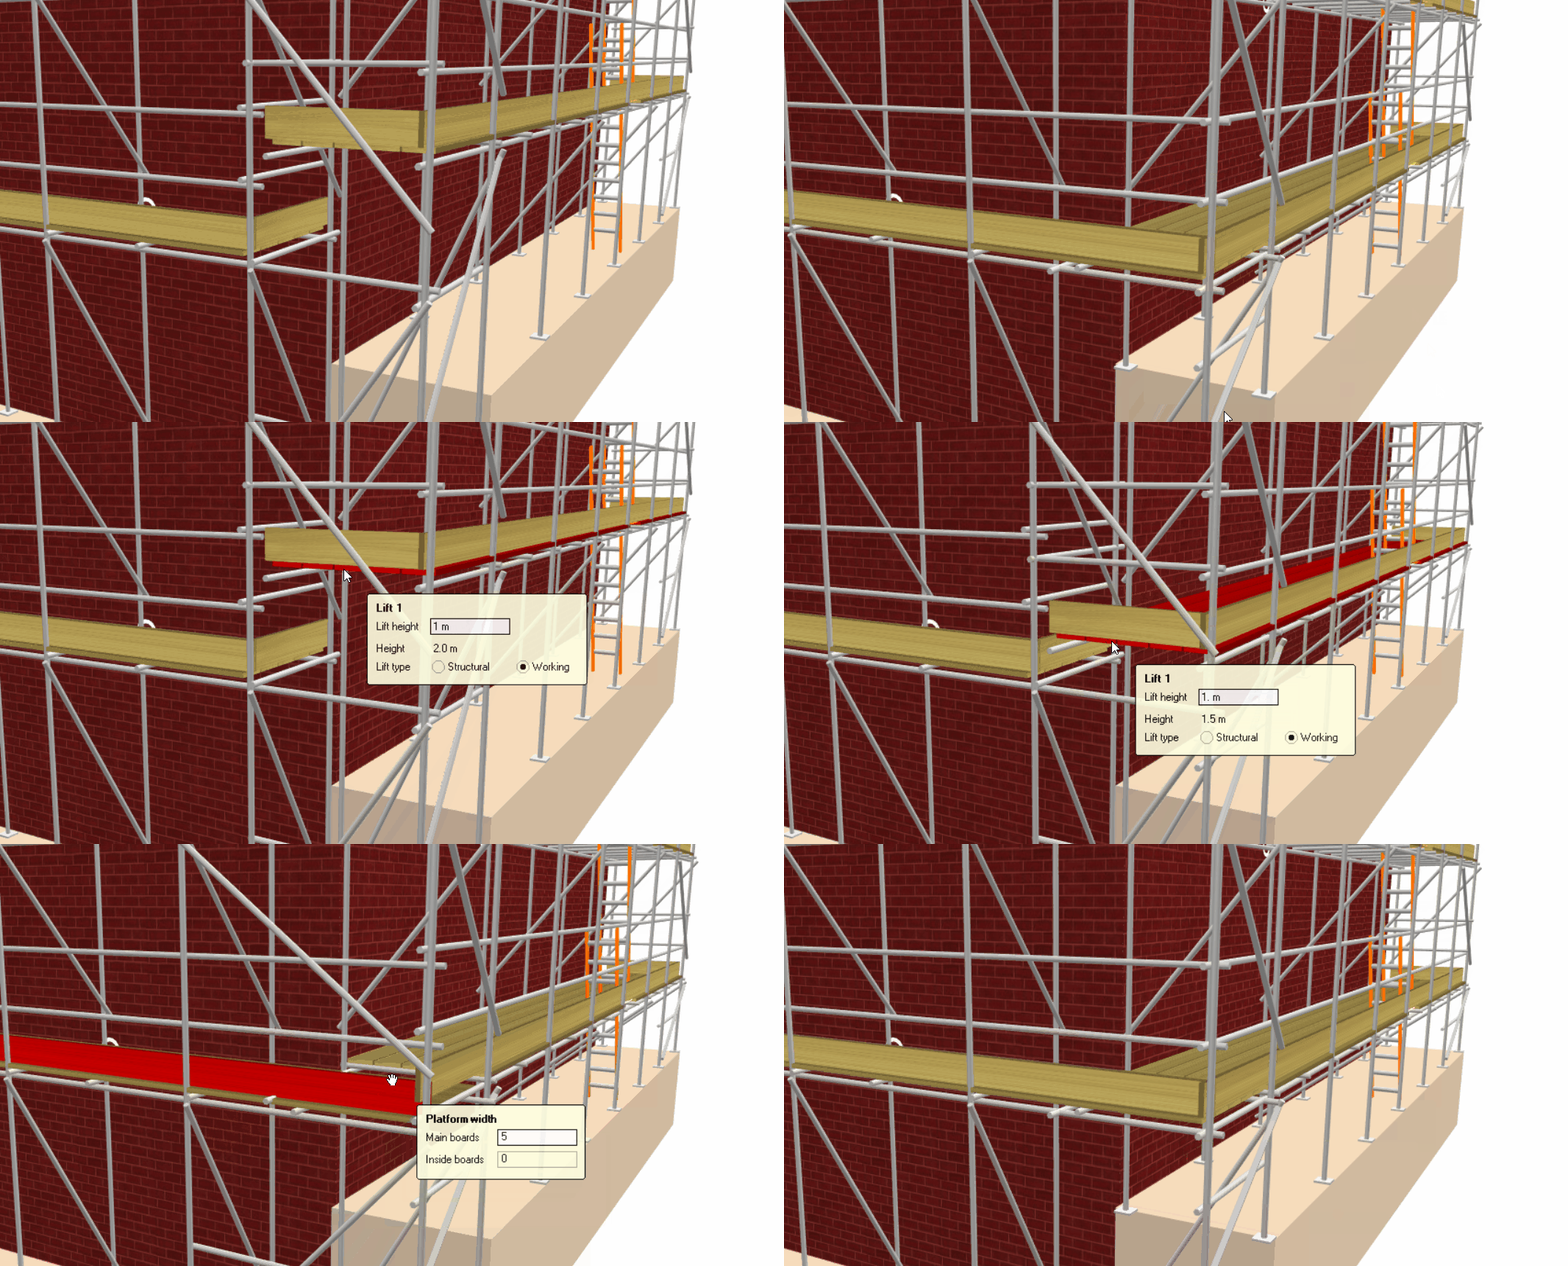
If you adjust the elevation ground in this manner on a scaffold with multiple elevations, you will notice that the lift will disconnect from the lifts adjacent to them. Lift heights are calculated from the foundation, so if you have a 2 metres high box scaffold and drag the front lift down 0.5 metres, the front lift will be offset by 0.5 metres below the side and back lifts.
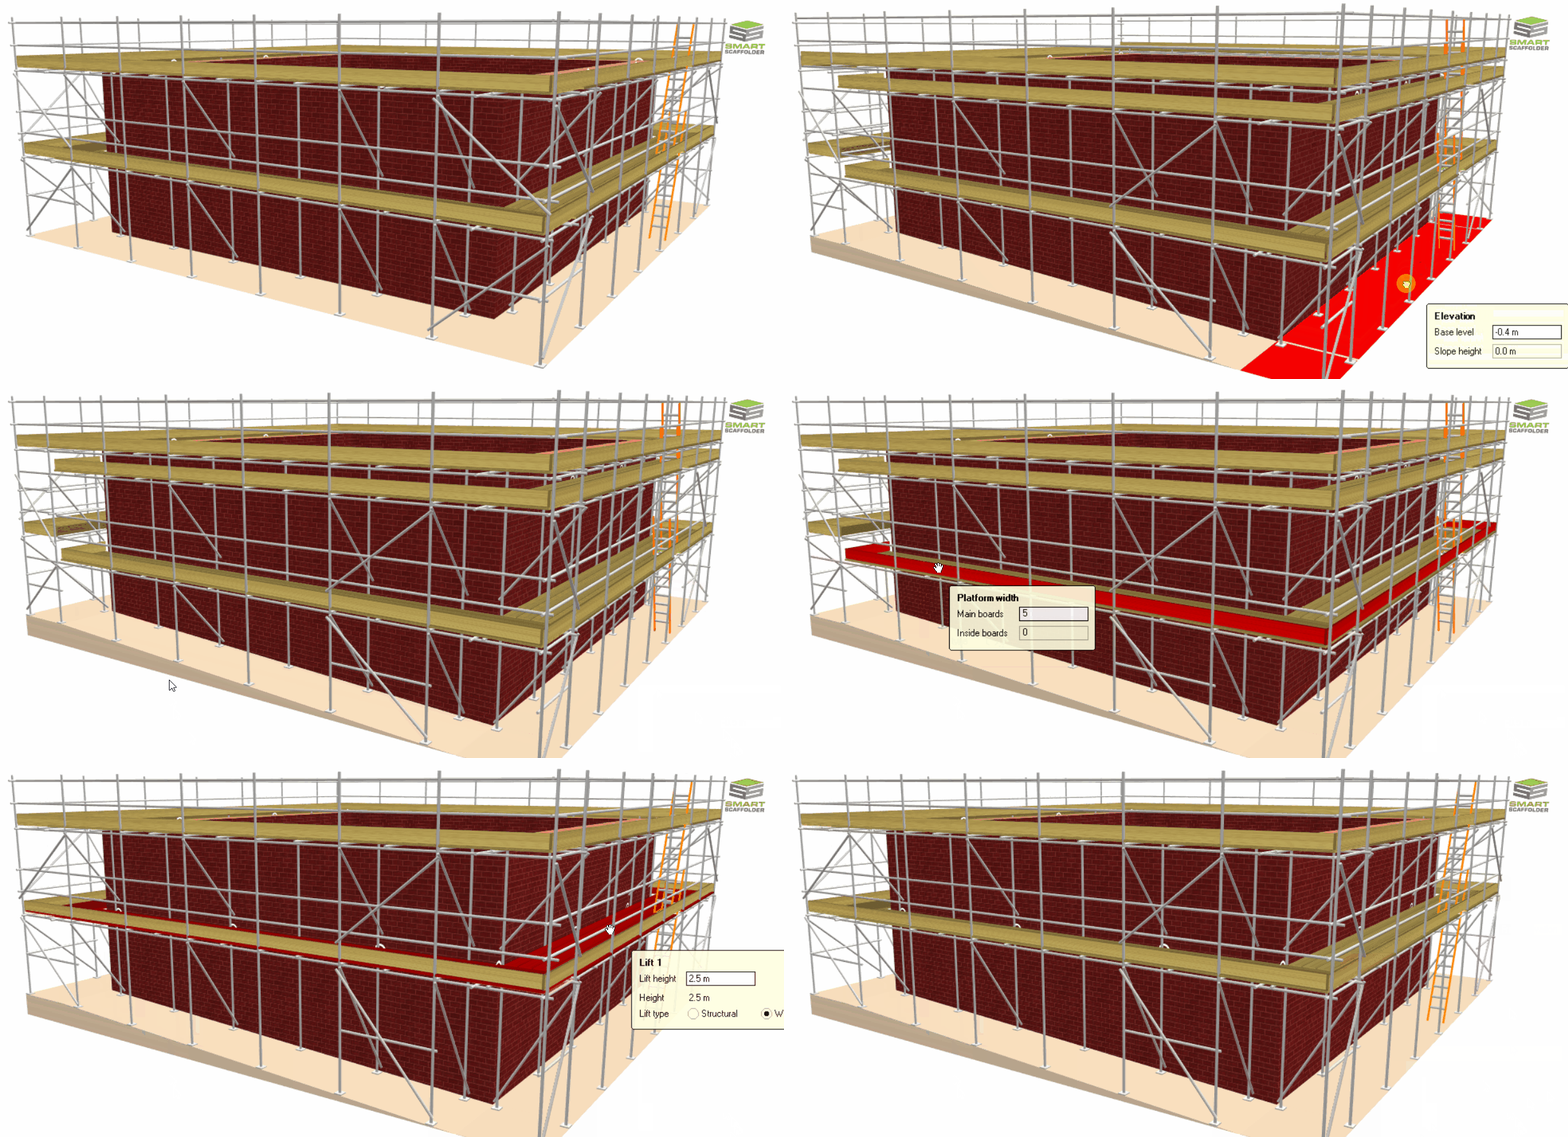
Levelling the lift height on an adjusted surface
To fix this, you can drag and drop it back to the same height. However, it’s recommended that you either use the Toolbox Dialog or Schedule IT to set the height, as it can get tricky to perfectly match the lift height.
Lifting and lowering the entire scaffold
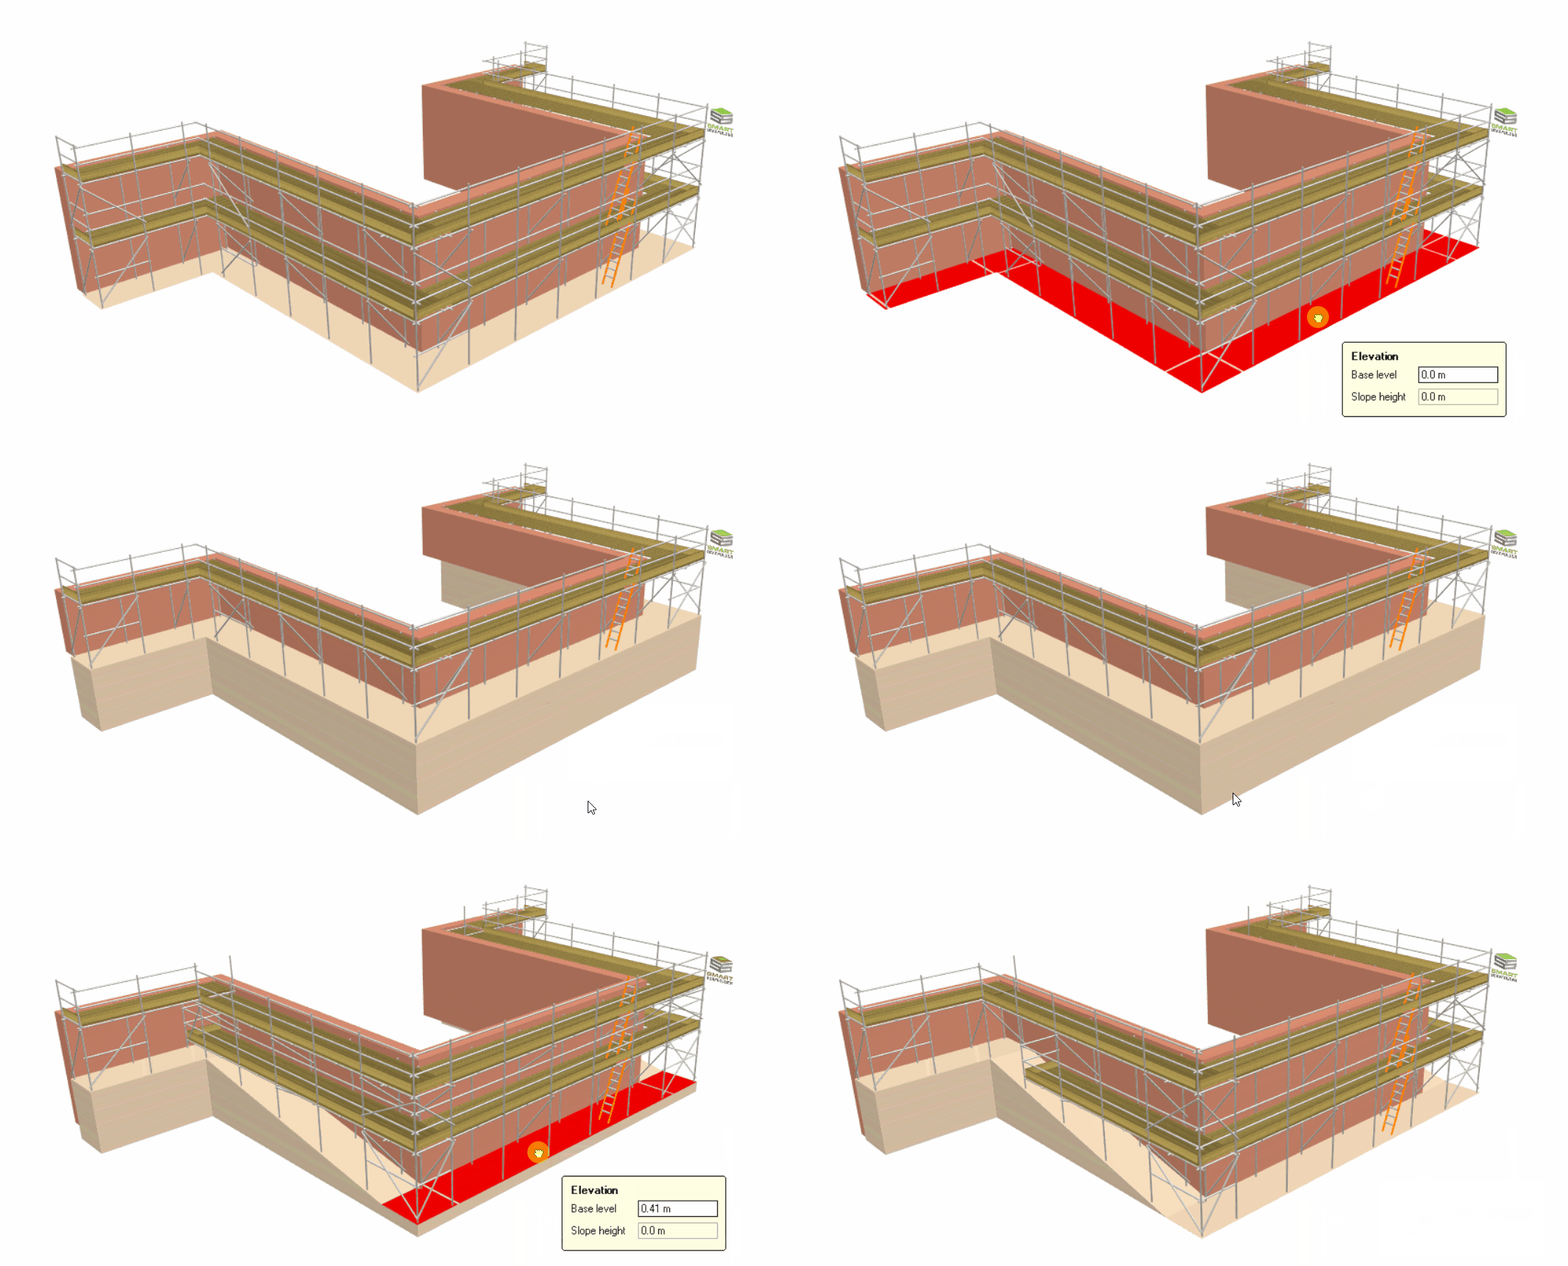
If you have a multiple elevation scaffold, you can hold the Shift key before raising or lowering the ground to perform this operation across the entire scaffold. The Material List will not be affected by this adjustment; however, it is useful to depict the scaffold from a higher elevation.
-
Sloped and Stepped Ground
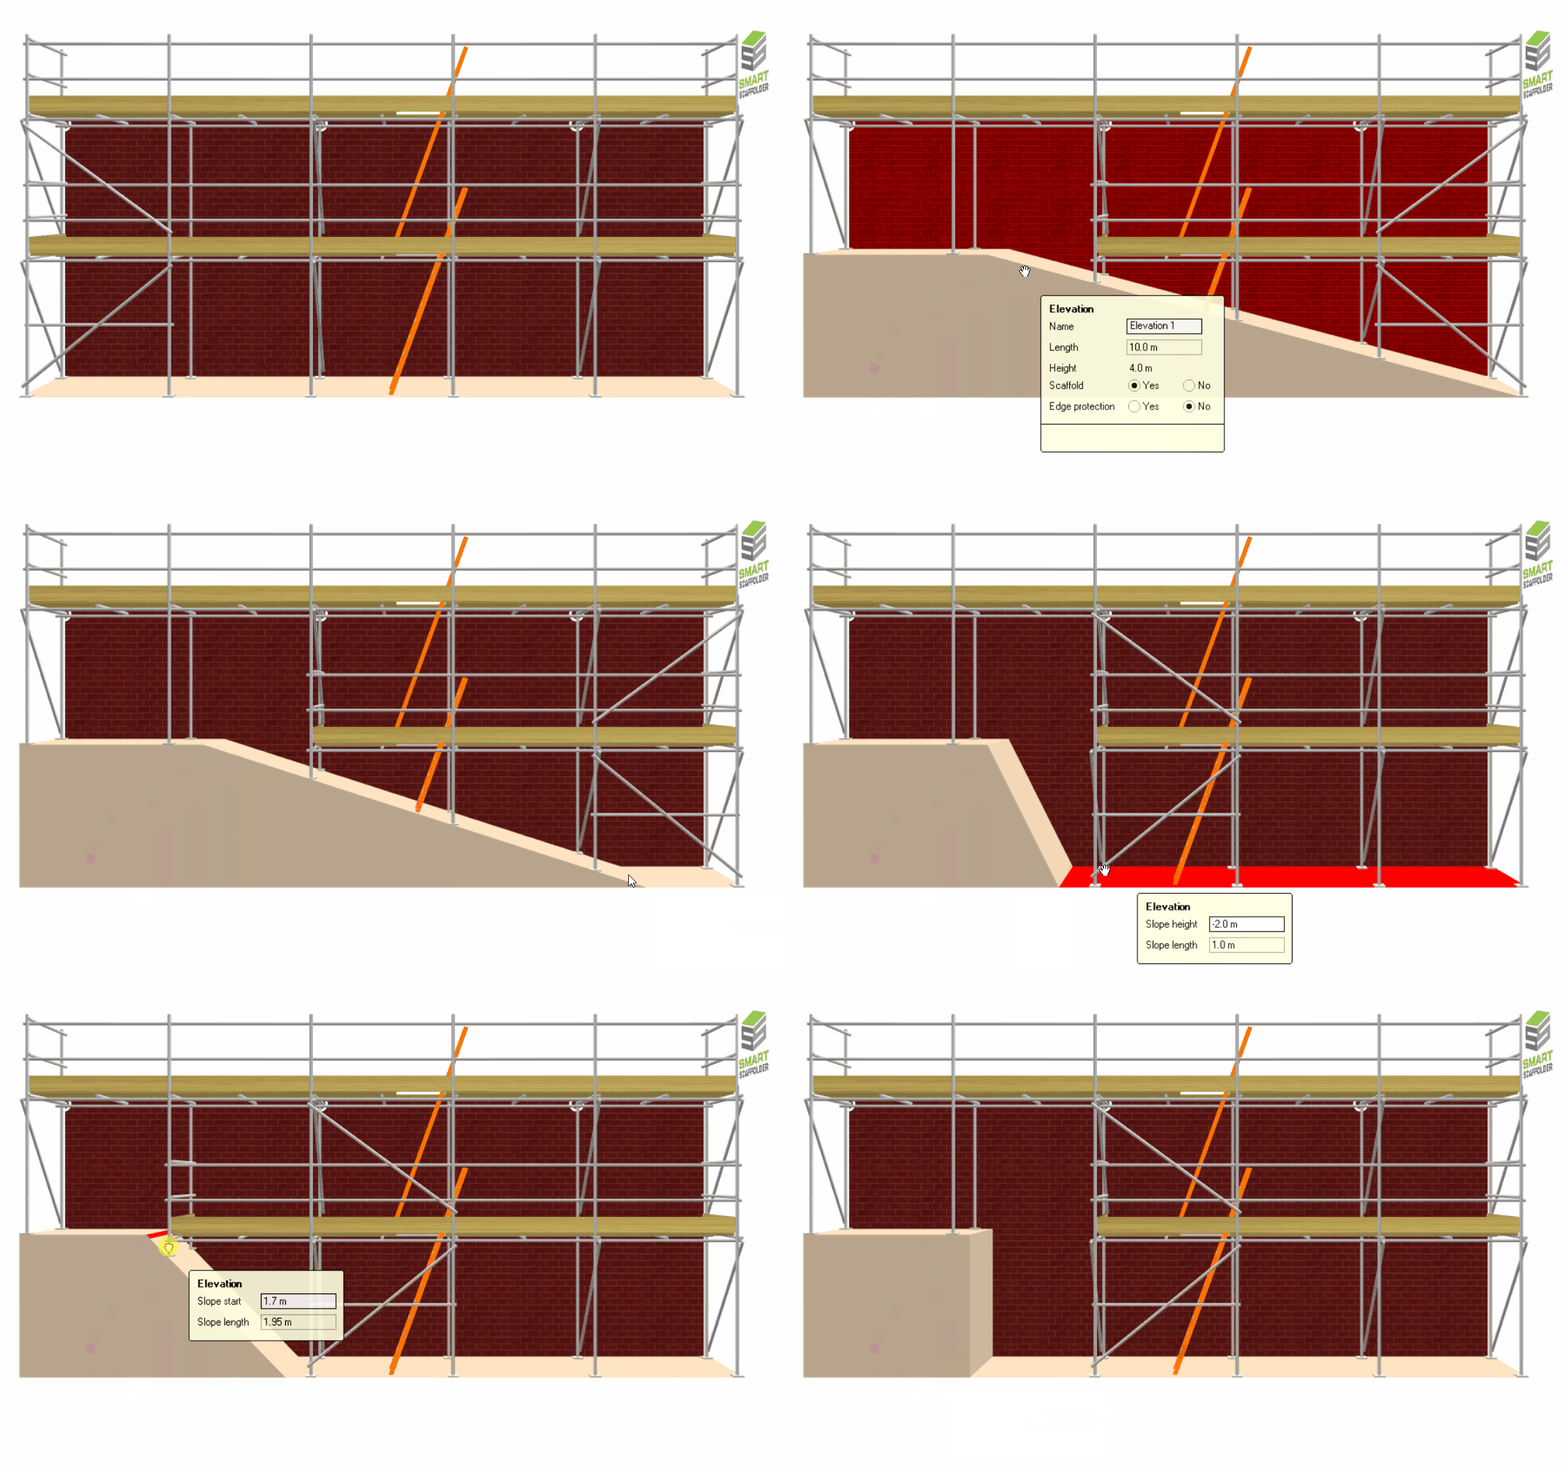
In order to create an incline on the scaffold model, you first need to raise the ground using the Corner Controllers. Next to them, you’ll find the start and end position controllers. By dragging the controllers or setting the Slope Height, Slope Start, and Slope Length of the ground conditions, you can modify the slope’s shape.
Stepped Ground Conditions
If you wish to create a Stepped Ground Condition, simply hold down the Ctrl Key and drag the elevation ground upwards, so as not to disturb the adjacent lifts. Alternatively, you may drag the start and end position controllers across so that they overlap vertically.
Multiple Steps along the Elevation
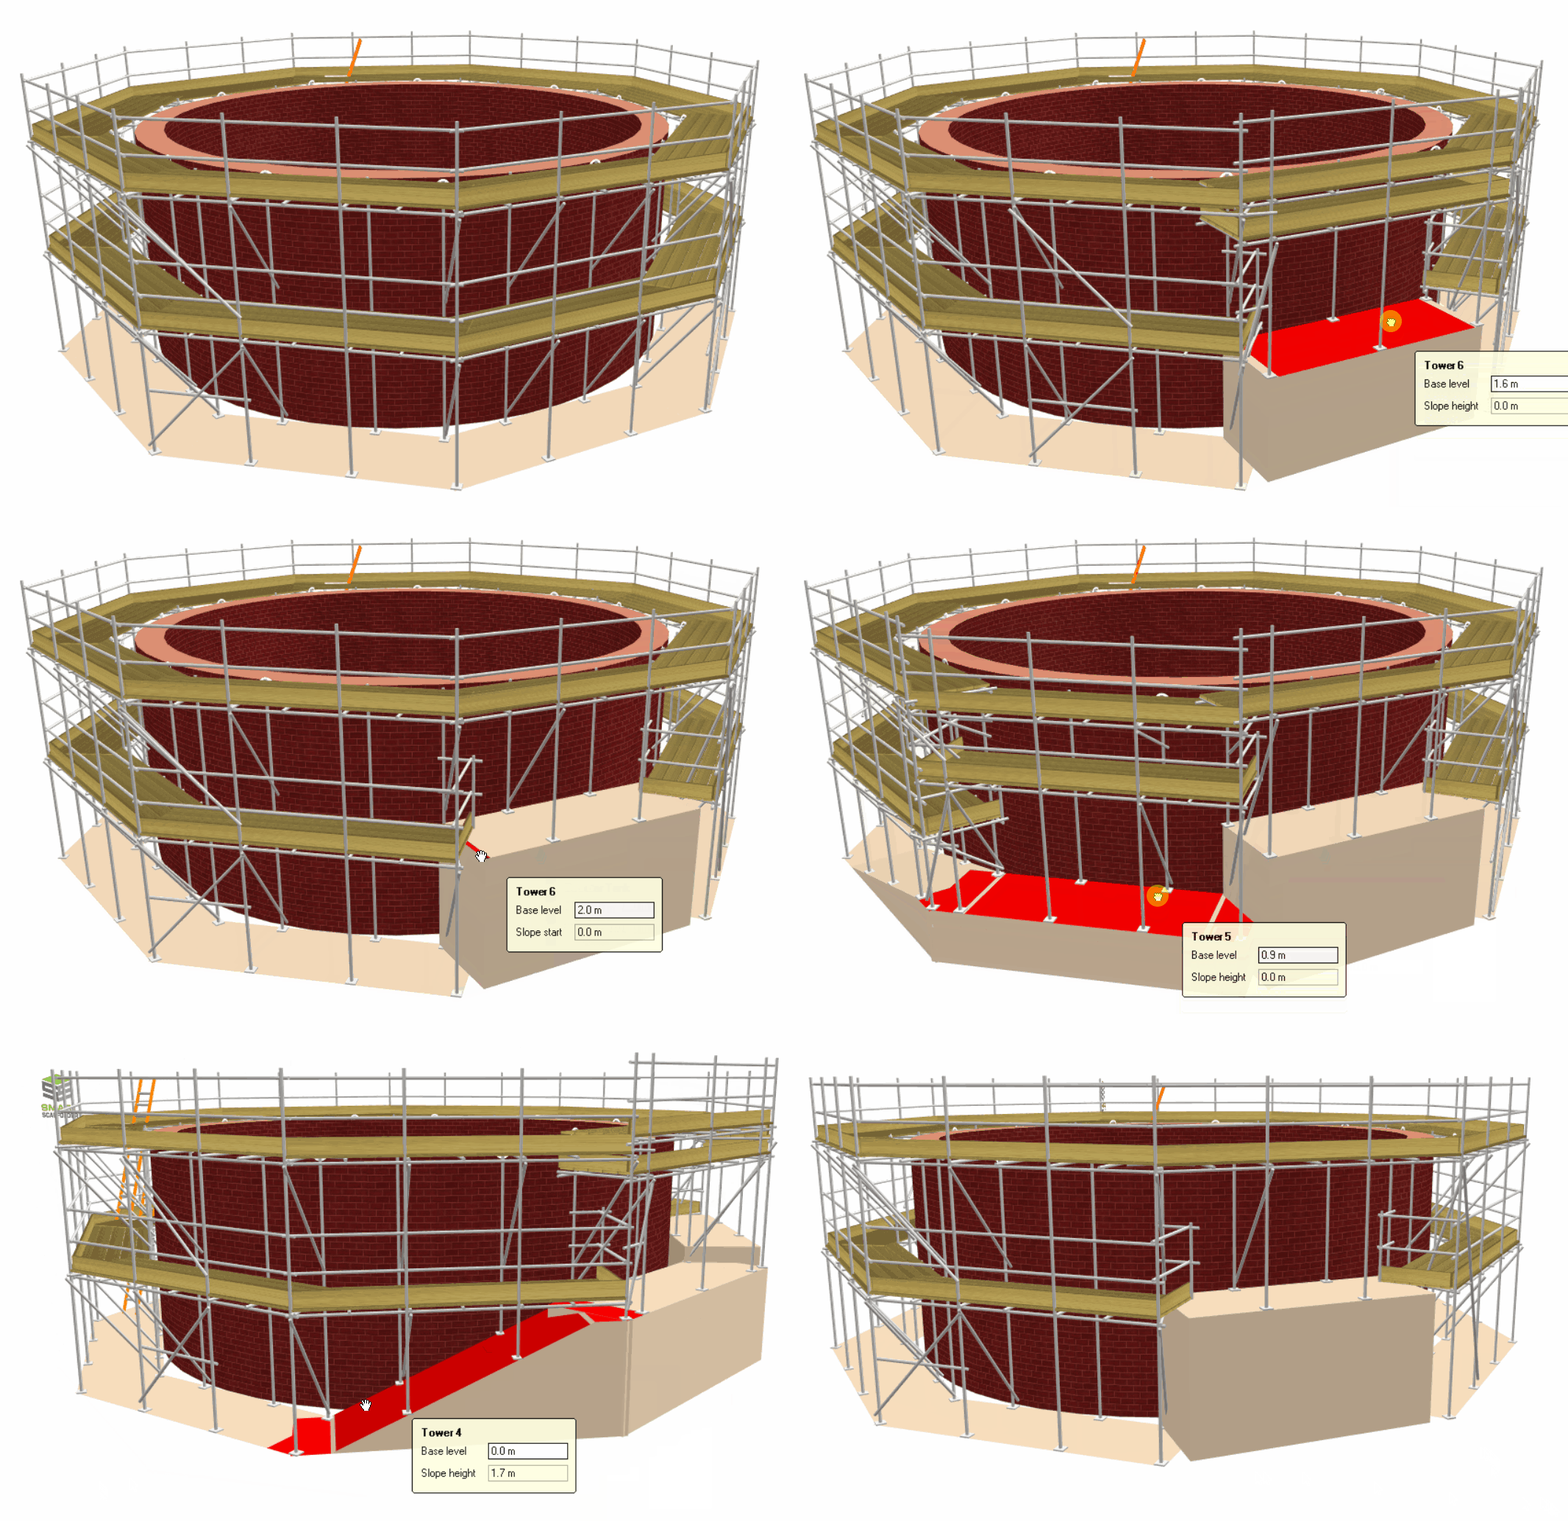
Whenever you split an elevation on a scaffold, it creates two separate elevations. Ground conditions are also included in this logic. Furthermore, you can use this technique to create a Stepped Lift in the middle of an elevation.
-
Birdcage Stepped / Sloped Ground
If you are modeling a step or a slope in the ground for a birdcage scaffold, the slope will always run along the length of the birdcage. As a result the scaffold may need to be rotated 90 degrees to ensure that the slope is oriented appropriately.
If you want to modify the slope height of a birdcage, or create a step, in the first step, lift the corner controller upwards by dragging or typing the revised slope height and pressing the Enter key. You may need to drag the Start or End position controllers inward to be able to see the corner controller more clearly, but normally this is not necessary.
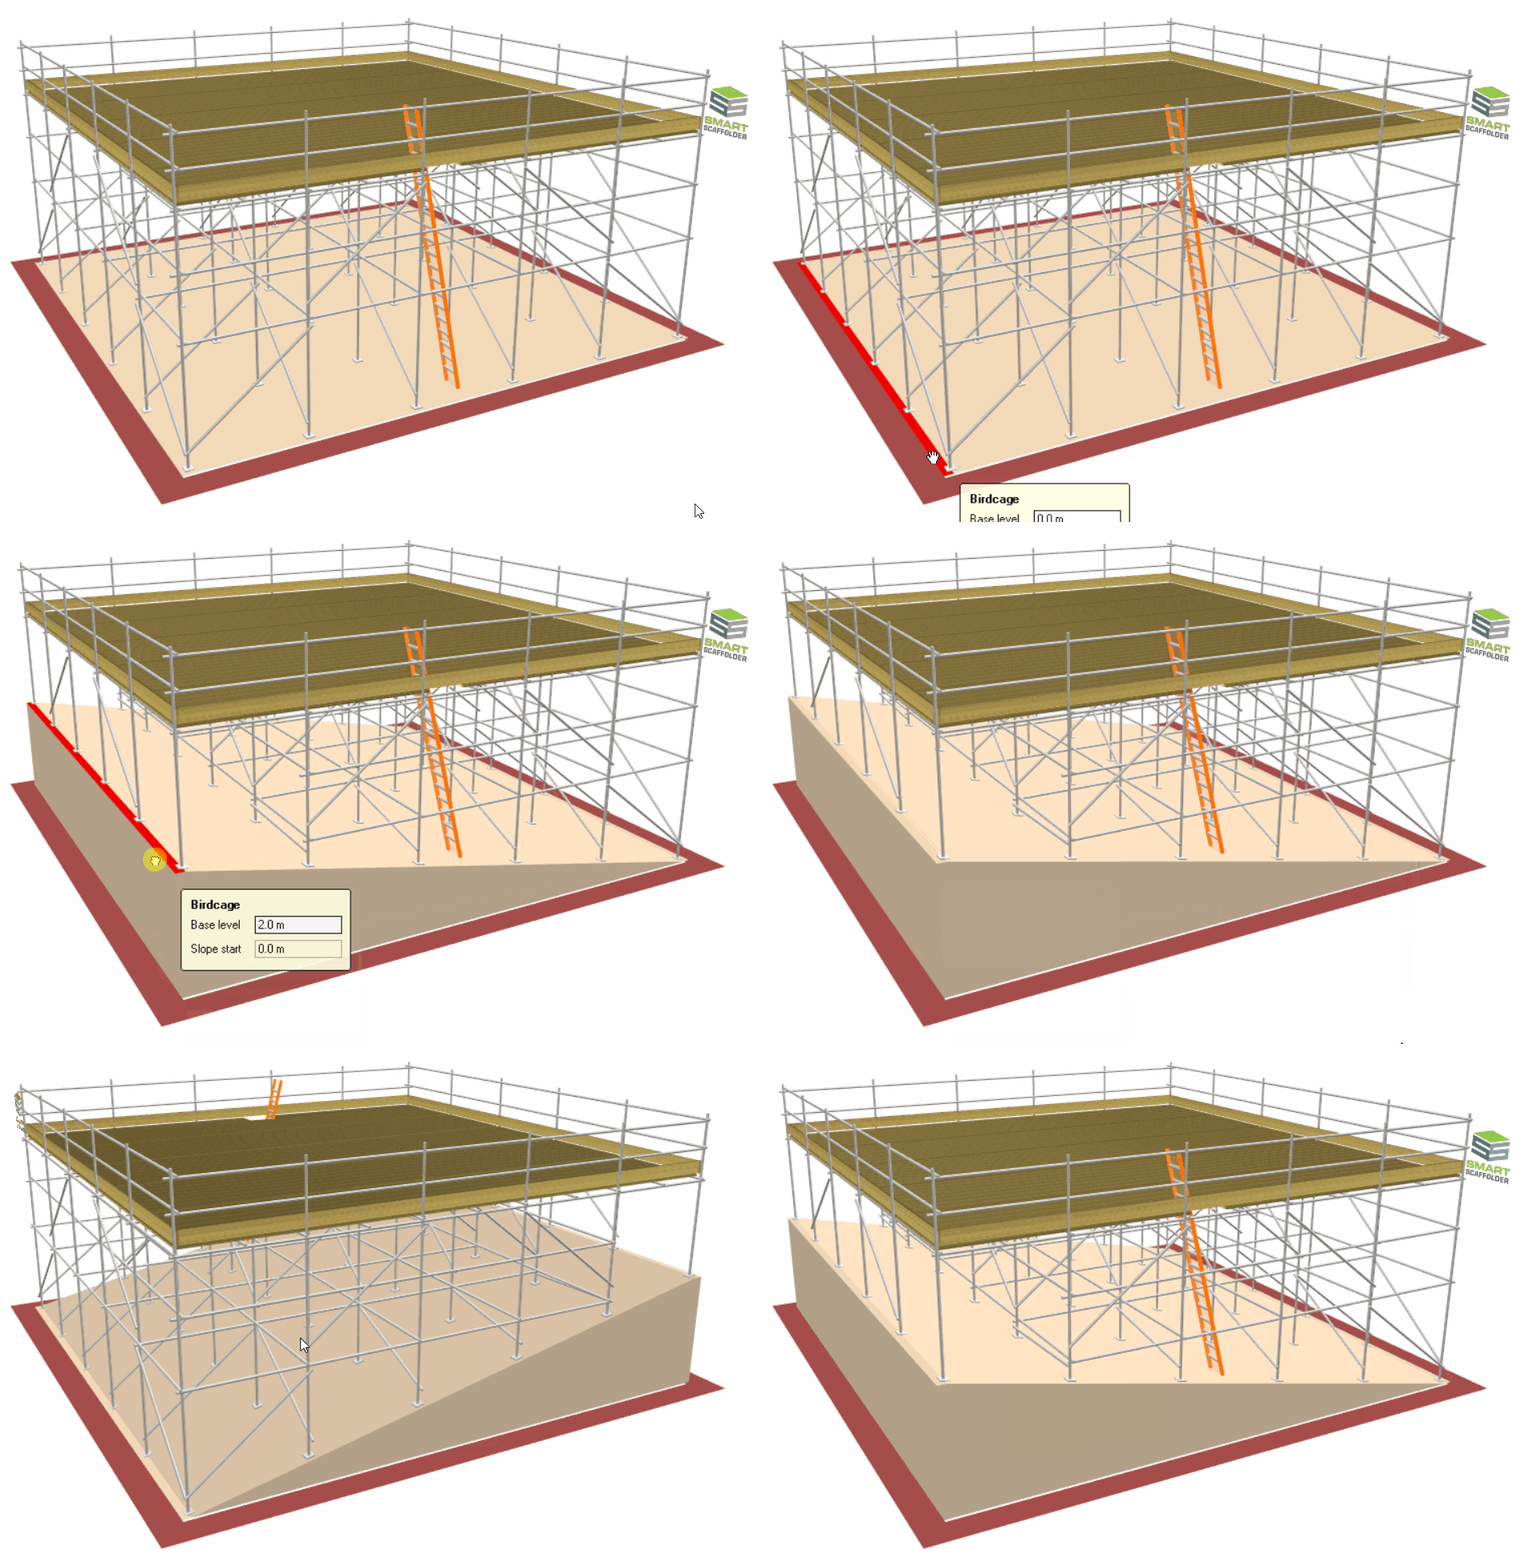
Secondly, you can now modify the slope by dragging its start and end positions or by typing the desired value in the start and end position controllers.
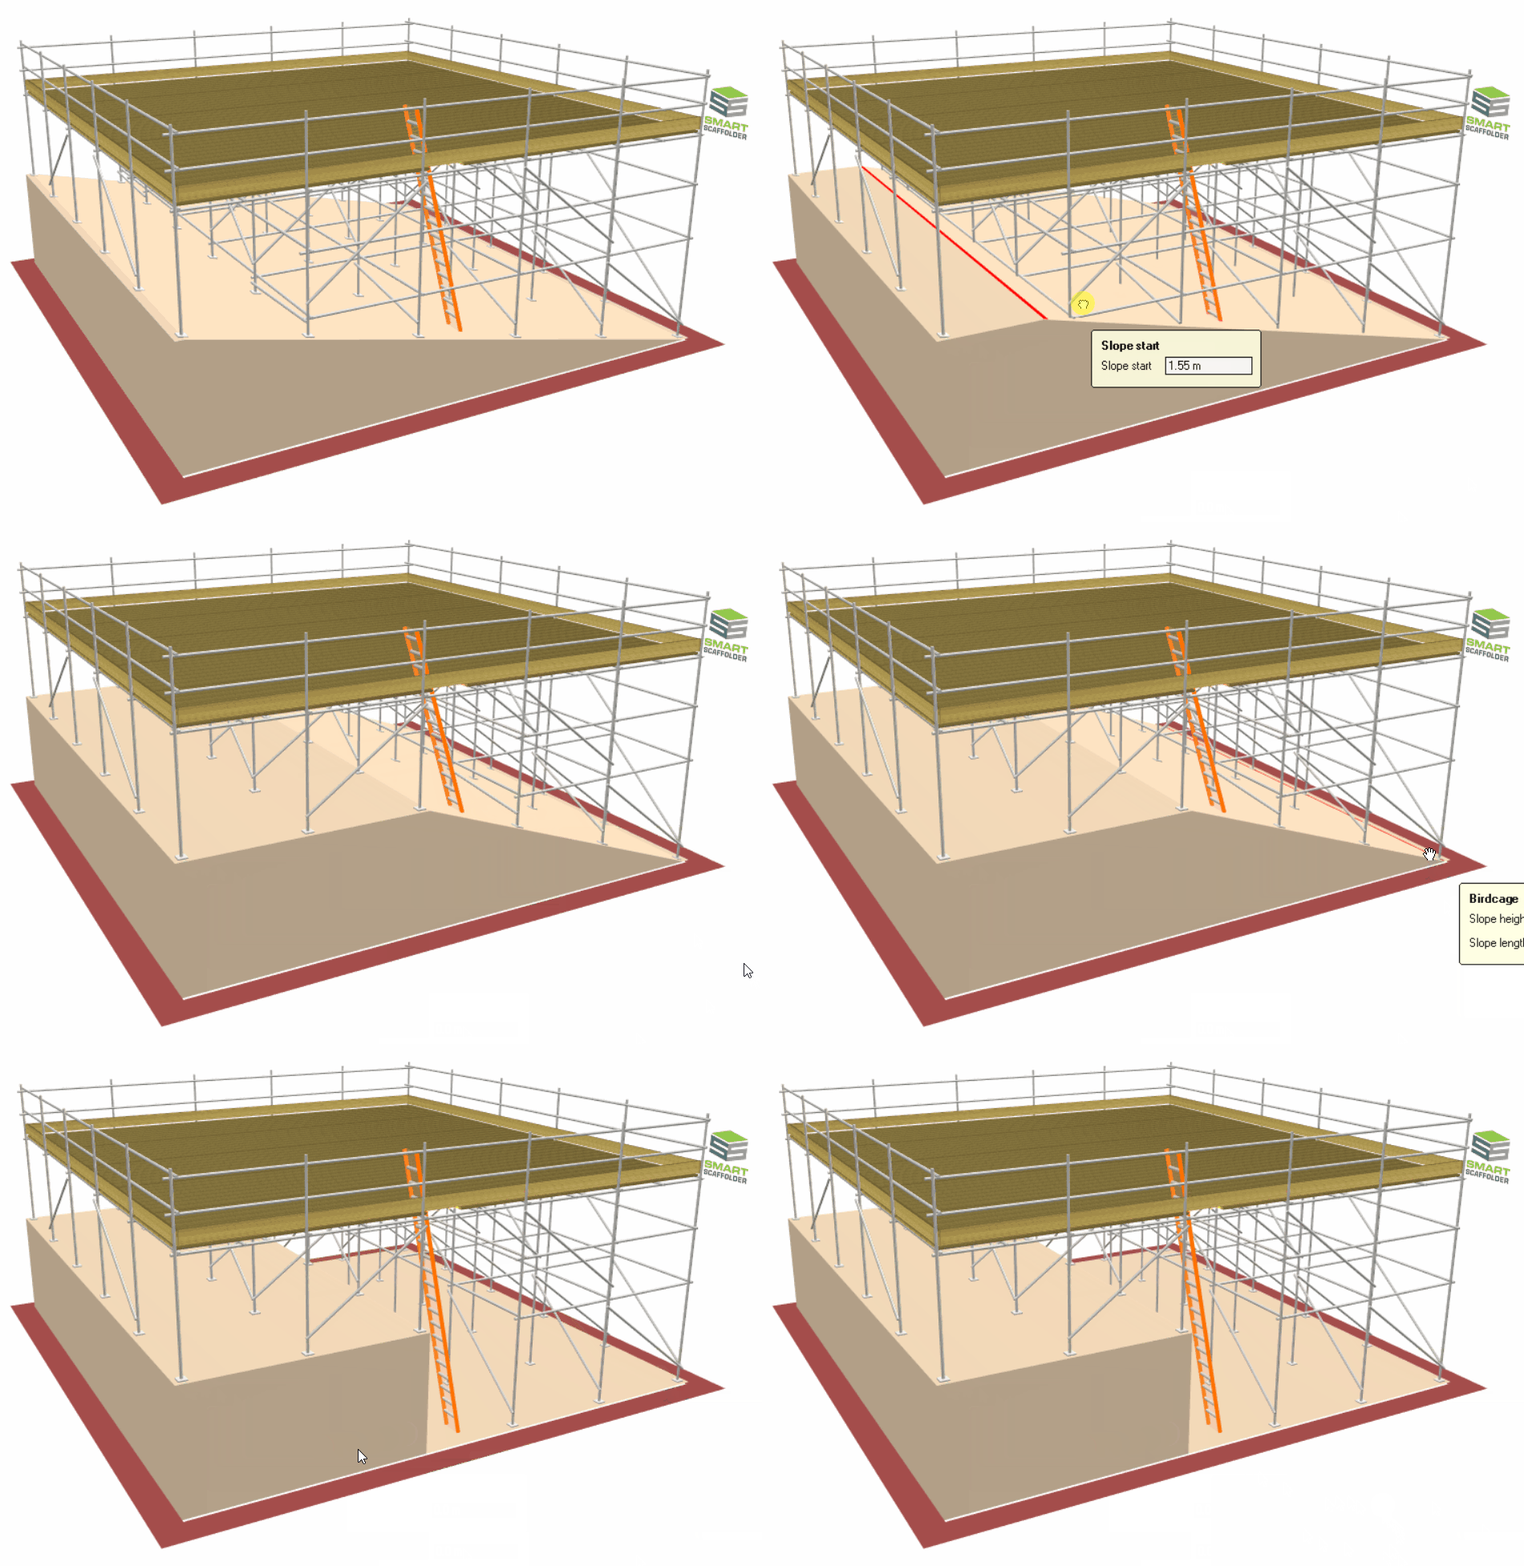
SMART Estimator
What’s new?
Getting Started
Setup and Configuration
-
Enterprise Server
-
Cloud Server Setup
Local Windows Server Setup
Adding Cloud server users
Server Back Up and Restore
Archiving Estimates from server
Migrating Local server to Cloud
Creating Folders in Enterprise Server
Using Server Tools from the Command Line
-
User software settings
User Address Settings and Yard
Scaffold Banner and Sheeting logo
Adding Watermarks
-
Setting up your Rates
Editing Shared Pricing Rates
Creating a rate setting template project
Importing and Exporting shared Rates
Creating an Estimate
Importing Drawings and Models
Scheduling Scaffolds
Creating 3D Scaffolds
-
3D Model Controls
Adding Independent scaffolds
Adding Circular Tank scaffolds
Adding Birdcage & Lift shaft scaffolds
Adding Tied or Freestanding towers
Adding Stair towers, Ladders towers & Buttresses
Adding Loading bays
Adding Chimney scaffolds
Adding Temporary Roof
Adding Edge protection
Adding Pavement Gantry’s
System Scaffolds
Safety Decking
Using the Scaffold Library
Editing Scaffolds
Scaffold Add-ons & Options
-
Adding Gin wheels, Rubbish Chutes, Safety standards, Double standards and Lamps
Adding and Editing bridges/beam work
Adding Beams around Corners
Adding Cladding
Adding Cantilever protection fans
Adding Pavement Lifts
Adding Recesses and Infills
Building and Ground colour
Visual options (Tube, Ladder, System details and Grips)
Add a Pedestrian or Scaffolder
Copying pictures of the model
Material Lists and Drawings
Pricing and Estimation
Quotations
Enterprise Server
Troubleshooting


