-
Creating a Gable End
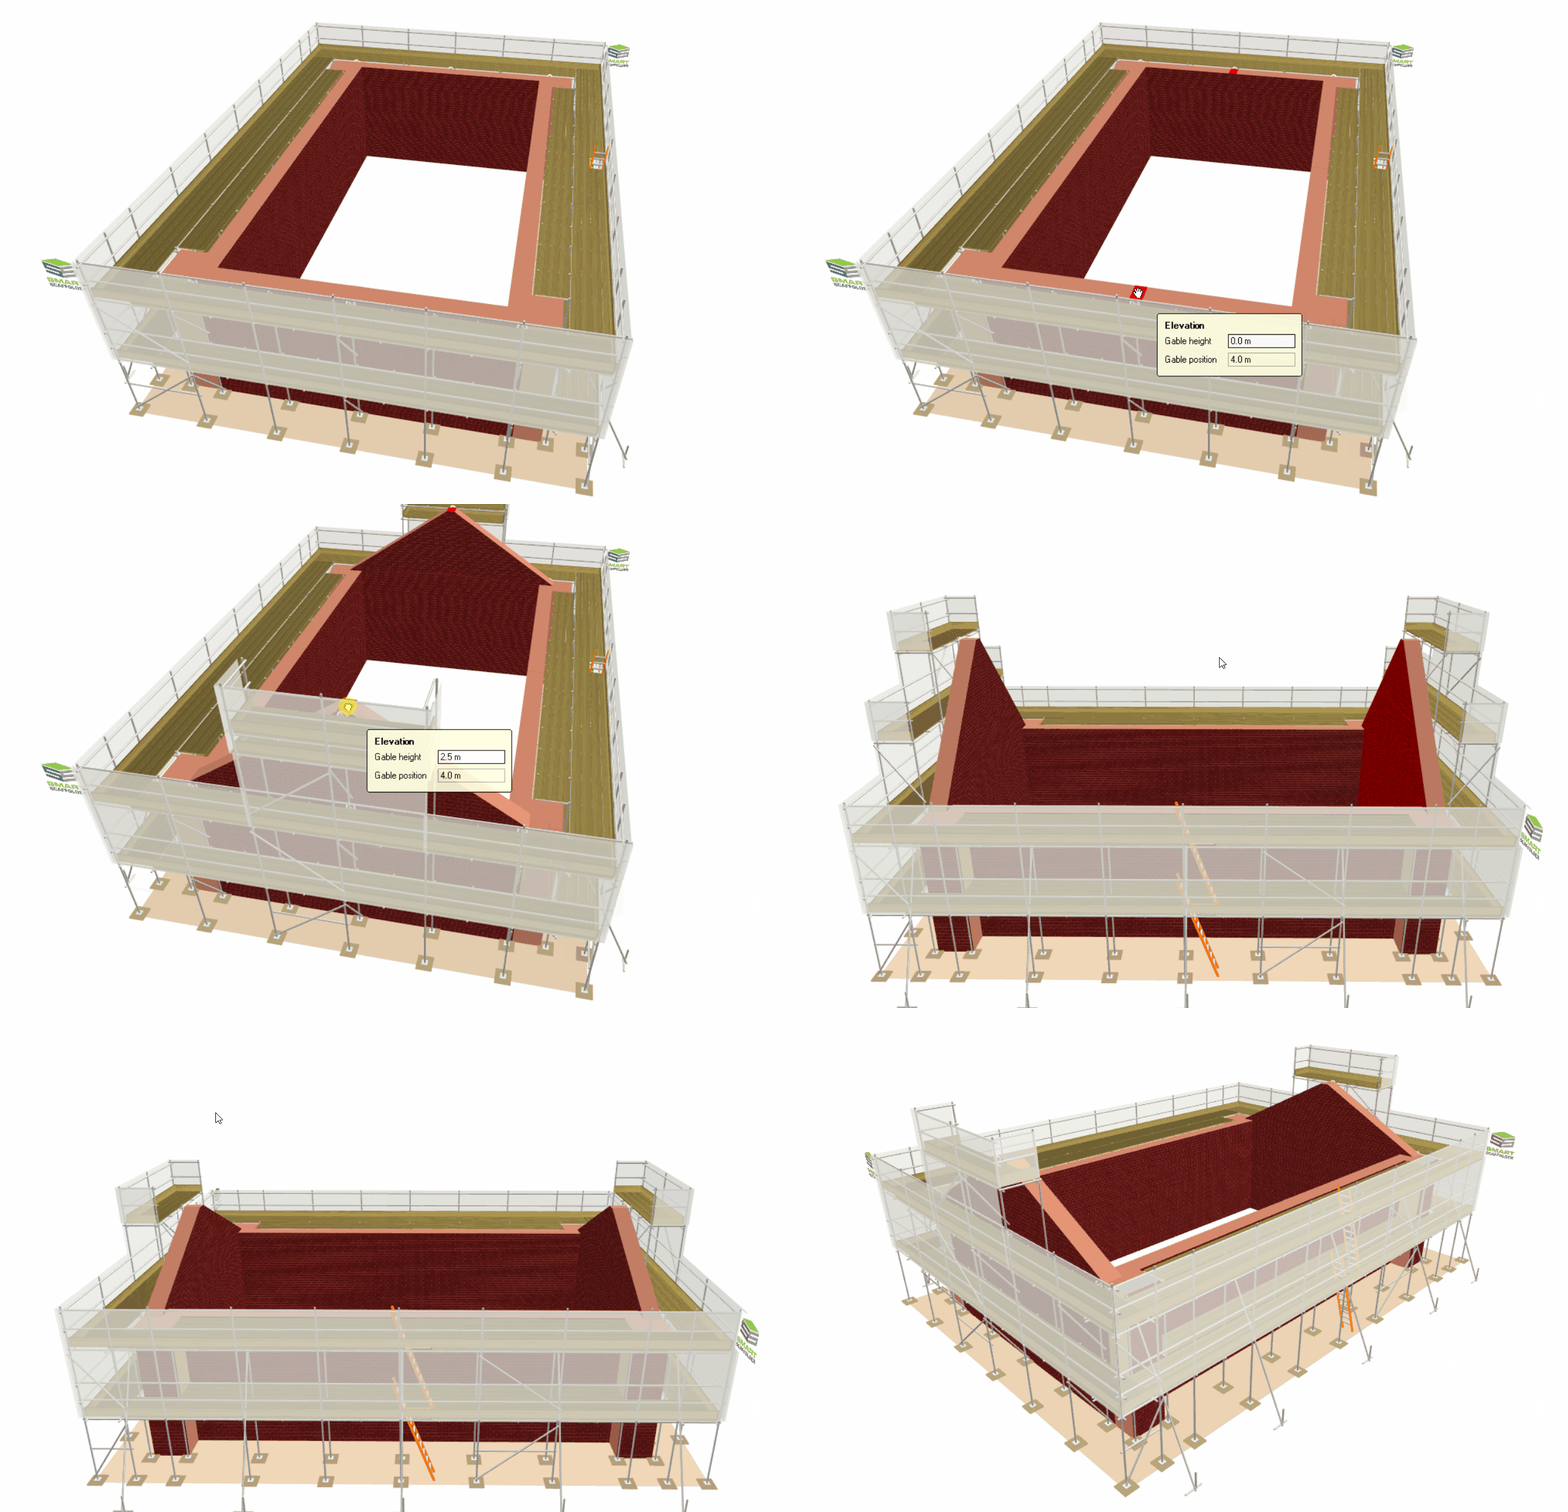
To establish a Gable End, hover your mouse over the centre of the top face of the elevation, until you find a Highlighted Red Square. Then press the left button and drag this controller upwards. You may also use the Toolbox Dialog to set the height of the Gable by typing it in and pressing the Enter key.

Table lifts will be generated automatically
When you adjust the Gable upwards or downwards, an additional table lift will usually be created above the elevation. Depending on the height of the gable, additional Table lifts and the width of the Table lifts will automatically adjust accordingly.
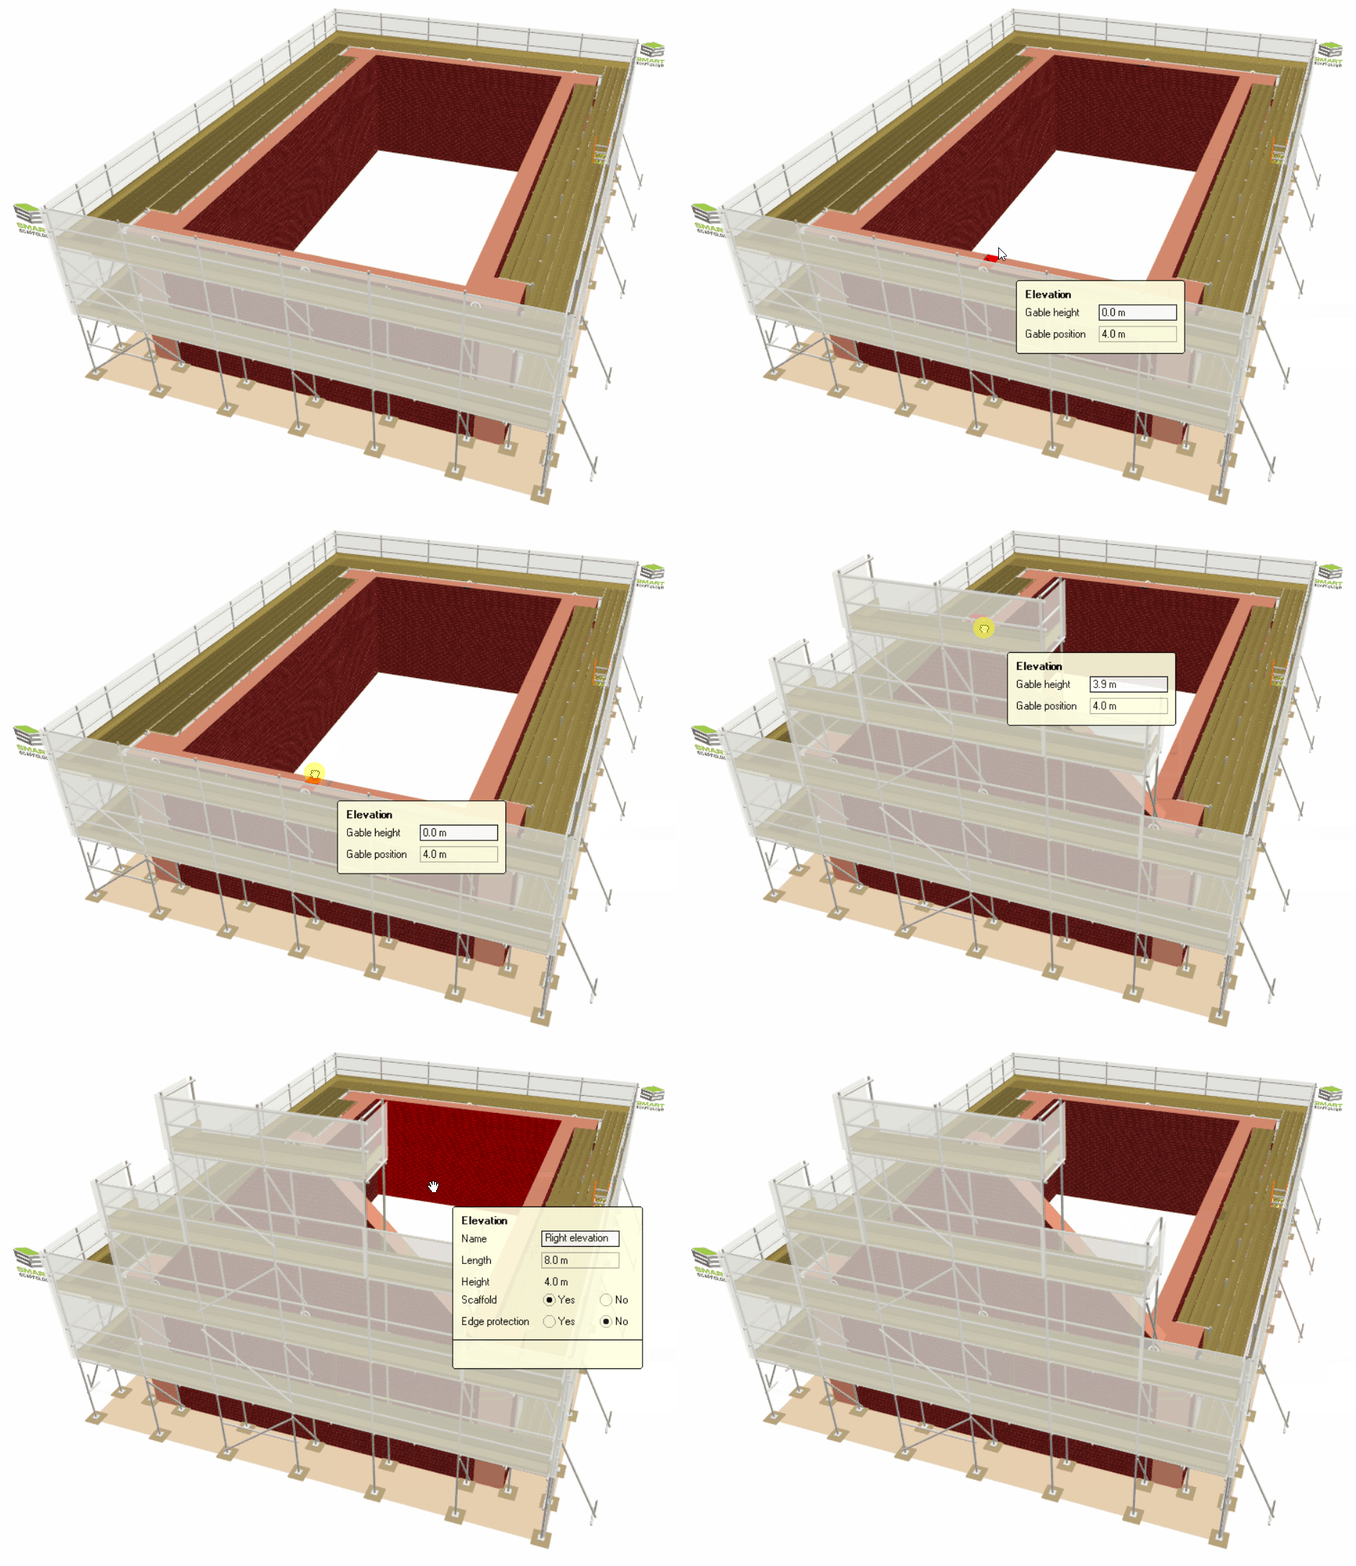
Create a Gable on one side of the elevation?
In most cases, when you adjust a Gable, you can also adjust the symmetrical gable on the opposite side, if it is present. If you wish to prevent this from occurring, simply hold the Ctrl key whilst dragging the Gable End Controller.

-
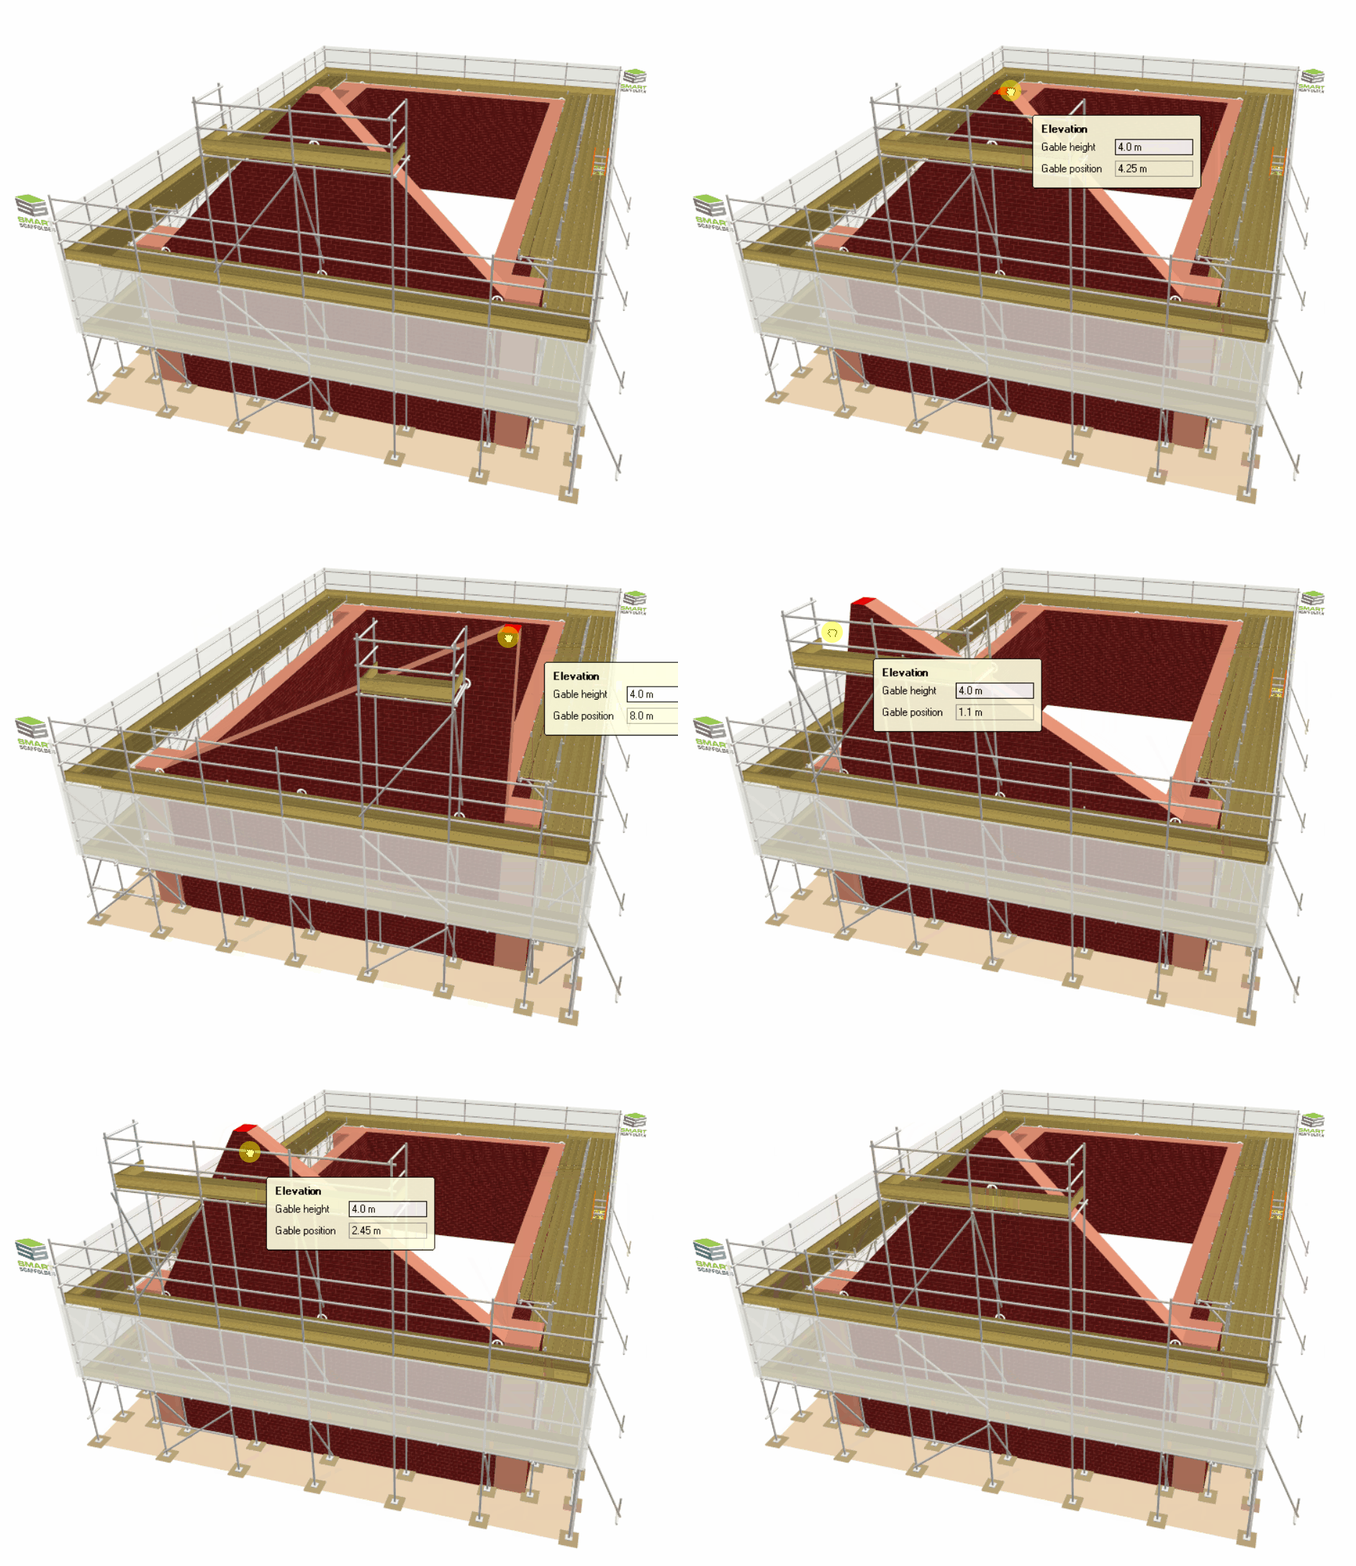
Creating an Asymmetric Gable
Additionally, if you wish to create an asymmetric gable. The controller can be clicked and dragged left and right to change its position along the elevation. Alternatively, you can set the Gable’s position through the Toolbox Dialog by hovering over the controller, pressing Tab, and setting the desired position.

-
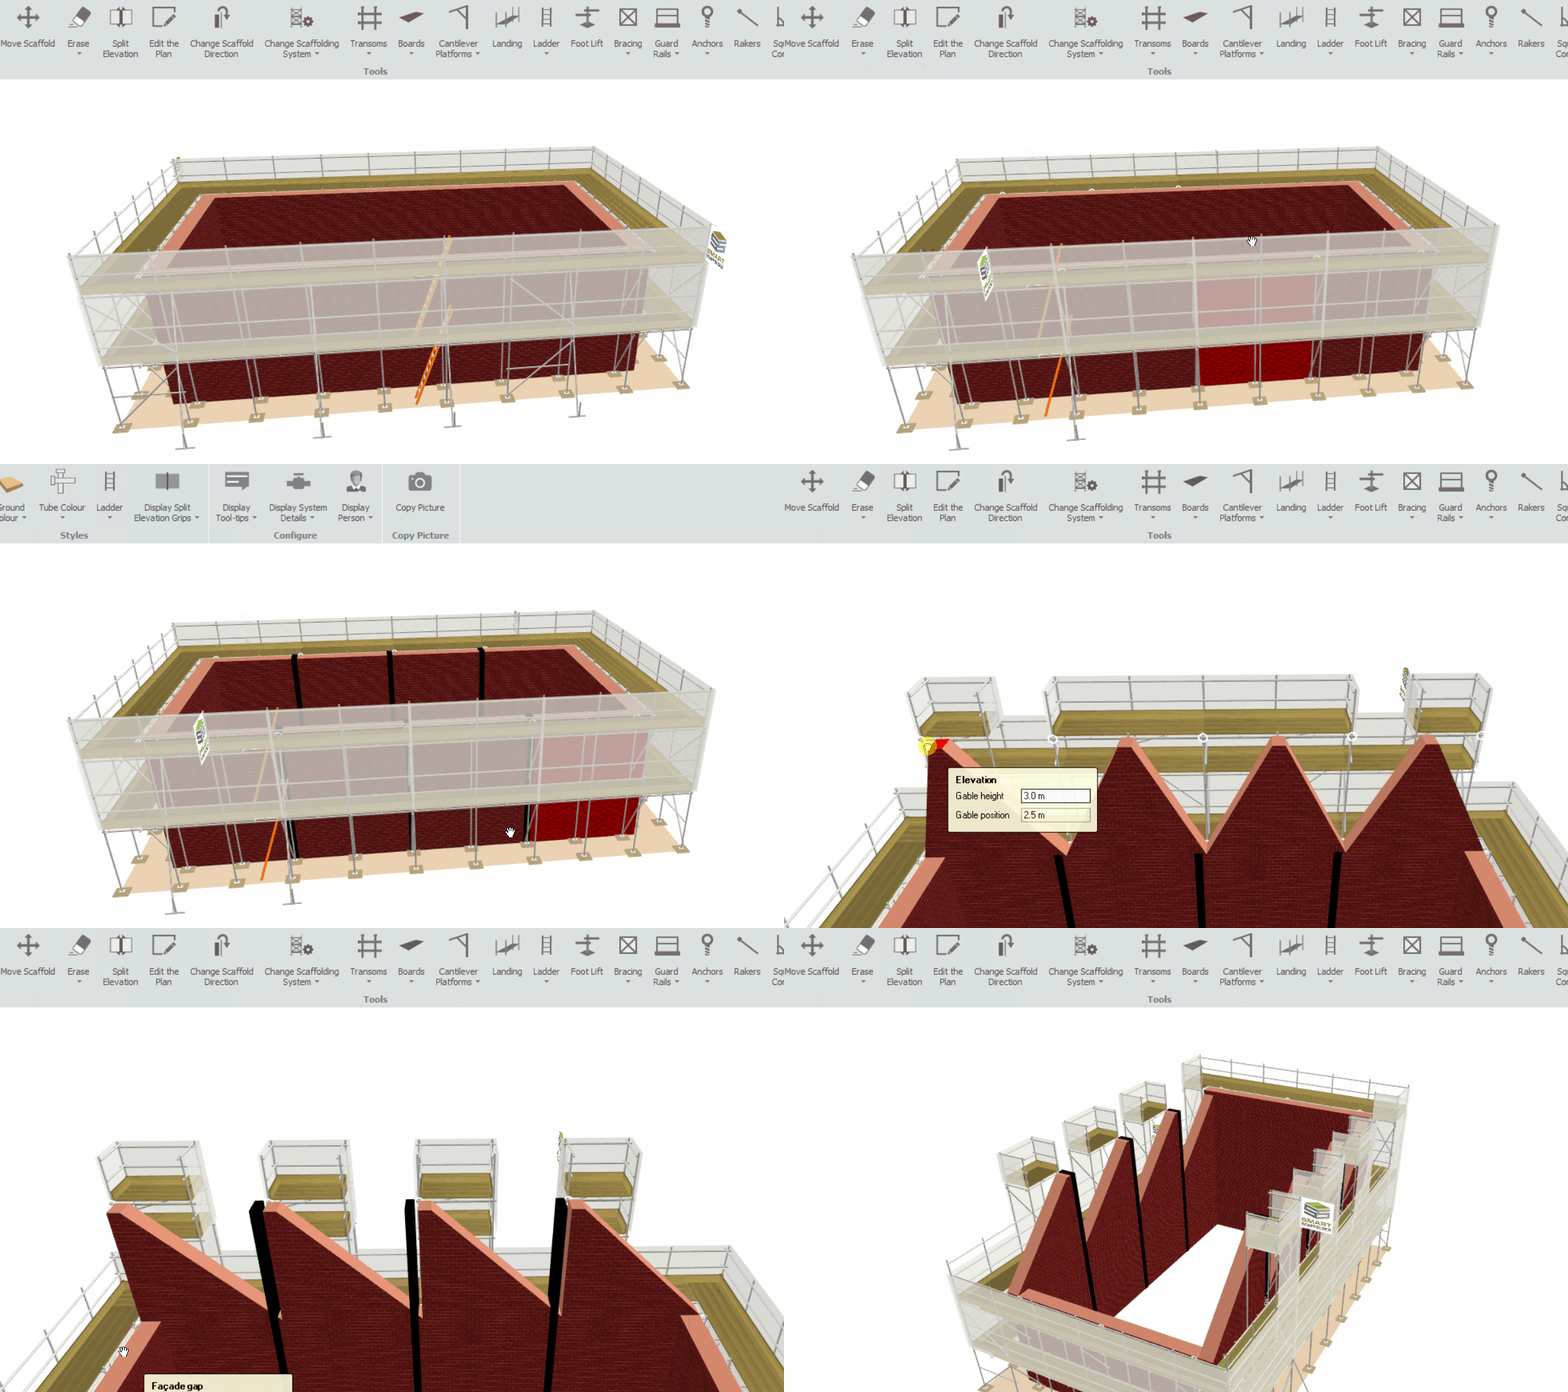
Creating multiple Gable Ends and Table Lifts
Due to the fact that each elevation has its own Gable End, if you simply split the elevations, then every elevation on either side of a split will have a Gable End. From there you can modify the additional Gable Ends to create the desired scaffold.

SMART Estimator
What’s new?
Getting Started
Setup and Configuration
-
Enterprise Server
-
Cloud Server Setup
Local Windows Server Setup
Adding Cloud server users
Server Back Up and Restore
Archiving Estimates from server
Migrating Local server to Cloud
Creating Folders in Enterprise Server
Using Server Tools from the Command Line
-
User software settings
User Address Settings and Yard
Scaffold Banner and Sheeting logo
Adding Watermarks
-
Setting up your Rates
Editing Shared Pricing Rates
Creating a rate setting template project
Importing and Exporting shared Rates
Creating an Estimate
Importing Drawings and Models
Scheduling Scaffolds
Creating 3D Scaffolds
-
3D Model Controls
Adding Independent scaffolds
Adding Circular Tank scaffolds
Adding Birdcage & Lift shaft scaffolds
Adding Tied or Freestanding towers
Adding Stair towers, Ladders towers & Buttresses
Adding Loading bays
Adding Chimney scaffolds
Adding Temporary Roof
Adding Edge protection
Adding Pavement Gantry’s
System Scaffolds
Safety Decking
Using the Scaffold Library
Editing Scaffolds
Scaffold Add-ons & Options
-
Adding Gin wheels, Rubbish Chutes, Safety standards, Double standards and Lamps
Adding and Editing bridges/beam work
Adding Beams around Corners
Adding Cladding
Adding Cantilever protection fans
Adding Pavement Lifts
Adding Recesses and Infills
Building and Ground colour
Visual options (Tube, Ladder, System details and Grips)
Add a Pedestrian or Scaffolder
Copying pictures of the model
Material Lists and Drawings
Pricing and Estimation
Quotations
Enterprise Server
Troubleshooting


