-
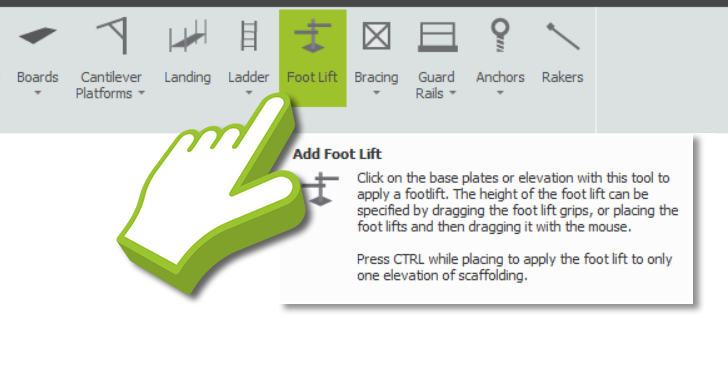
Adding the Foot Lift
You can apply a structural lift at the foot of any Independent, Circular Tank or Birdcage by navigating to the Tools View. On the Toolbar, select the Foot Lifts tool, and then apply it to the scaffold you wish to have a foot lift. Furthermore, by hovering your mouse over one of the standards that make up the foot lift and dragging it up and down, you can adjust the lift height of the foot lift.
System Scaffolding: Adjusting the Base Jack
Even if you do not have a foot lift on the scaffold, the highlight will still exist on Tube and Fitting and System Scaffolds, although this will not affect Tube and Fitting. You can adjust the highlight on System Scaffolding by dragging it up and down or set it to adjust the base jack’s height.
-
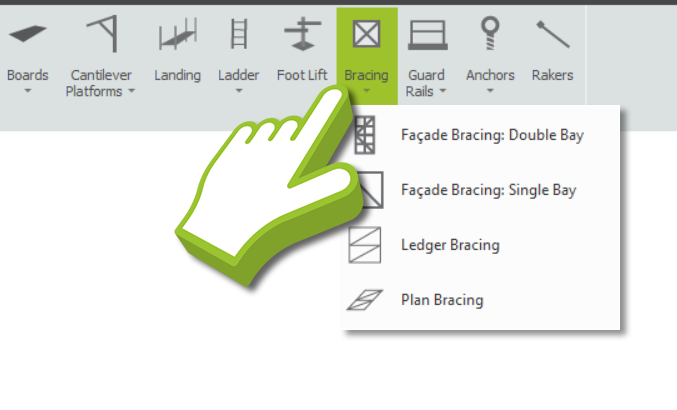
Reinstating the Bracing
The Façade, Ledger, Plan bracing can be added or reinstated to the scaffold by navigating to the Tools View, then clicking on the Bracing drop-down menu to the right of the toolbar. From this menu you can select from any bracing option available to you. Once the bracing option has been selected, click on the scaffold to reinstate the bracing.
What Bracing Options are available to me?
The bracing options available to you are determined by the scaffolding system that you have chosen. The bracing options are then dictated by the TG20:21 guidelines for tube and fitting or the manufacturer guidelines for system scaffolding.
-
Adding Guard Rails
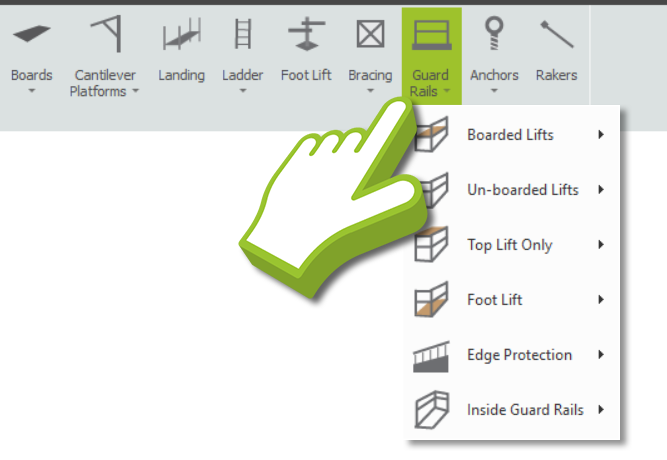
As default, all scaffolds in SMART Estimator are created with double guard rails at boarded lifts and single guard rails at non-boarded lifts. On the scaffold, you have the option of changing any of the guard rails to Single, Double, Triple or Quadruple guard rails, if applicable. In addition, you can apply Inside Guard Rails and Edge Protection.
In order to specify the guard rails, navigate to the Tools View and click on the Guard Rails drop-down button. Hover your mouse over the option you would like to change, then select from one of the guard rail types available. Click on the scaffolding to apply the respective guard rails to the entire scaffold. You can also hold down the Ctrl key before applying them to one elevation of scaffolding.
Inside Guard Rails
If you wish to add guard rails to the inside of a lift to prevent falling from the Façade of the scaffold, select the Guard Rails drop-down menu button, then choose the type of guard rail from the Inside Guard Rails option. Then you can either apply it to the entire scaffold or use the Ctrl key to apply it to one elevation only.
You also have another option to match the outer guard rails, if you want the Inside and Outside Guard Rails to have the same amount of rails.
Edge Protection
You also have the option to add Edge Protection to your Scaffold. To learn more about how to implement Edge Protection in your scaffolding project, click on the button below to navigate to its relevant documentation.
SMART Estimator
What’s new?
Getting Started
Setup and Configuration
-
Enterprise Server
-
Cloud Server Setup
Local Windows Server Setup
Adding Cloud server users
Server Back Up and Restore
Archiving Estimates from server
Migrating Local server to Cloud
Creating Folders in Enterprise Server
Using Server Tools from the Command Line
-
User software settings
User Address Settings and Yard
Scaffold Banner and Sheeting logo
Adding Watermarks
-
Setting up your Rates
Editing Shared Pricing Rates
Creating a rate setting template project
Importing and Exporting shared Rates
Creating an Estimate
Importing Drawings and Models
Scheduling Scaffolds
Creating 3D Scaffolds
-
3D Model Controls
Adding Independent scaffolds
Adding Circular Tank scaffolds
Adding Birdcage & Lift shaft scaffolds
Adding Tied or Freestanding towers
Adding Stair towers, Ladders towers & Buttresses
Adding Loading bays
Adding Chimney scaffolds
Adding Temporary Roof
Adding Edge protection
Adding Pavement Gantry’s
System Scaffolds
Safety Decking
Using the Scaffold Library
Editing Scaffolds
Scaffold Add-ons & Options
-
Adding Gin wheels, Rubbish Chutes, Safety standards, Double standards and Lamps
Adding and Editing bridges/beam work
Adding Beams around Corners
Adding Cladding
Adding Cantilever protection fans
Adding Pavement Lifts
Adding Recesses and Infills
Building and Ground colour
Visual options (Tube, Ladder, System details and Grips)
Add a Pedestrian or Scaffolder
Copying pictures of the model
Material Lists and Drawings
Pricing and Estimation
Quotations
Enterprise Server
Troubleshooting


