-
Overview of the Tied and Freestanding Towers
To make your life easier, SMART Estimator offers the option to create Tied and Freestanding Scaffold Towers for Access and Eggress. These scaffolds have been specifically designed for this purpose and provide additional functionality and controls.
However, Tied Towers and Freestanding Towers are very similar to independent scaffolds, birdcage scaffolds and ladder towers. You will be able to transfer your knowledge if you have read these documents.
-
Creating a Tied or Freestanding Tower
Tied Tower
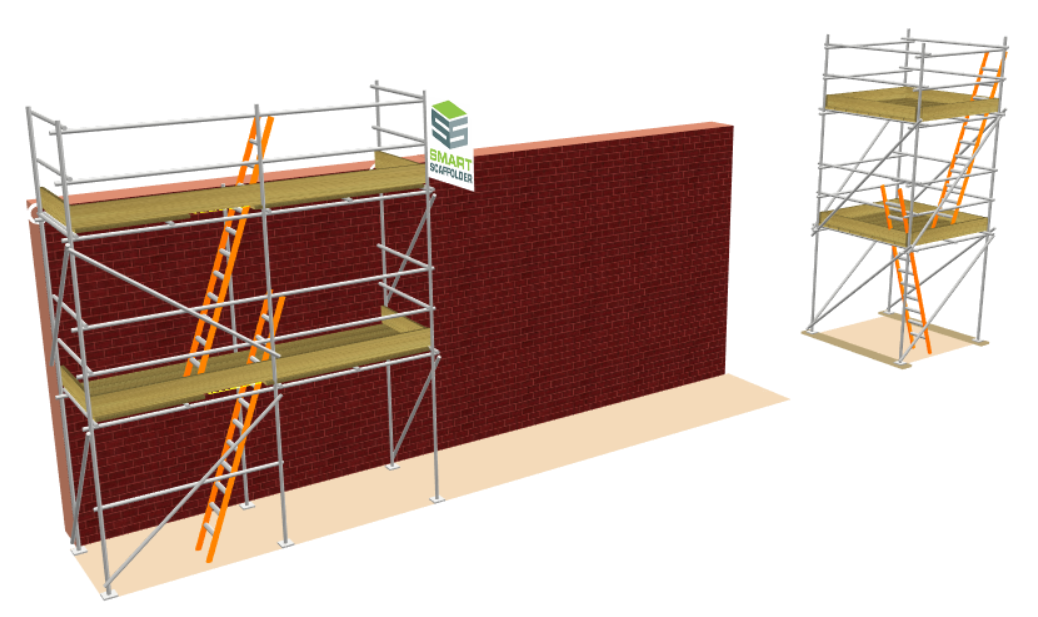
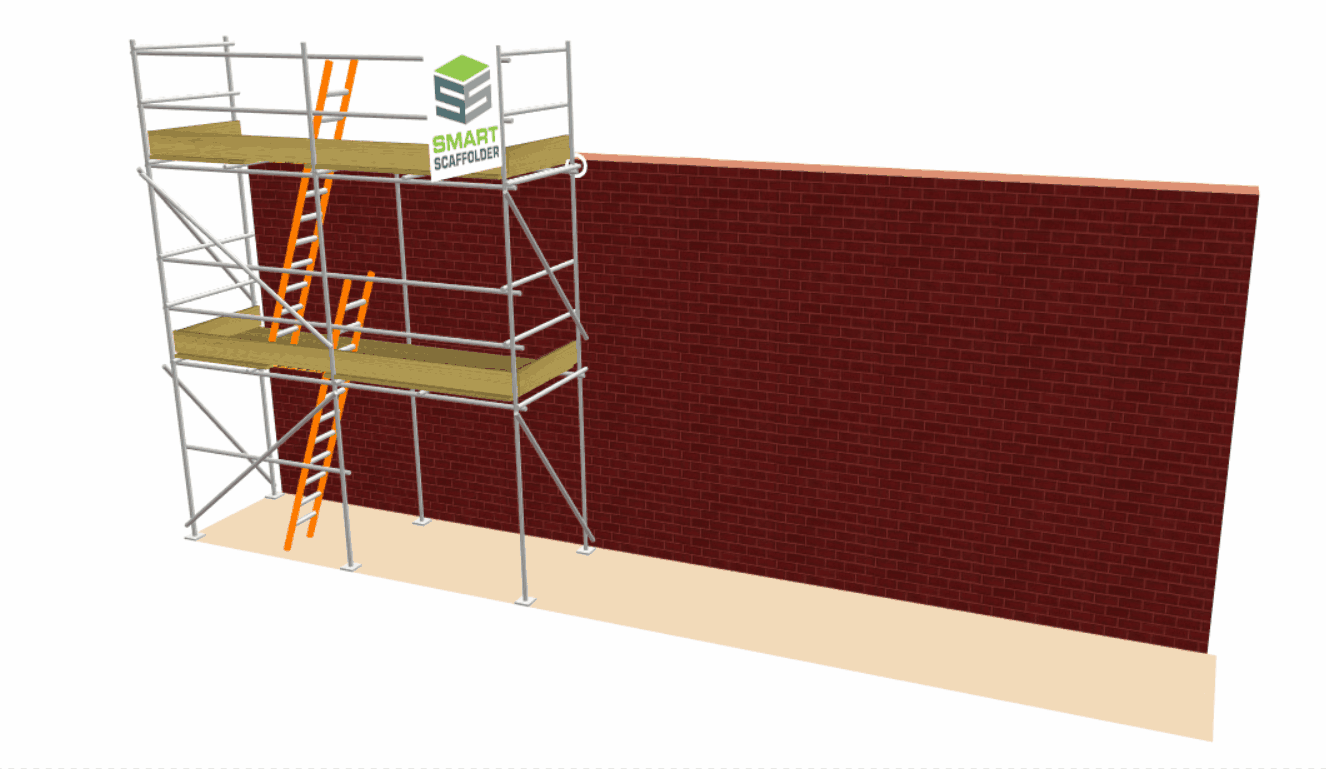
In order to add a Tied Tower to Model IT, you must first navigate to the Scaffolds View. Then, select the Tied Tower option. By doing this, you will create an independent scaffold tied to an elevation that’s 10 metres long. The Tied Tower itself measures 4 metres in height, 2 bays measuring a total of 4 metres in length and 5 boards in width.
Freestanding Tower
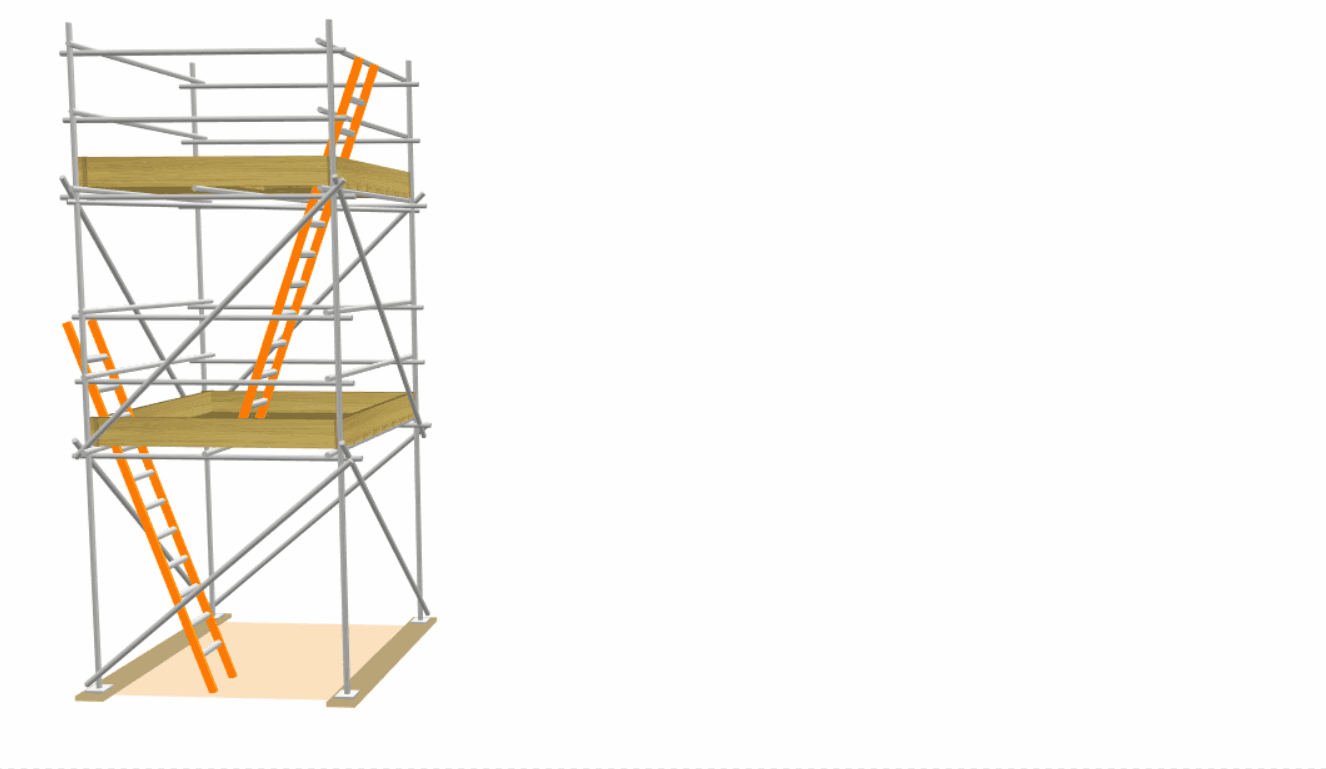
To create a Freestanding Tower in Model IT, you need to navigate across to the Scaffolds View. Select the Free Standing Tower option. This will create a ladder tower scaffold 4 metres tall, 2 metres long and 8 boards wide.
-
Adjusting the Scaffold
Using the 3D Model Controls, such as the Red Highlight and the Toolbox Dialog, we can now modify the Tied and Freestanding Towers. It is likely that you will use both of these features extensively.
Height (Up and Down)
When hovering your mouse over the general area of the tower, you will see a red highlighted box that allows you to alter its height. By clicking and dragging the tower, it will adjust its height as you drag it, allowing you to easily adjust it to the desired height.
Alternatively, whilst hovering over the general area of the tower. You can also manually type in the Total Height value within the Toolbox Dialog and press Enter, to adjust the Tied Tower’s Height.
Width (Boards)
Also when you hover your mouse over the toeboards, you will see that they’re highlighted in red. On the toeboards, you can manually specify how many boards make up the width on the Main Boards value. Then, press Enter to confirm your changes.
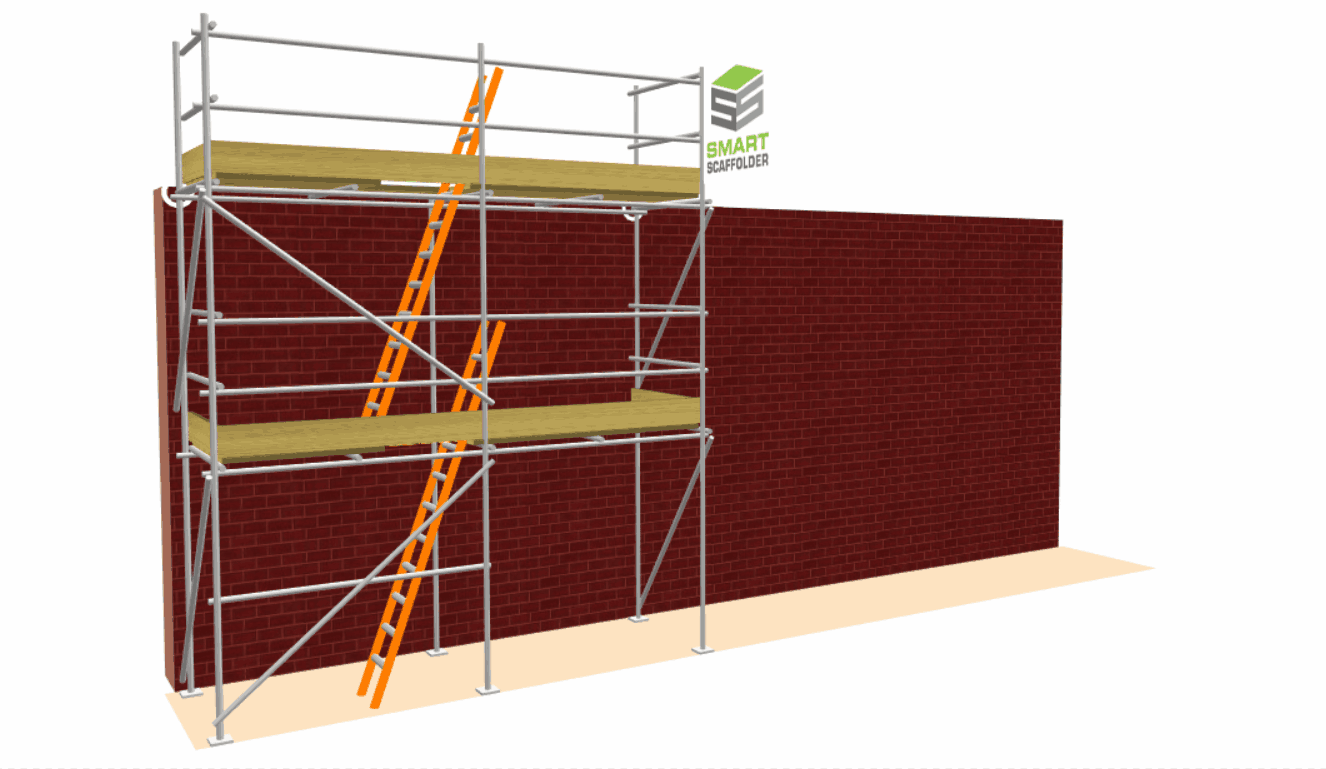
Tied Tower: Adjusting the Length
Moreover, if you hover your mouse over the side of the Tied Tower, the scaffold will be highlighted. From there you can click and drag the side of the Tied Tower to adjust the length of the scaffold.
Tied Tower: Shifting the Tower
When hovering over the tied tower standards, you may click and move your scaffold across the elevation. The Tied Tower will move in the direction you drag it, allowing you to position it exactly where you need it.
Freestanding Tower: Extending the Bays
Using your mouse, hover over the side of the Freestanding Tower where the highlight is parallel with the sole board, and click and drag; the Freestanding Tower will widen and adjust accordingly when you release your grip.
-
Modifying the Tower Scaffold
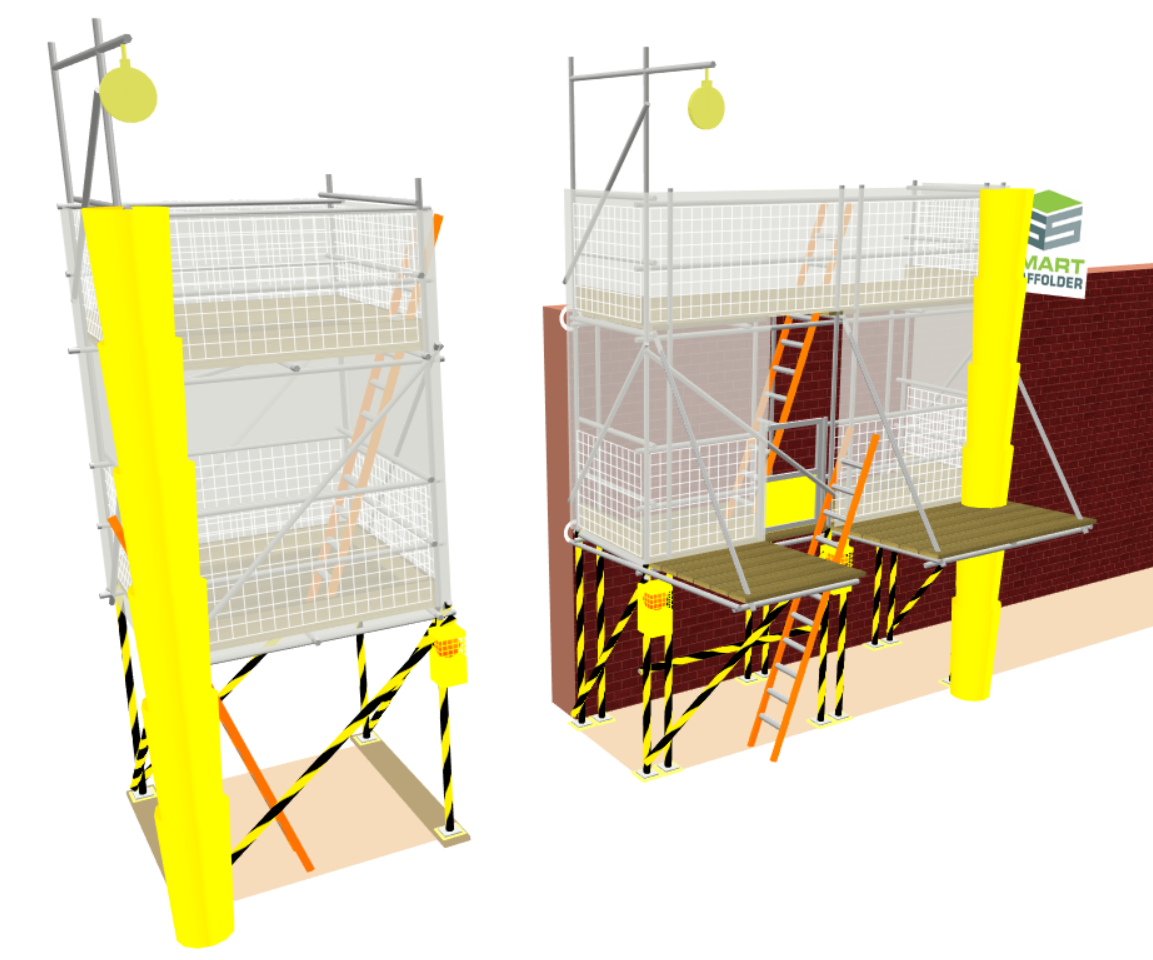
Using the Associated Tools in Model IT or Schedule IT, you can apply Ladders, Brickguards and Bridges to the scaffold. You can also apply Safety Standards, Rubbish Chutes, Safety Lamps, (Cladding) Sheeting and Debris Netting, Double Standards, and Banners to the Tied or Freestanding Tower.
-
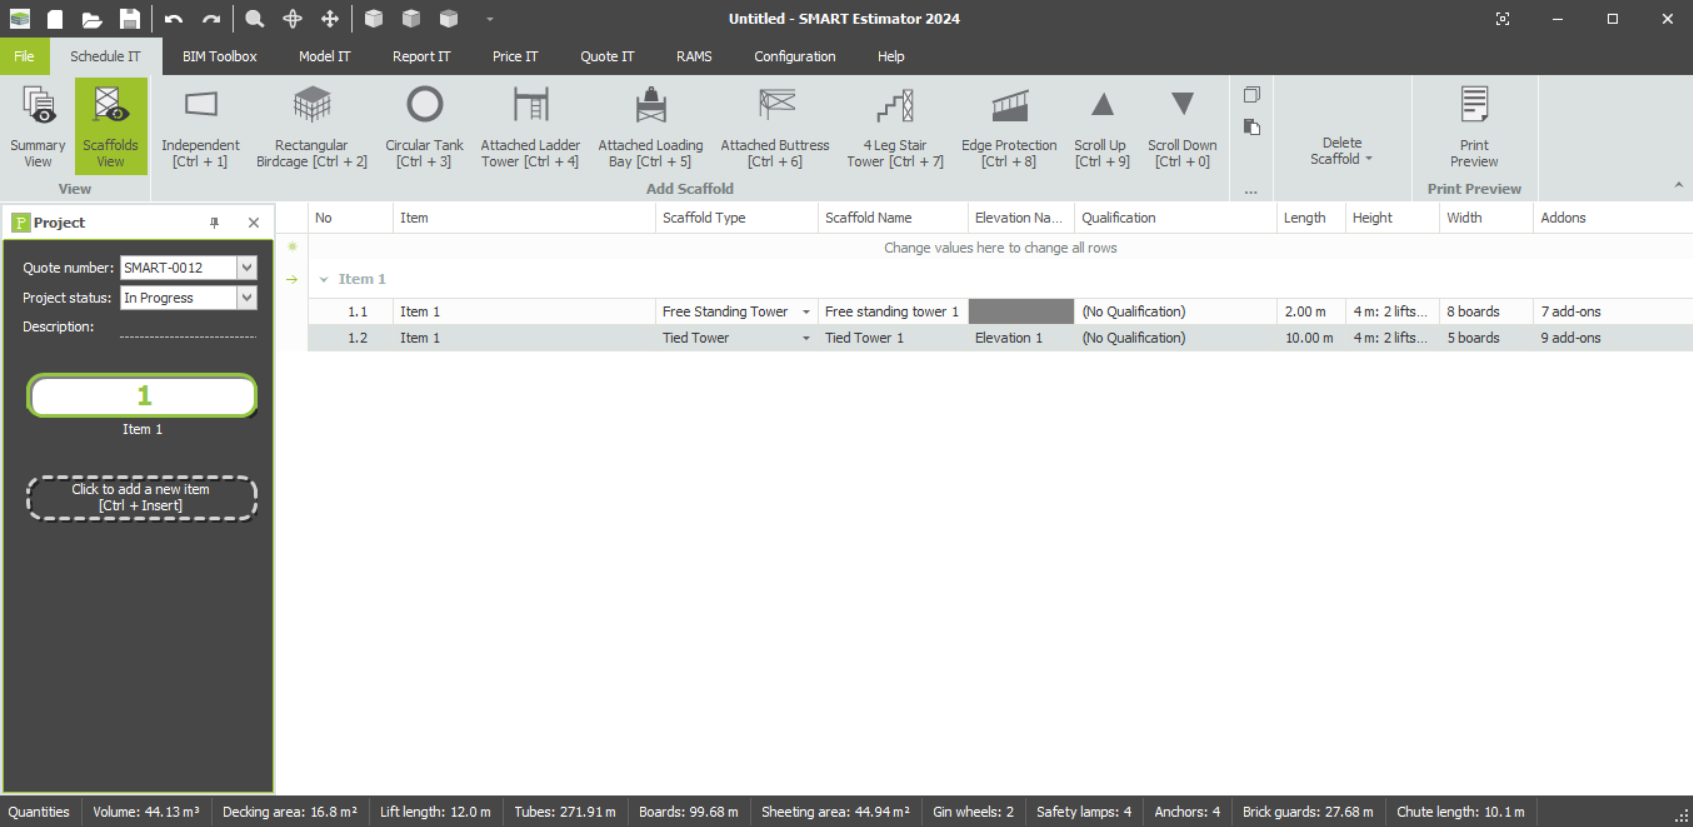
Schedule IT: Tied and Freestanding Towers
As an alternative, you may also adjust and modify the Freestanding and Tied Towers using the Schedule IT module. Click here for more information on how to use Schedule IT.
SMART Estimator
What’s new?
Getting Started
Setup and Configuration
-
Enterprise Server
-
Cloud Server Setup
Local Windows Server Setup
Adding Cloud server users
Server Back Up and Restore
Archiving Estimates from server
Migrating Local server to Cloud
Creating Folders in Enterprise Server
Using Server Tools from the Command Line
-
User software settings
User Address Settings and Yard
Scaffold Banner and Sheeting logo
Adding Watermarks
-
Setting up your Rates
Editing Shared Pricing Rates
Creating a rate setting template project
Importing and Exporting shared Rates
Creating an Estimate
Importing Drawings and Models
Scheduling Scaffolds
Creating 3D Scaffolds
-
3D Model Controls
Adding Independent scaffolds
Adding Circular Tank scaffolds
Adding Birdcage & Lift shaft scaffolds
Adding Tied or Freestanding towers
Adding Stair towers, Ladders towers & Buttresses
Adding Loading bays
Adding Chimney scaffolds
Adding Temporary Roof
Adding Edge protection
Adding Pavement Gantry’s
System Scaffolds
Safety Decking
Using the Scaffold Library
Editing Scaffolds
Scaffold Add-ons & Options
-
Adding Gin wheels, Rubbish Chutes, Safety standards, Double standards and Lamps
Adding and Editing bridges/beam work
Adding Beams around Corners
Adding Cladding
Adding Cantilever protection fans
Adding Pavement Lifts
Adding Recesses and Infills
Building and Ground colour
Visual options (Tube, Ladder, System details and Grips)
Add a Pedestrian or Scaffolder
Copying pictures of the model
Material Lists and Drawings
Pricing and Estimation
Quotations
Enterprise Server
Troubleshooting


