-
Overview of Pavement Gantries
When it comes to modelling a Pavement Gantry in SMART Estimator, due to the sophisticated nature of these structures, there is no ‘Click on it to create’ option. However, it is possible to construct the Pavement Gantry manually by assembling the Independent Scaffold and the Birdcage Scaffold together.
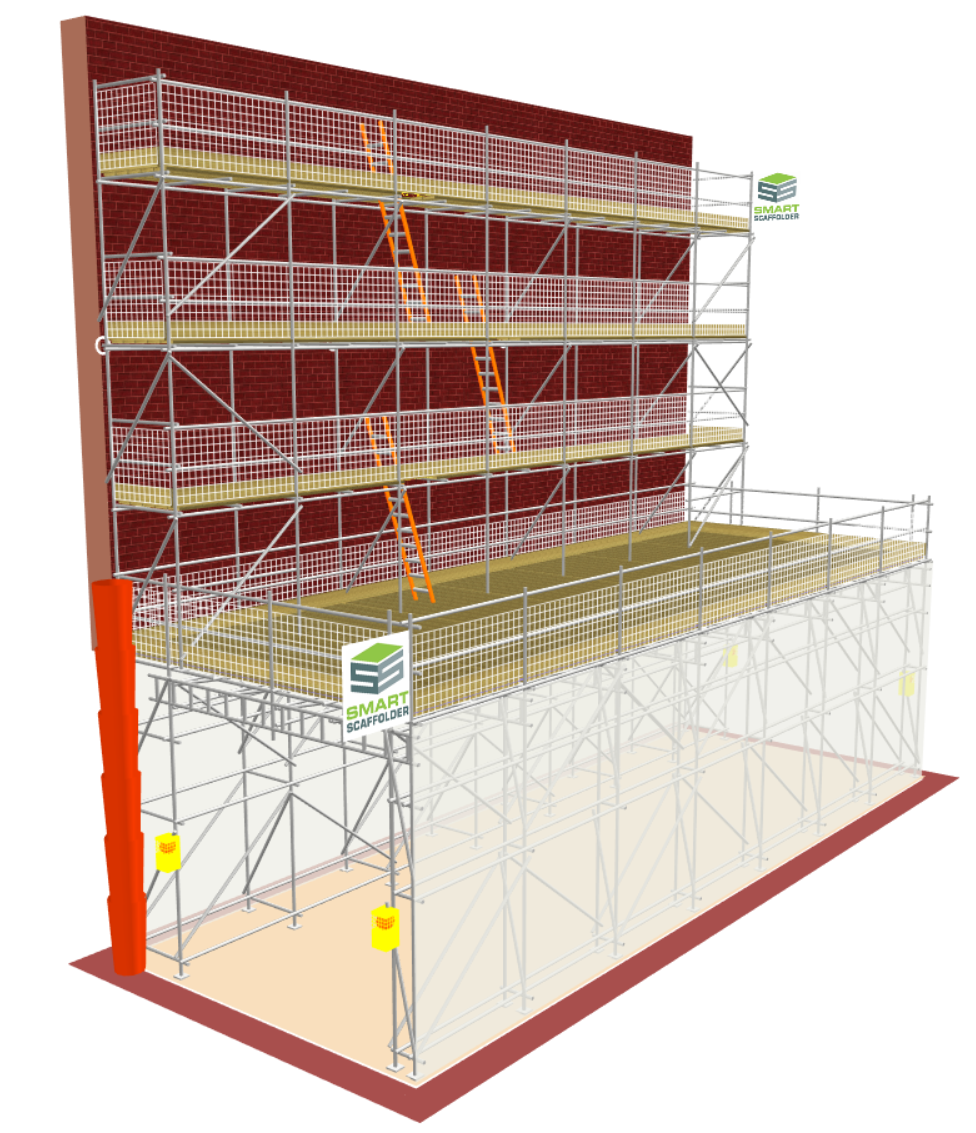
Saving to the Scaffold Library
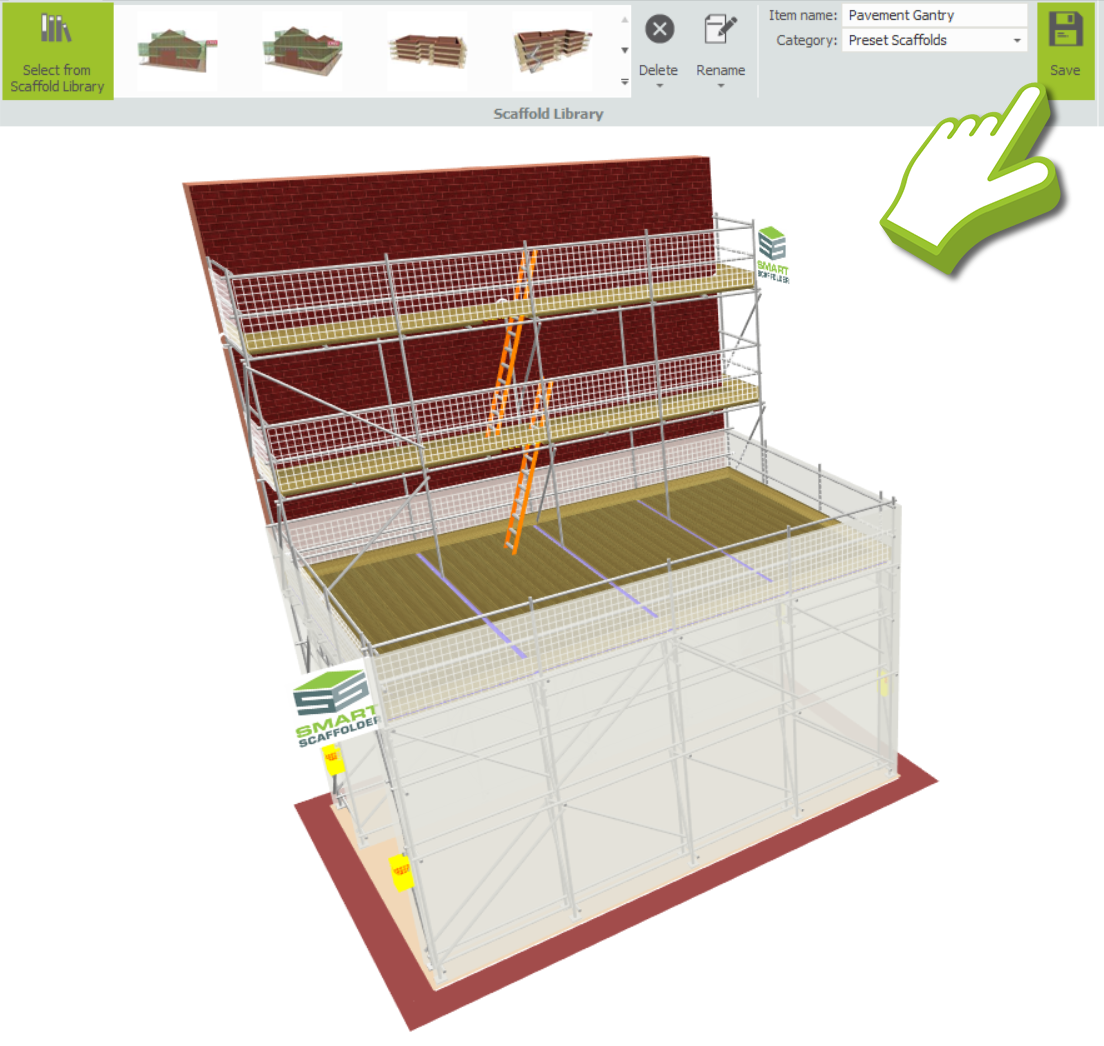
Once you’ve manually assembled the Pavement Gantry, you can save it as a reusable item in the Scaffold Library. You will be able to import this saved item easily when constructing Pavement Gantries in the future.
-
Creating the Birdcage Gantry Scaffold
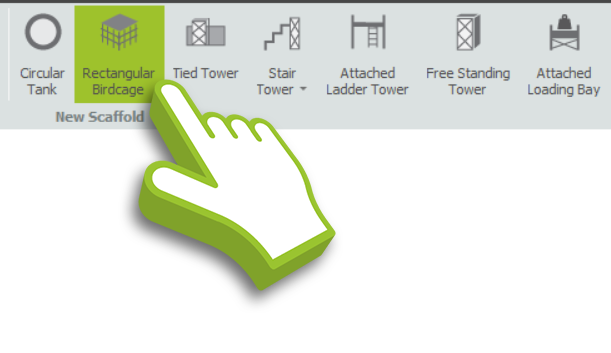
The first step is to create the Pavement Frame. In order to accomplish this, navigate to the Scaffold View and select the Rectangular Birdcage option to create a Birdcage. We will use the boarded lift of the birdcage as a protection deck.
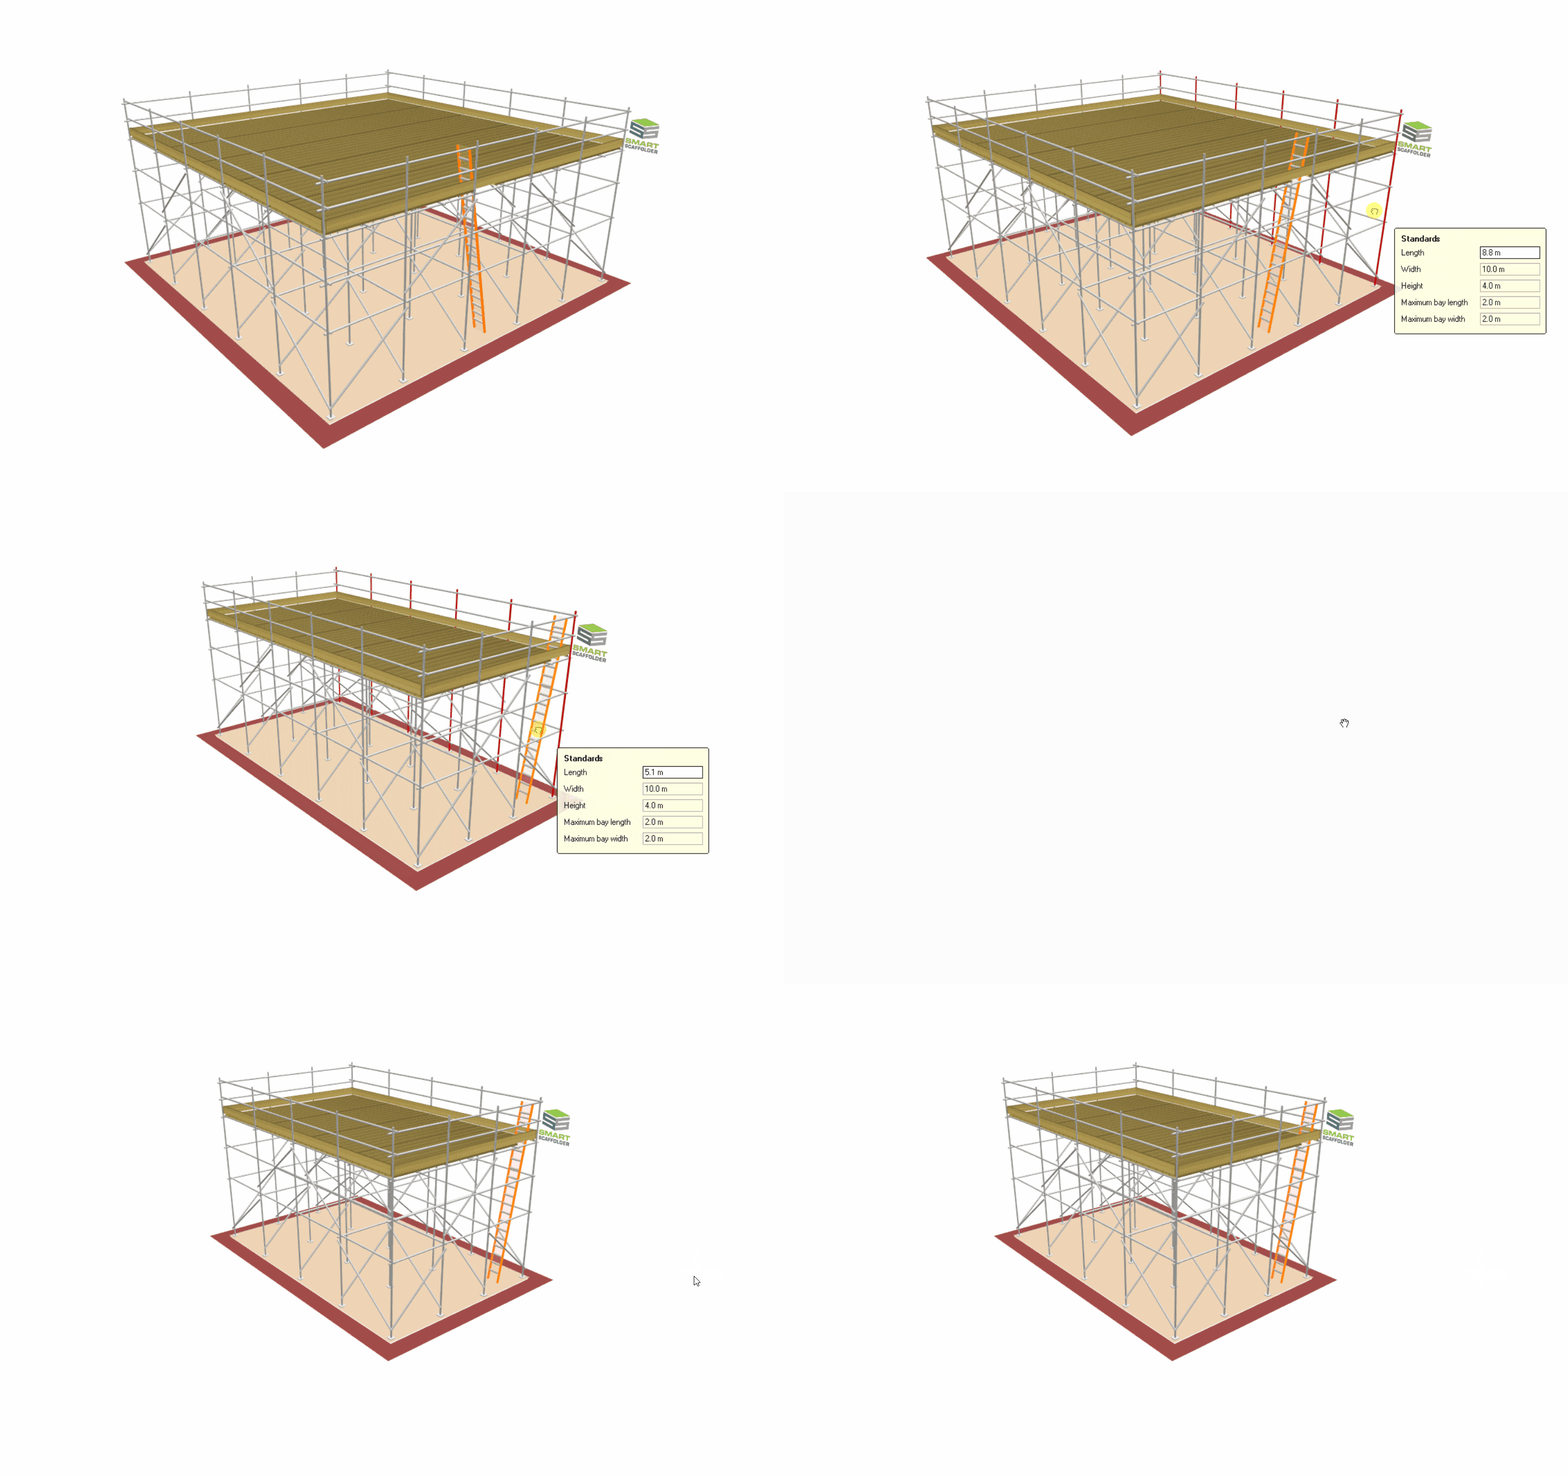
Once you have created a Birdcage, you will need to adjust its dimensions. To adjust the Birdcage dimensions, hover your mouse over the Birdcage standards. From here, you can click and drag the standards or set the Height, Width, and Length parameters in the Toolbox Dialog.
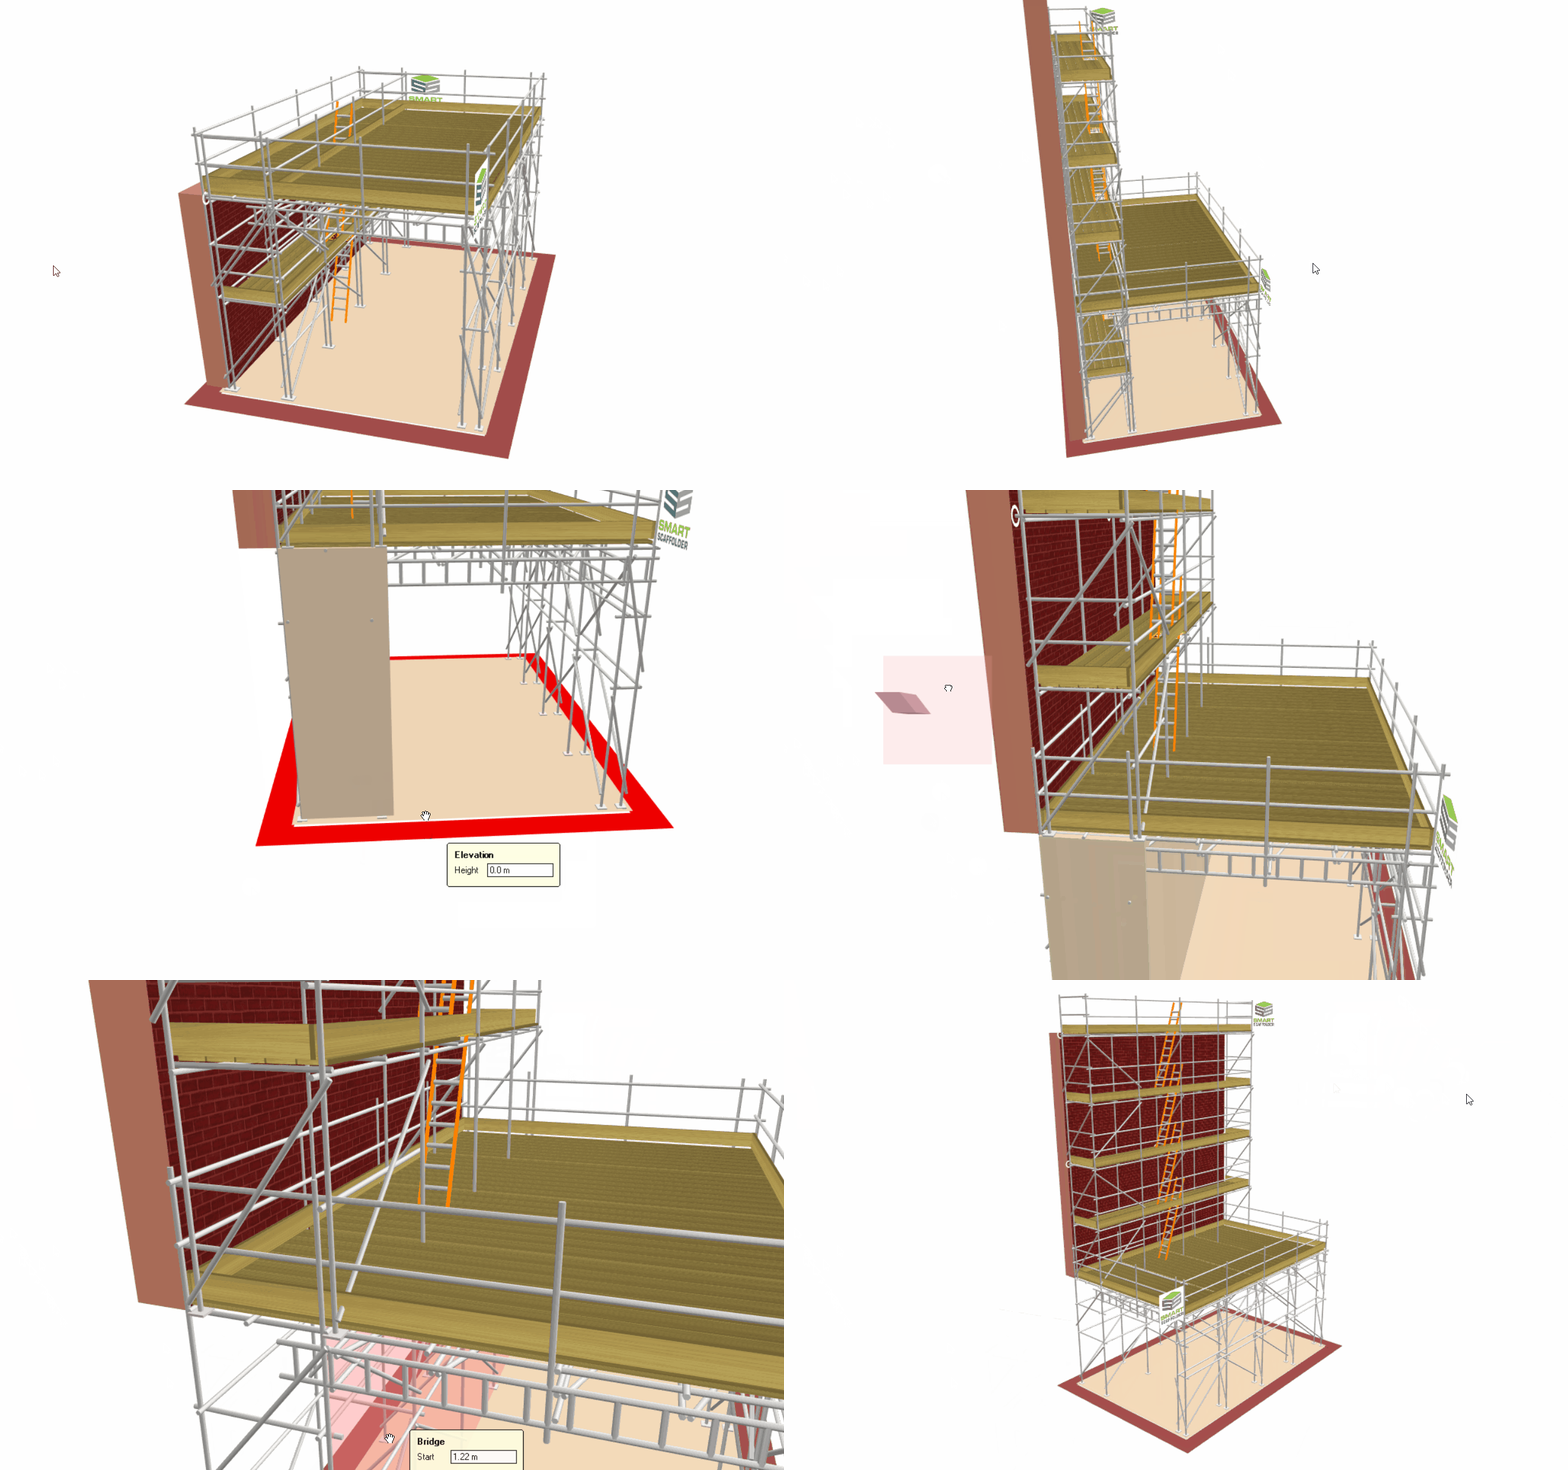
As soon as the Birdcage has been designed with the appropriate dimensions, we need to create the Gantry so that pedestrians can safely access through the scaffold. Navigate over to the Bridge Tool and apply the Bridge onto the top unboarded lift of the Birdcage scaffold. Once it’s applied, the bridge can be adjusted accordingly.
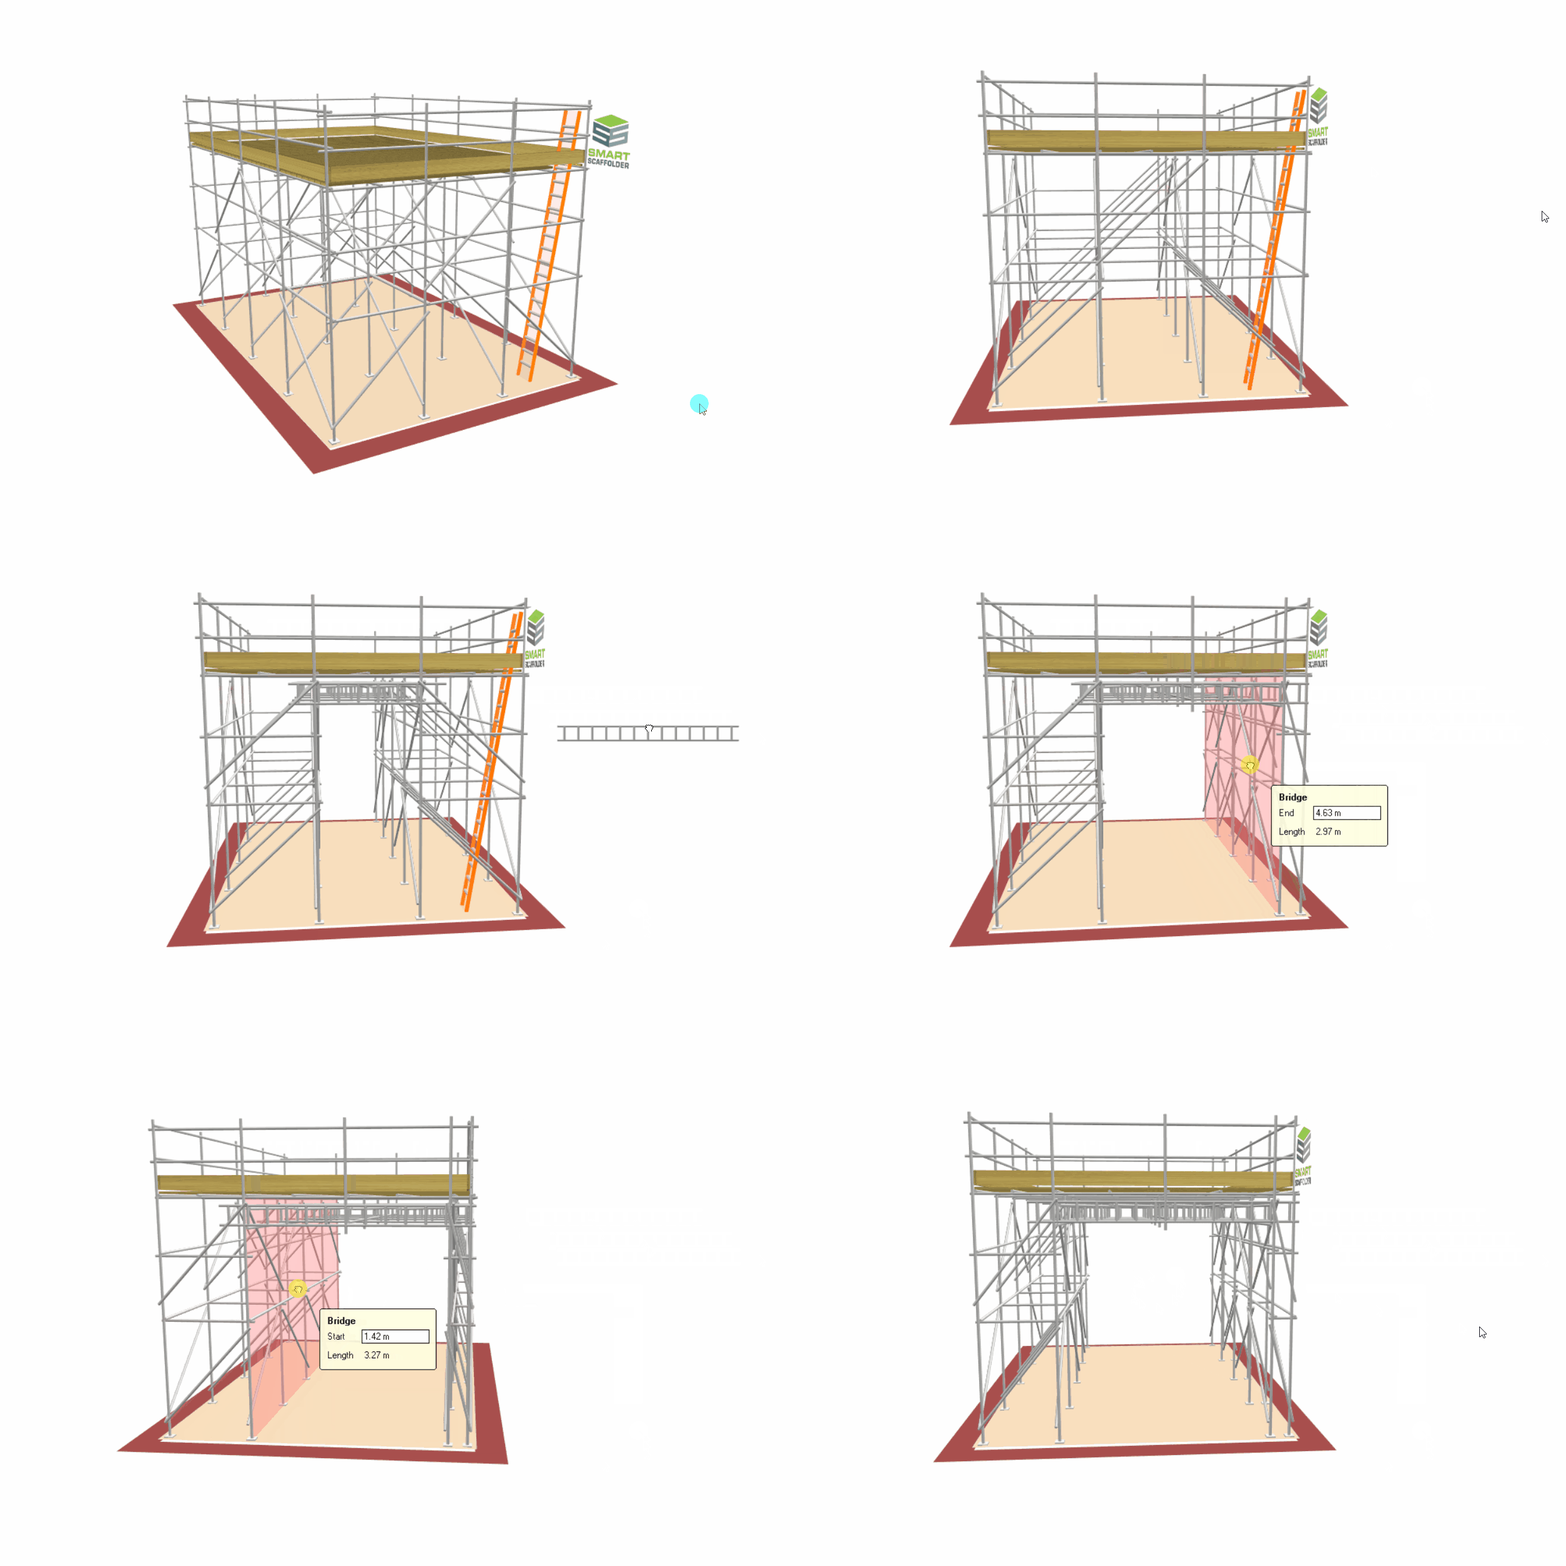
-
Creating the Working Independent Scaffold
The second step is to construct the Working Independent Scaffold. We recommend using the Draw Plan tool and drawing an overlay along the edge of the birdcage so that the scaffold intentionally overlaps. As an alternative, you can manually create an Independent Scaffold and move it by dragging and rotating it into position.
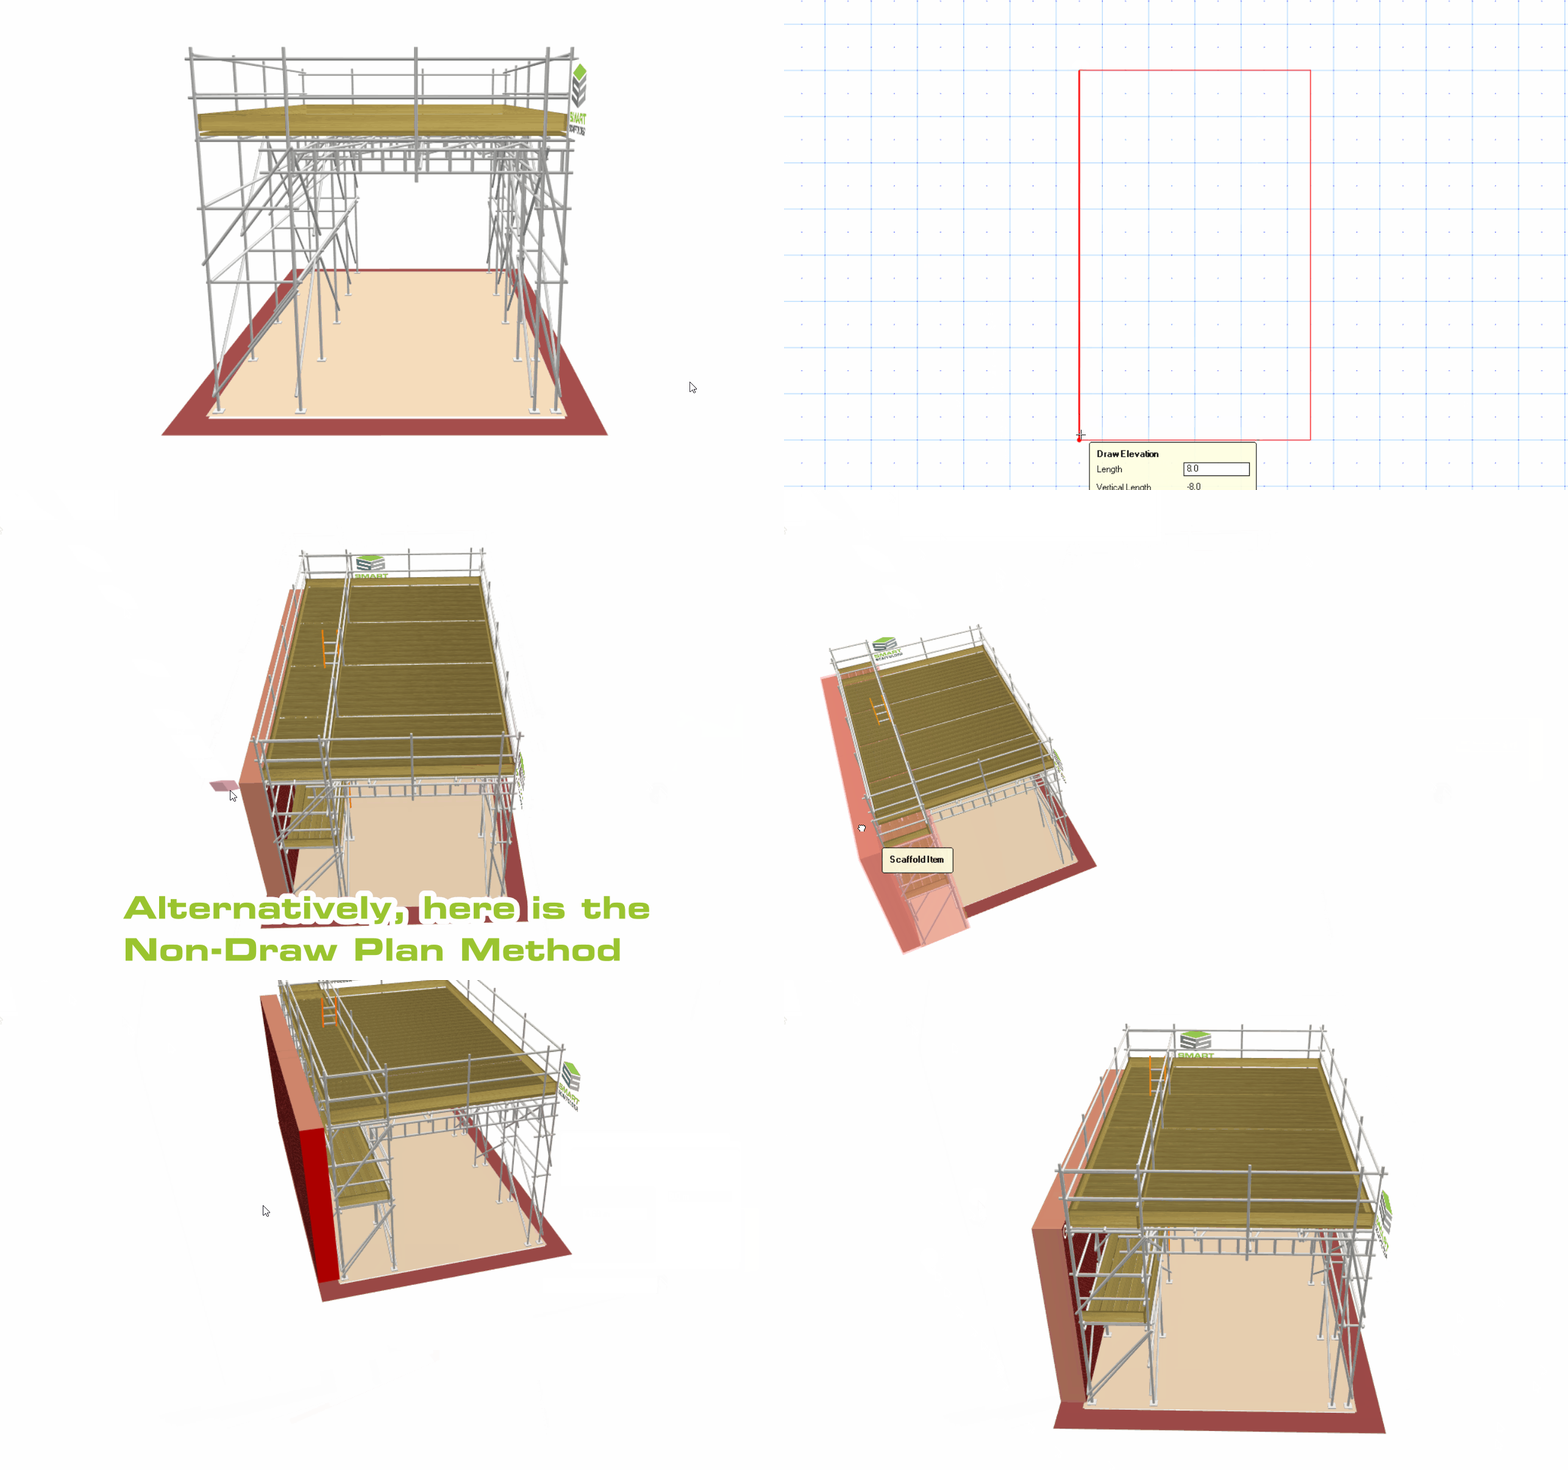
The next step is to drag or set the Lift Height to the height at which you would like the Pavement Gantry to be, followed by dragging or setting the Ground Height to match the boarded lift of the Birdcage. All that remains is to ensure that the Standards from the Birdcage and Independent Scaffold are aligned and to apply a Transparent Ground Condition to the scaffold.
-
Finalising the Pavement Gantry
Once you have tweaked, aligned and applied the Add-Ons necessary to the Birdcage Gantry Scaffold and the Working Independent Scaffold, you have now completed making a Pavement Gantry. You can save your design to the Scaffold Library, so that it can be reused for any future pavement gantry projects.
SMART Estimator
What’s new?
Getting Started
Setup and Configuration
-
Enterprise Server
-
Cloud Server Setup
Local Windows Server Setup
Adding Cloud server users
Server Back Up and Restore
Archiving Estimates from server
Migrating Local server to Cloud
Creating Folders in Enterprise Server
Using Server Tools from the Command Line
-
User software settings
User Address Settings and Yard
Scaffold Banner and Sheeting logo
Adding Watermarks
-
Setting up your Rates
Editing Shared Pricing Rates
Creating a rate setting template project
Importing and Exporting shared Rates
Creating an Estimate
Importing Drawings and Models
Scheduling Scaffolds
Creating 3D Scaffolds
-
3D Model Controls
Adding Independent scaffolds
Adding Circular Tank scaffolds
Adding Birdcage & Lift shaft scaffolds
Adding Tied or Freestanding towers
Adding Stair towers, Ladders towers & Buttresses
Adding Loading bays
Adding Chimney scaffolds
Adding Temporary Roof
Adding Edge protection
Adding Pavement Gantry’s
System Scaffolds
Safety Decking
Using the Scaffold Library
Editing Scaffolds
Scaffold Add-ons & Options
-
Adding Gin wheels, Rubbish Chutes, Safety standards, Double standards and Lamps
Adding and Editing bridges/beam work
Adding Beams around Corners
Adding Cladding
Adding Cantilever protection fans
Adding Pavement Lifts
Adding Recesses and Infills
Building and Ground colour
Visual options (Tube, Ladder, System details and Grips)
Add a Pedestrian or Scaffolder
Copying pictures of the model
Material Lists and Drawings
Pricing and Estimation
Quotations
Enterprise Server
Troubleshooting


