-
Overview of Report IT
In SMART Estimator Report IT, materials lists can be generated based on your scaffold models and material configurations, as well as modified further with extra material and customisations. Furthermore, professional drawings can be produced using your scaffold models and exported to AutoCAD.
-
Navigating the Material List
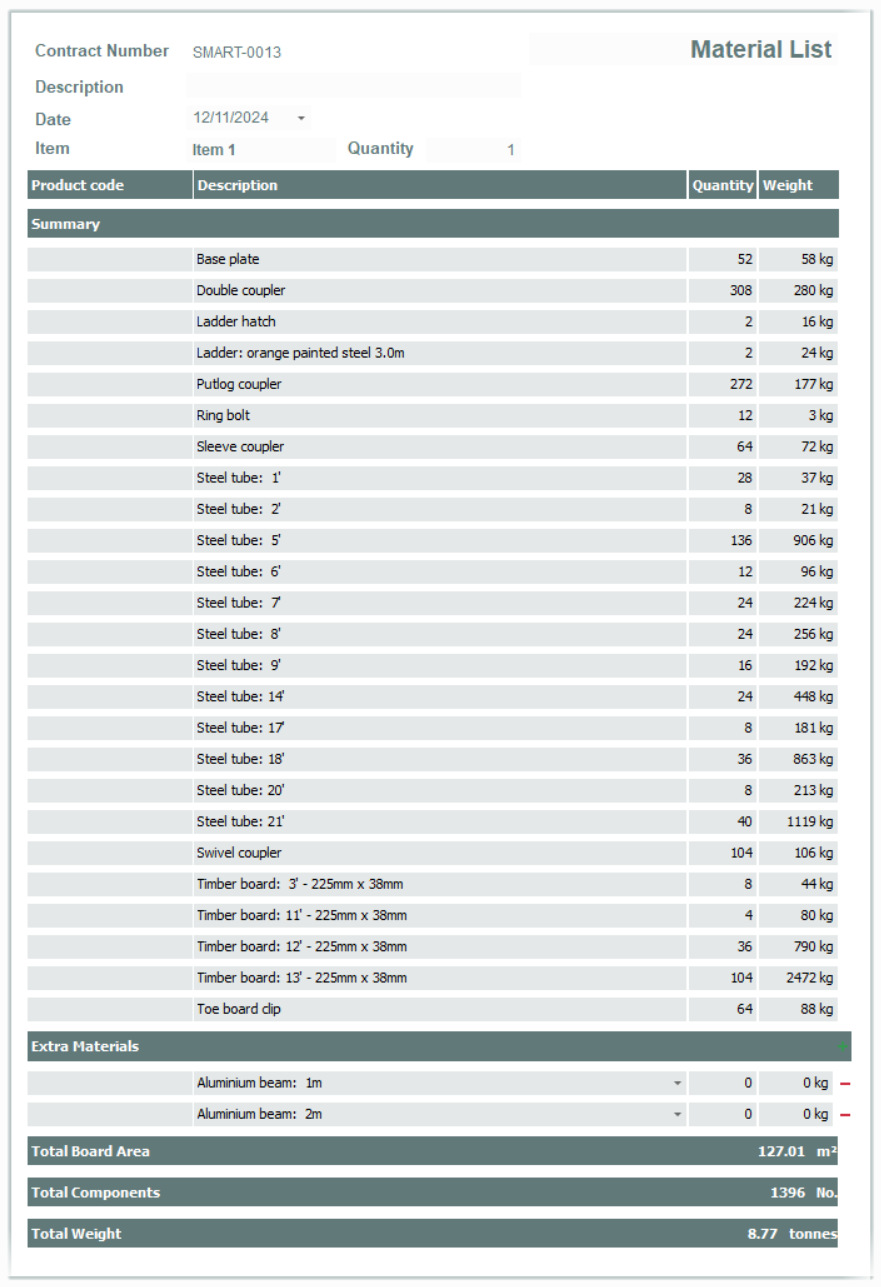
When the Report IT tab is selected, the Material List is usually shown immediately. There are four sections in the Material List, the Header Section, the Summary Section, the Extra Materials Section and finally the Total Value Section. If you can see the Drawings instead, change to the Material List by pressing the Material List button.
Header Section
In the Header Section of the report, you will see details about the selected item. These details include the Contract Number, Item Name and Contract Description as shown in the Project Browser. As well as the Date, Quantity and Title of the document. You can edit any of these details in the header section by clicking on them and typing in the desired value.
Summary Section
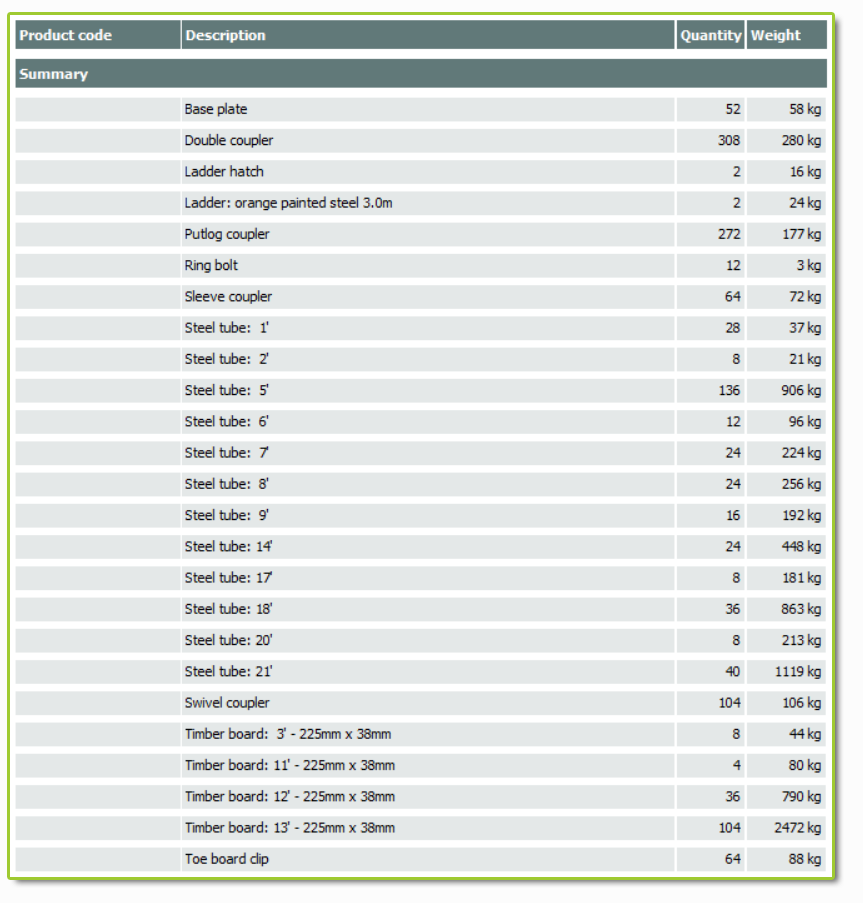
The Summary section displays the calculated Material Lists made automatically by SMART Estimator. Modifications can be made to this section. However, keep in mind that any changes you make within Model IT or Schedule IT will override any changes you make in the Summary Section.
You can find the Main Kit List here
Whenever an active project item contains scaffolds, you will see that the Summary section of the report is already filled in with the components that make up its Kit List.
Extra Materials Section
The Extra Materials section is empty by default. This section shows all of the materials that you have manually entered into the Material List, click here to learn how to add extra materials and components.
Extra Materials are unaffected
Any changes made to an item through Schedule IT or Model IT will not affect this section. As such, you should use this section for materials that will always be required, regardless of the scaffolding details.
Total Value Section
Last, but not least, the Total Value section is where you can see the summed up value of the Material List, such as the Tonnage, Total Components, and Board Area of the scaffold.
-
Selecting the Kit List
Selecting the Item
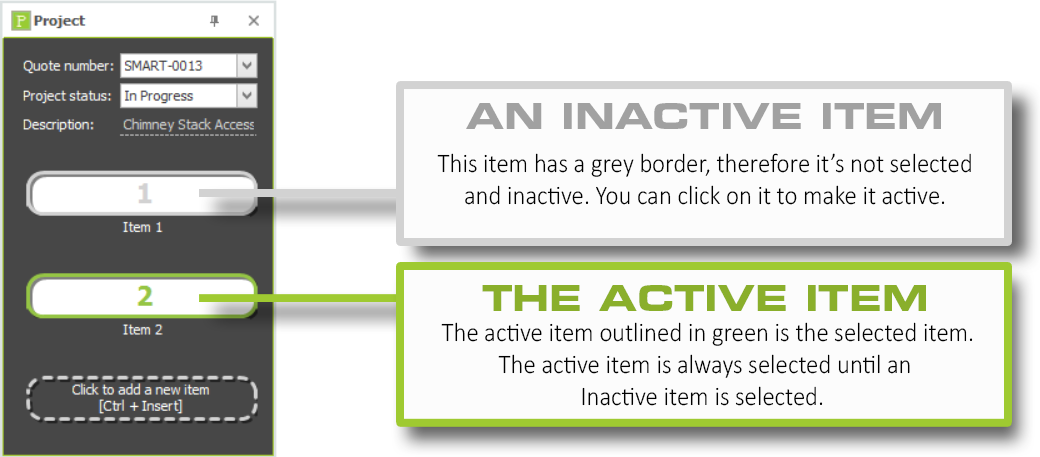
Material Lists are created for each item in the scaffold project. You can navigate between all of your Materials lists by clicking on the inactive items in the Project Browser. By default, the first item in the Project Browser will be selected.
Selecting the Section
Make sure scaffolding is included in the project item
Whenever scaffolding is included in a project item, the Summary Section will display a Material List of that scaffold, and this menu will also appear on the Report IT Toolbar.
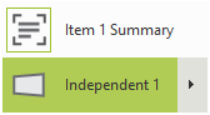
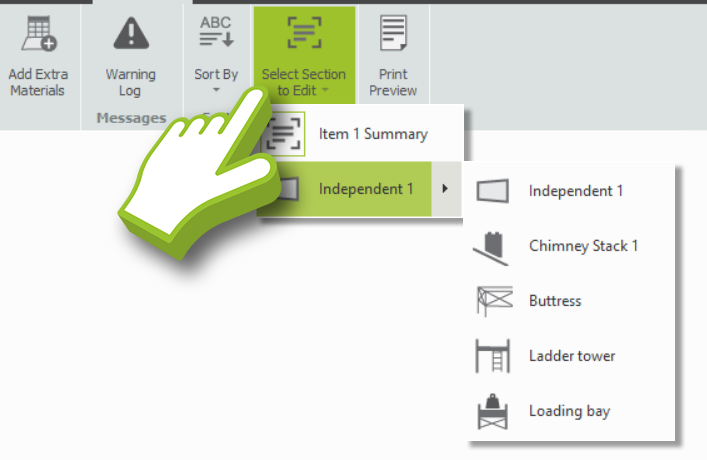
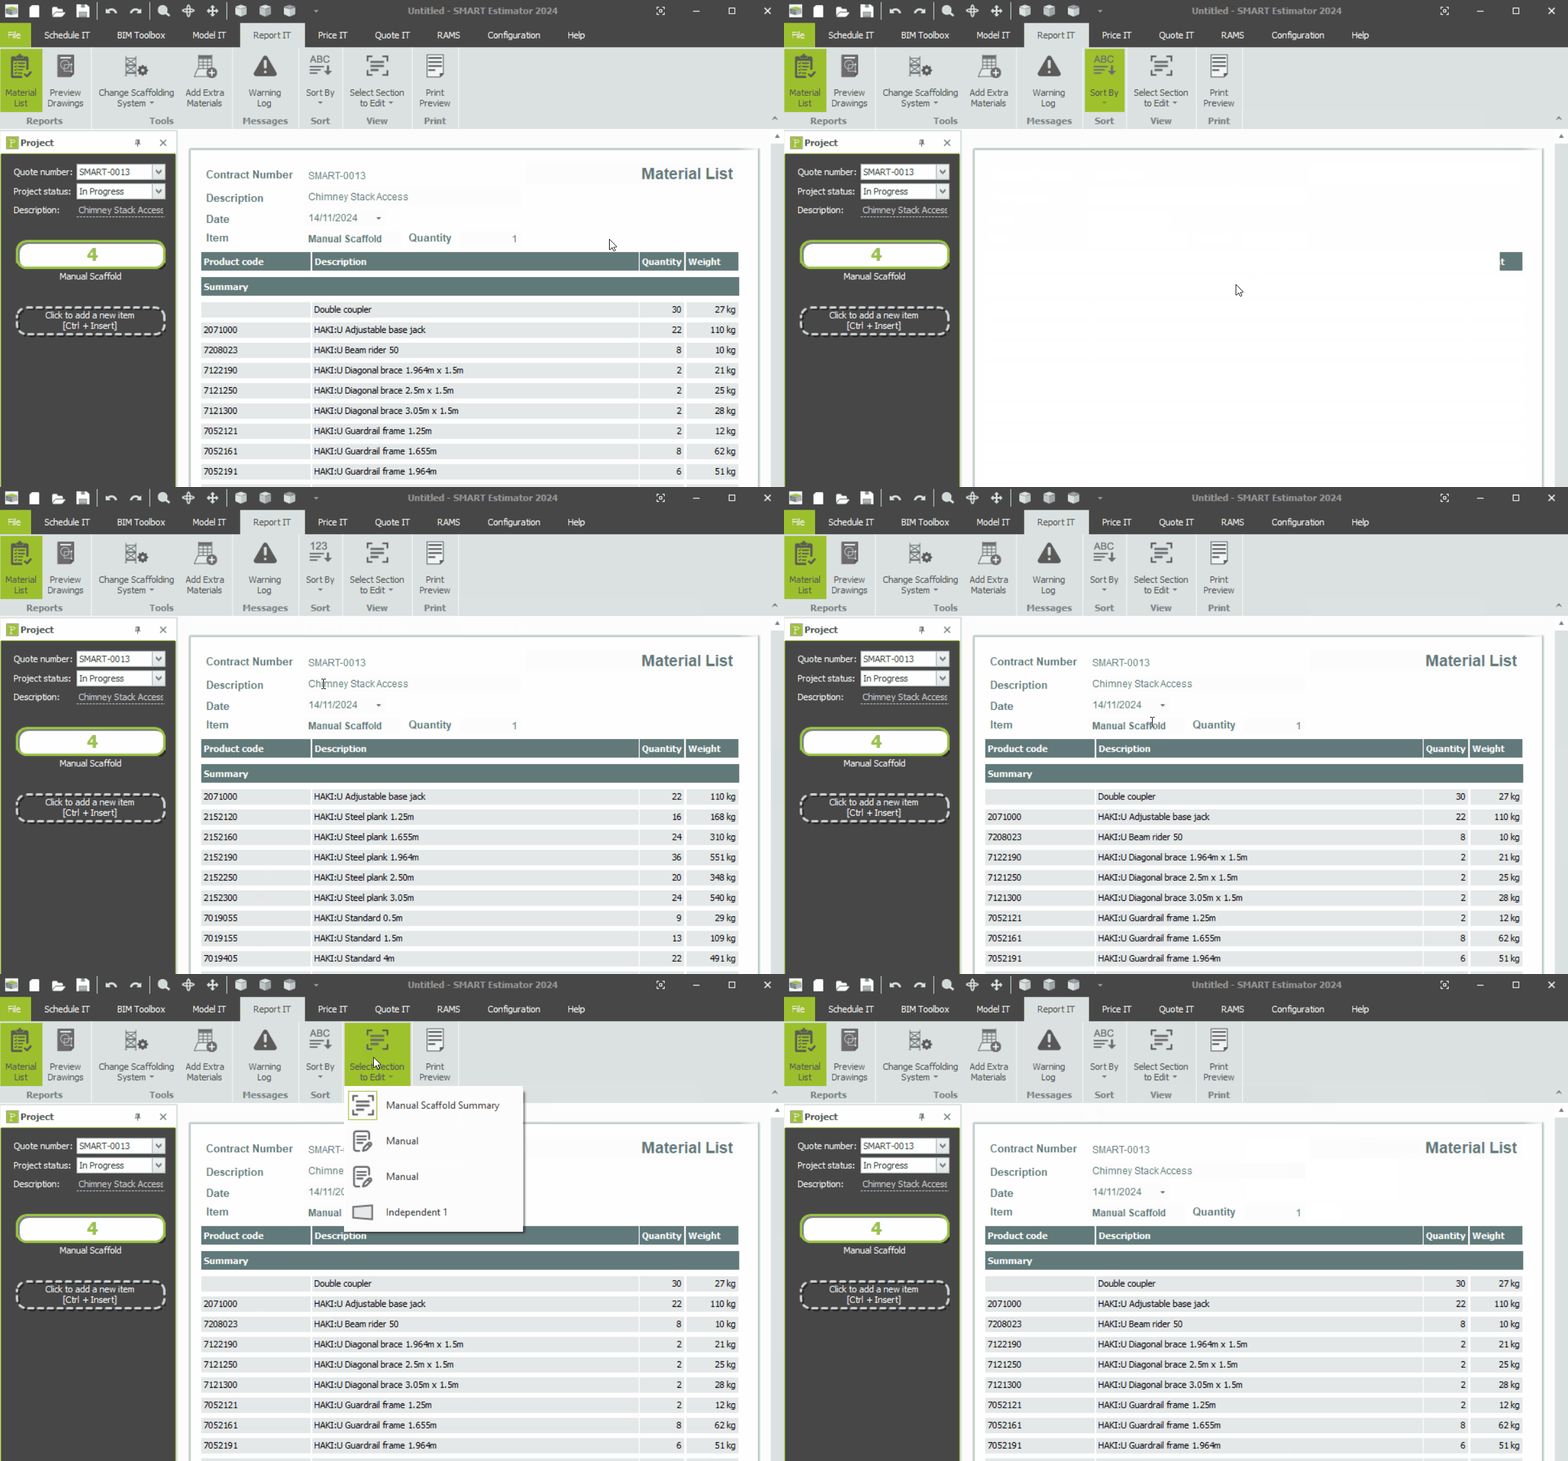
When you select the Select Section to Edit menu, you will see which Material List you are currently editing based on the green box surrounding the icon. The item summary is displayed by default, showing all the components required to erect all of the scaffolds in the selected item.
Now if you want to isolate the Material List so that it only shows the materials required to erect one of the scaffolds, simply select it from the dropdown menu. A submenu is also available where you can select the Material List for Attached Scaffolds, such as Loading Bays, Chimney Stacks and Stair Towers.
Summary Sections are automatically updated
If you make changes to the Material List for a scaffold, the summary list for that project item will be updated automatically.
-
Amending the Kit List
When Amending the Kit List, you can usually change the materials required for each individual item or scaffold in your project. While it’s only possible to edit one Material List at a time, it is possible to print multiple Material Lists at the same time.
Switching the Scaffold System
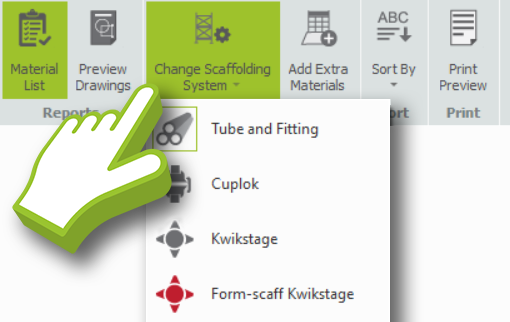
When you click on the Change Scaffolding System button on the Report IT Toolbar, a dropdown menu will display all the scaffolding systems you have in your SMART Estimator. From here select one of the available scaffolding systems to change the system.
Changing the Quantity
You can modify the number of components used in a Material List by changing the Quantity column value. Upon updating the quantity, you will see that the weight updates immediately and the text in that box changes colour.
The new colour shows you that this is not the calculated value and has been entered manually. You can reset any manually entered value, returning them to their calculated value. Simply hover your mouse over that box and click on the “exclamation mark” button.
Changing the Details of a Component
In the same way that you can change the quantity, you can change the Name, Product Code, and Weight shown for a component. Simply overwrite the new value or figure into the Name, Product Code or Weight of a component and the text in that box will change colour.
If you have changed the Product Code or the Description of the component, you can save the changes to your Material Configuration. You can do this by hovering your mouse over the text you just modified and pressing the “M” button that appears.
Add Extra Components
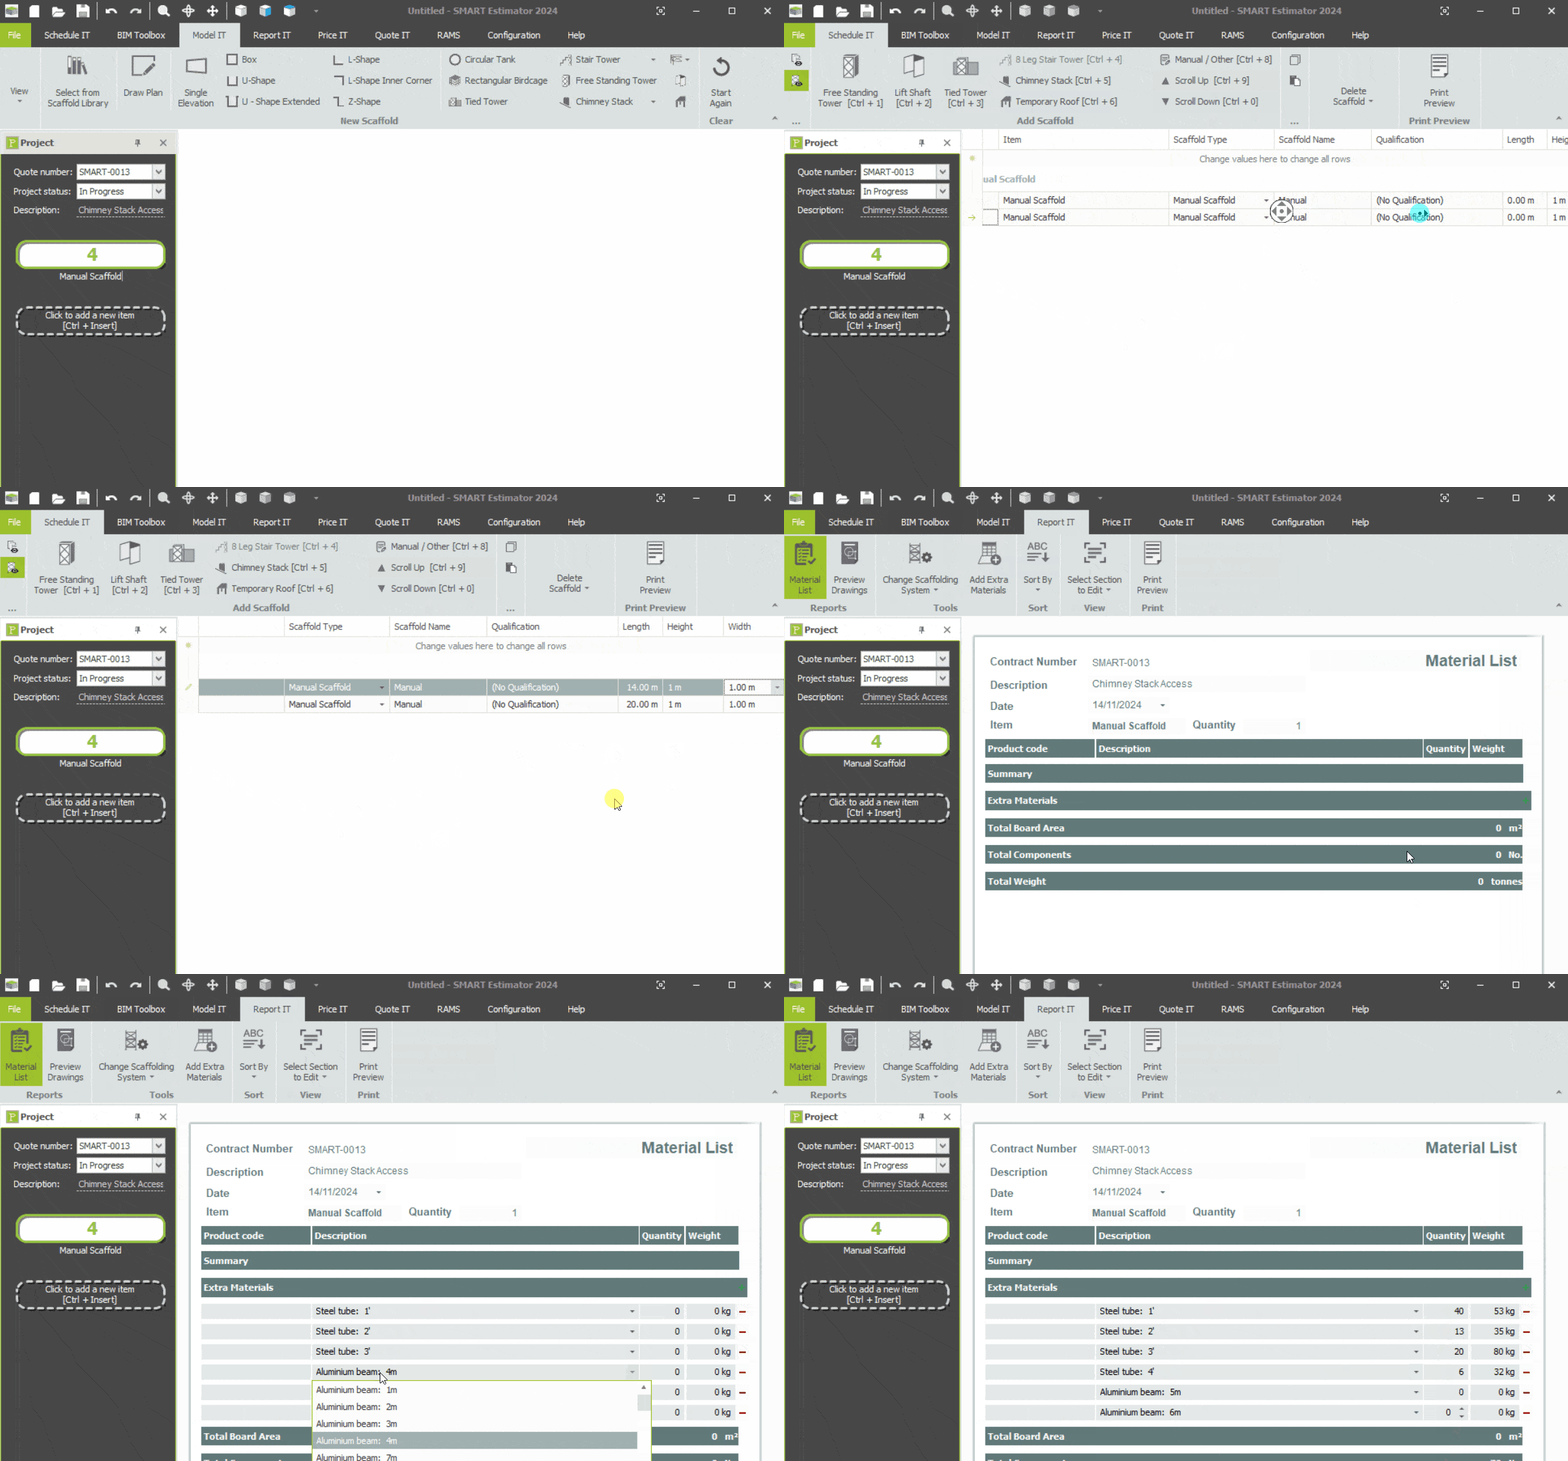
If you wish to add extra components (such as additional beams) to your Material List, click on the Add Extra Material Button on the Report IT Toolbar. A default component with no Quantity and Weight will be added to the Extra Materials section.
Modifying the Extra Components
Following that, you can select the component to adjust its type, as well as typing in its quantity and weight. As a result, SMART Estimator will account for the additional tonnage and adjust the material hire cost accordingly.
Removing an Extra Component
On the right-hand side of the component, there is a red minus button. Click this button to remove the extra component.
Material Lists for Manual Scaffolds
Empty project items and manual scaffolds created in Schedule IT do not have any calculated materials. For such lists, the Summary section will be empty. You can add the required materials to the Material List by adding them to the Extra Materials section.
Manual Scaffolds create their own Section
If you wish to modify the Kit List for the Manual Scaffold, you can use the Select Section to Edit button, once the changes have been made, the changes will be reflected on the Summary Section.
-
Filtering the Material List
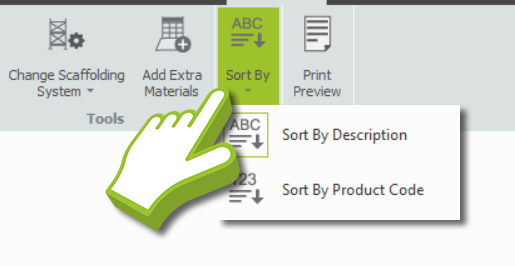
A Sort By button is available in the Report IT Toolbar. When you click on it, two options will appear. You can sort the Material List by selecting an option from the dropdown menu.
Using the first option, you can sort the list alphabetically according to their descriptions. Using the second option, you can sort the list numerically according to their product codes.


