-
Overview of Temporary Roofs
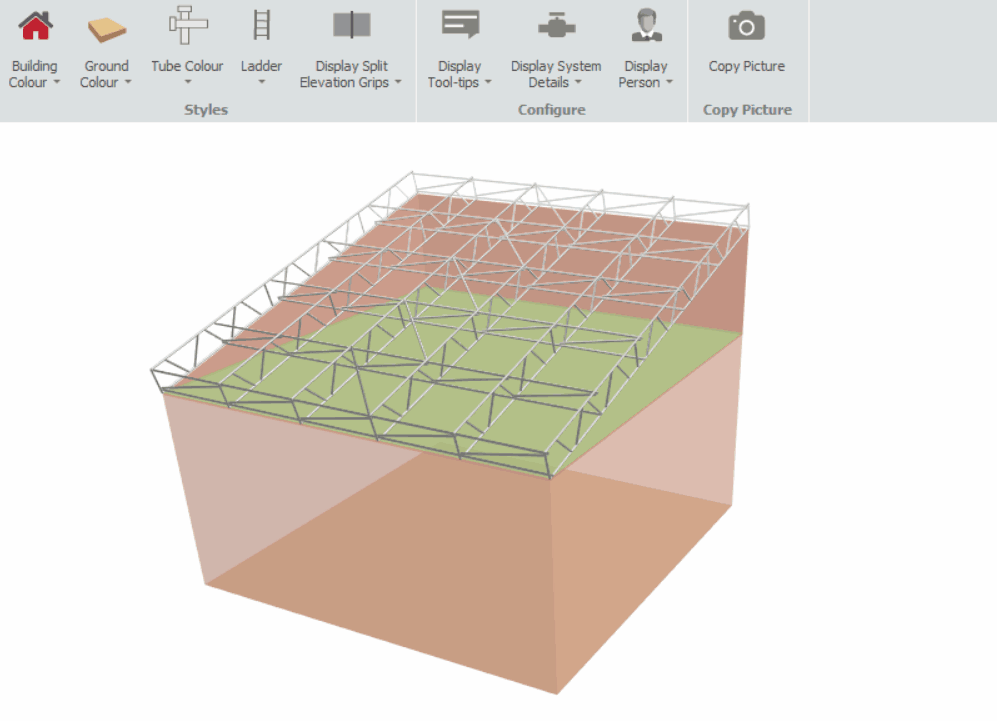
A temporary roof is a covered structure that utilises prefabricated metal beams that join together, creating a suitable supporting structure. Afterwards, it is affixed with either rigid corrugated sheets or plastic sheeting to protect the area inside from the elements.
Temporary Roof Compliance
It is important to note that temporary roofs have only been provided in SMART Estimator for estimation purposes only. These temporary roofs should not be used for the design of the actual scaffold. As a result, temporary roofs will not generate a drawing or design in Report IT.
-
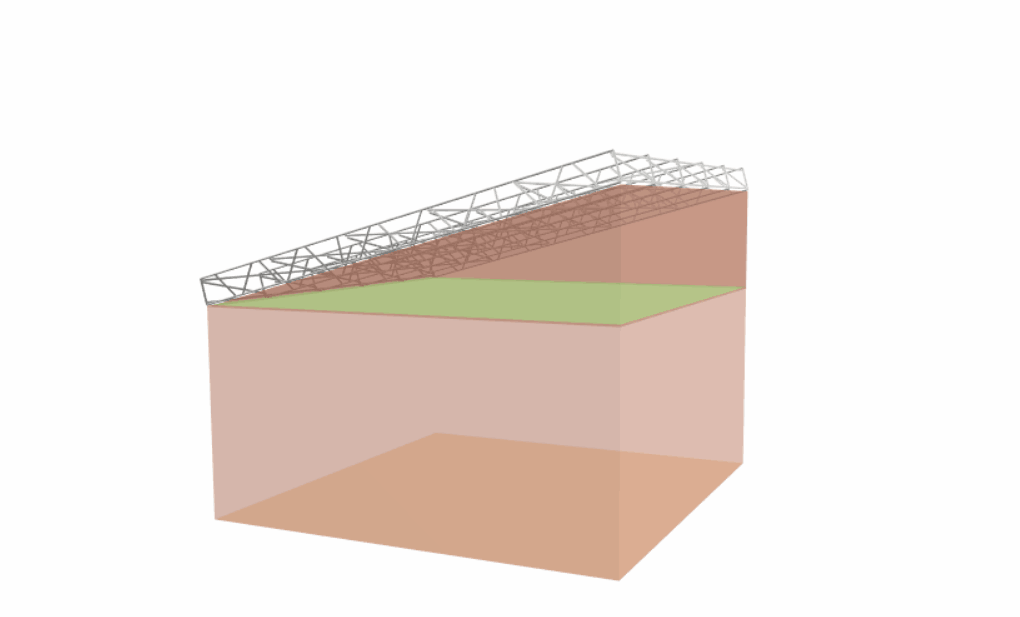
Adding a Temporary Roof in Model IT
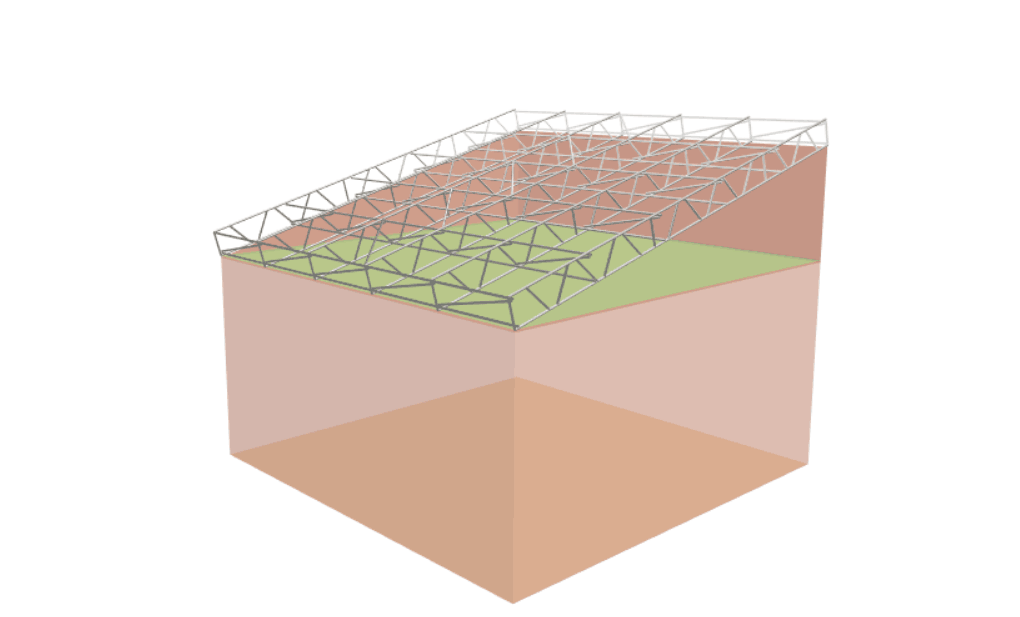
When using Model IT, a temporary roof can be created by selecting the Temporary Roof option on the Scaffolds view. As default, this will create a mono-pitched roof that is 10 metres wide by 10 metres long with a base height of 5 metres and a pitch of 15 degrees.
Schedule IT: Temporary Roof
You are also able to make a temporary roof in Schedule IT by clicking on the Temporary Roof option located in the Scaffolds View.
For more detailed instructions, please refer to the Schedule IT: User Guide.
-
Adjusting the Temporary Roof’s Dimensions
Roof Length
If you wish to modify the roof length, locate the roof length grip which is located on the front and back side of the temporary roof structure. Here, you can either drag and drop to adjust the length or manually input the desired length measurement in the designated field.
Roof Width
In order to modify the roof width, locate the roof width grips that are located on the left and right sides of the temporary roof structure. From here, you can manually enter the desired width measurement in the specified field or drag and drop to adjust the width.
Base Height
Whenever the mouse is hovered underneath the temporary roof scaffold, the grip at the base height becomes highlighted in red. The temporary roof can be raised or lowered by clicking and dragging or by setting the Base Height Grip through the Toolbox Dialog.
Pitch
You can adjust the angle of the temporary roof by hovering your mouse over the edge of the temporary roof as illustrated below, then dragging it up or down to adjust the angle or by manually setting the angle using the Toolbox Dialog box.
-
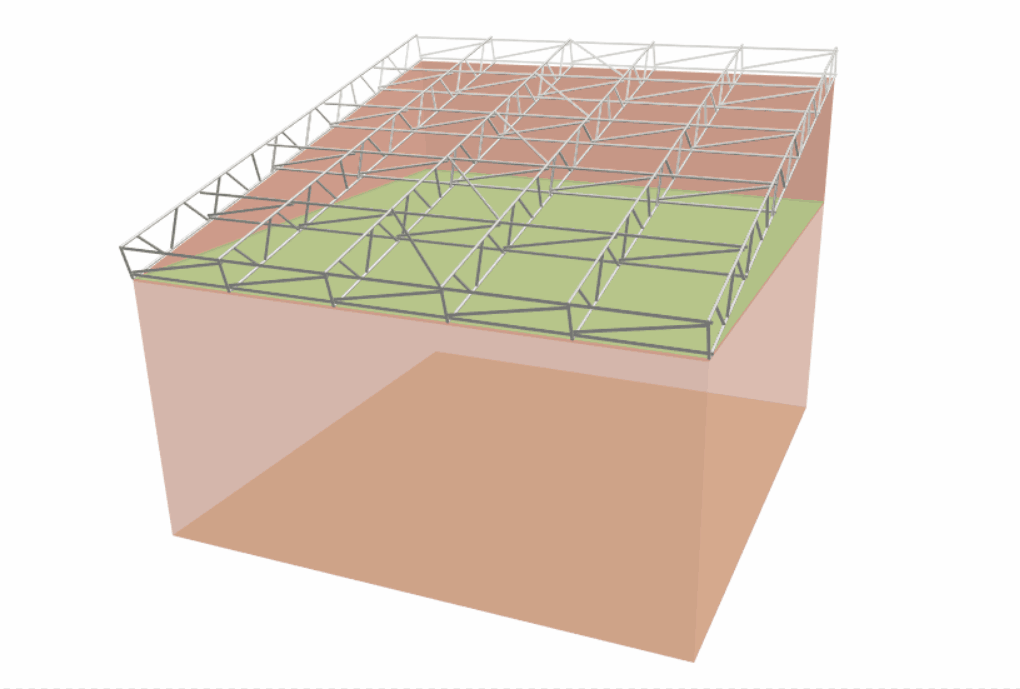
Applying the Roof Covering
Once you have adjusted the temporary roof, you are ready to apply a Roof Covering. Hover your mouse over the temporary roof, and a red highlight will appear.
Then, using the 🠄 and 🠆 Arrow Keys, you can then select either corrugated sheets or plastic sheeting from within the Toolbox Dialog box and press Enter to confirm your choice.
-
Beam Spacing and Beam Length
Maximum Beam Spacing
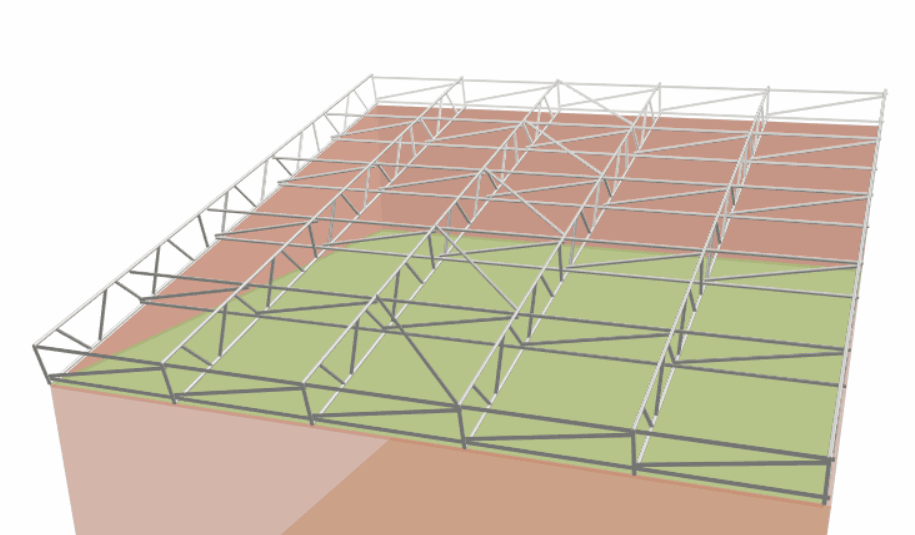
To adjust the beam spacing between each beam, hover your mouse over a beam of the temporary roof and press Tab until you reach Maximum beam spacing. After that, you should set your beam spacing appropriately. Additional beams will be added to span the entire length of the temporary roof depending on the maximum beam spacing.

Maximum Span Length
If you wish to adjust the distance between the support beams of the temporary roof, locate one of the span beams on the roof. Then hover your mouse over the span beam till it’s highlighted with a Toolbox Dialog. Last but not least, press Tab until you reach the Maximum span length and set it accordingly.
Plan Bracing Frequency
To adjust the frequency of the plan bracing for the temporary roof, hover your mouse over a plan bracing beam or where the roof covering will be placed till it’s highlighted with a Toolbox Dialog. Next, press Tab until you reach the Plan bracing frequency and adjust it accordingly.

-
Hiding the Ground Conditions and Controllers
Applying the Building Colour with the Transparent setting to the temporary roof hides the controllers from view. Furthermore, the Ground Colour can be applied to conceal the ground conditions. Allowing you to take a clean screenshot of the Temporary Roof, making the structure appear seamless and professional.
-
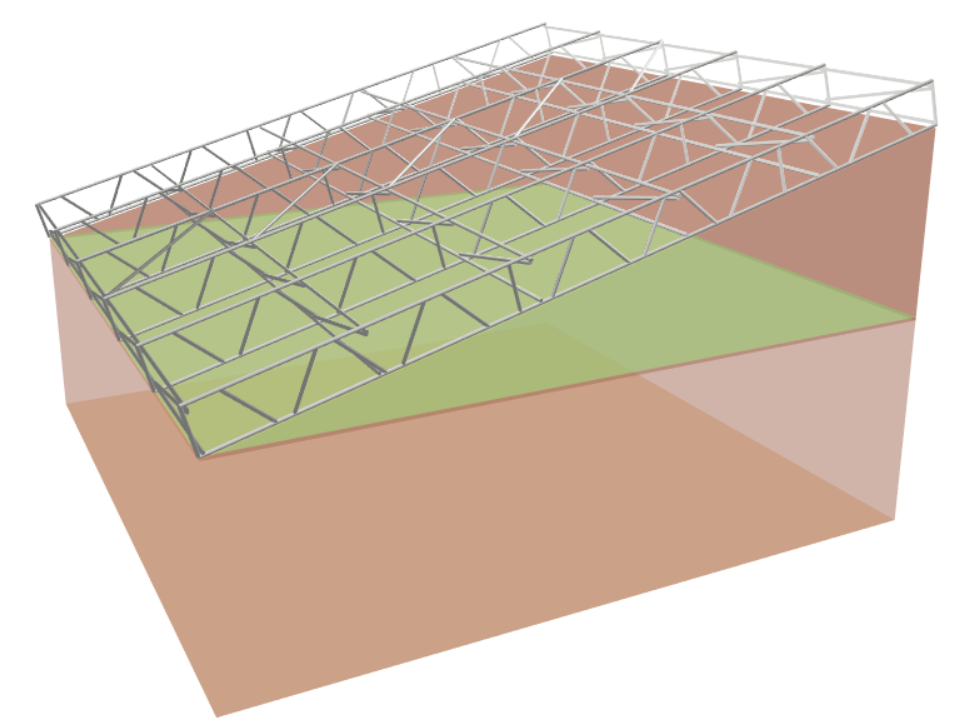
Complex Temporary Roof Designs
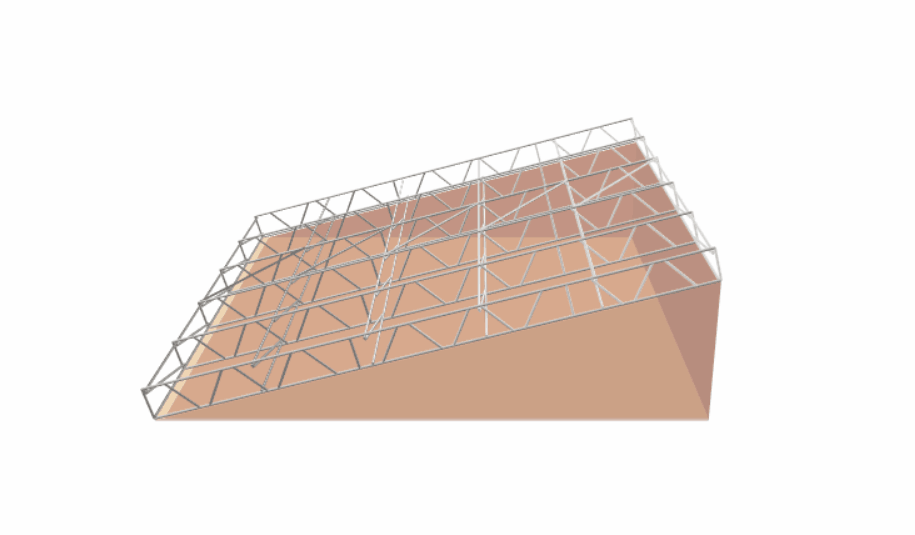
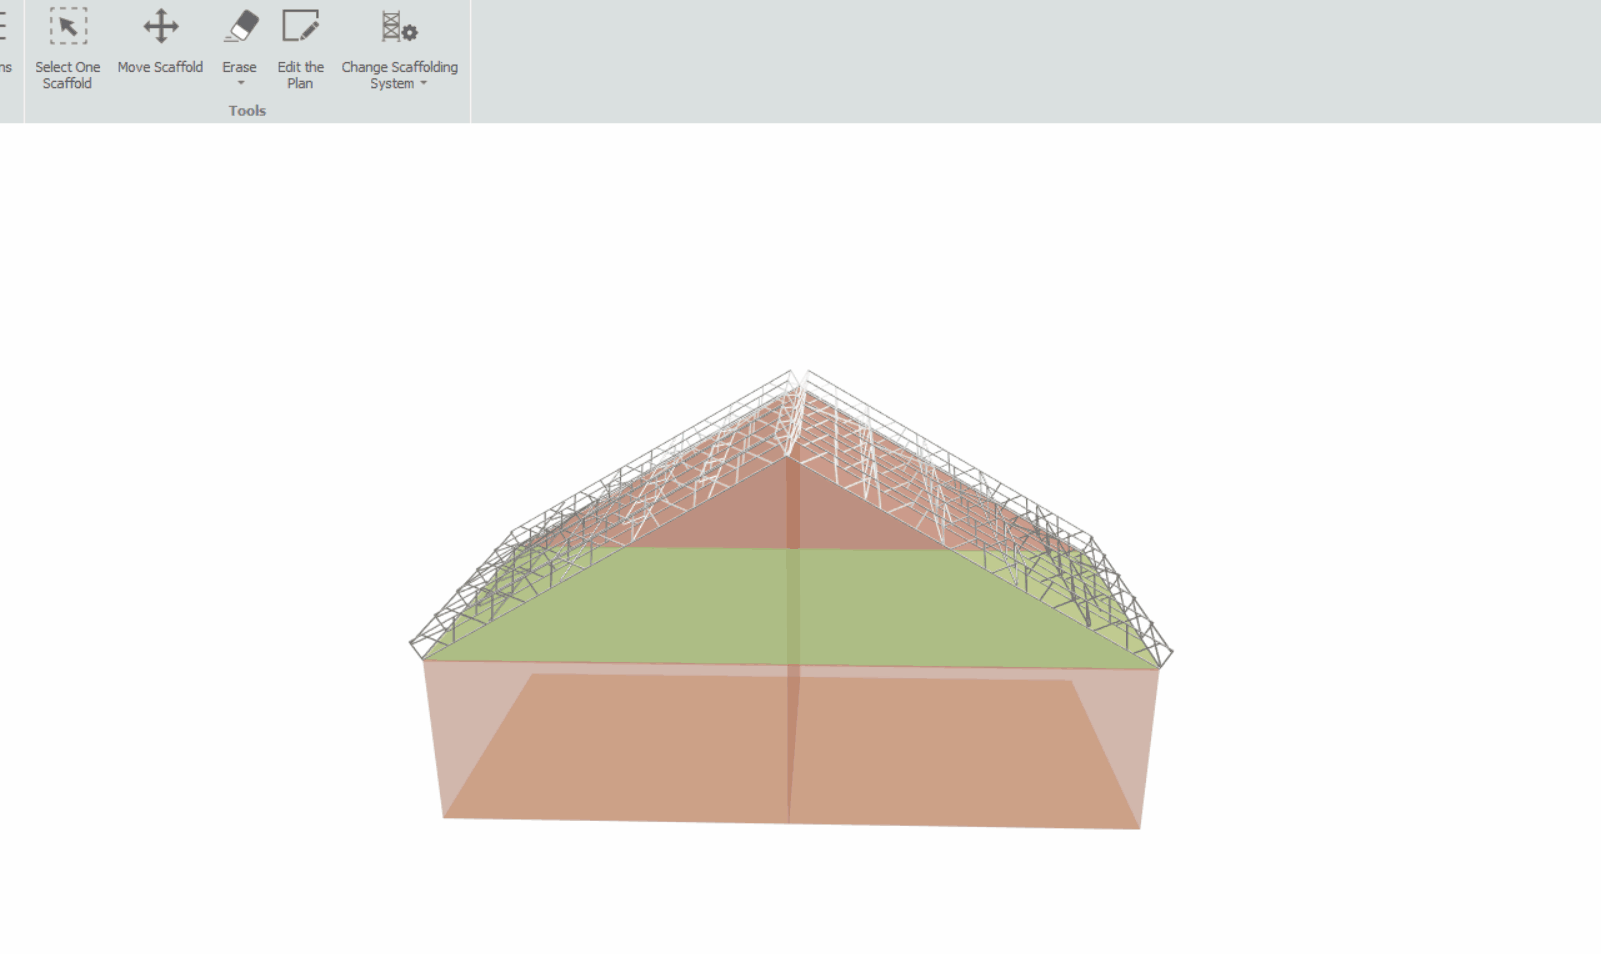
Apex (pitched) Roof
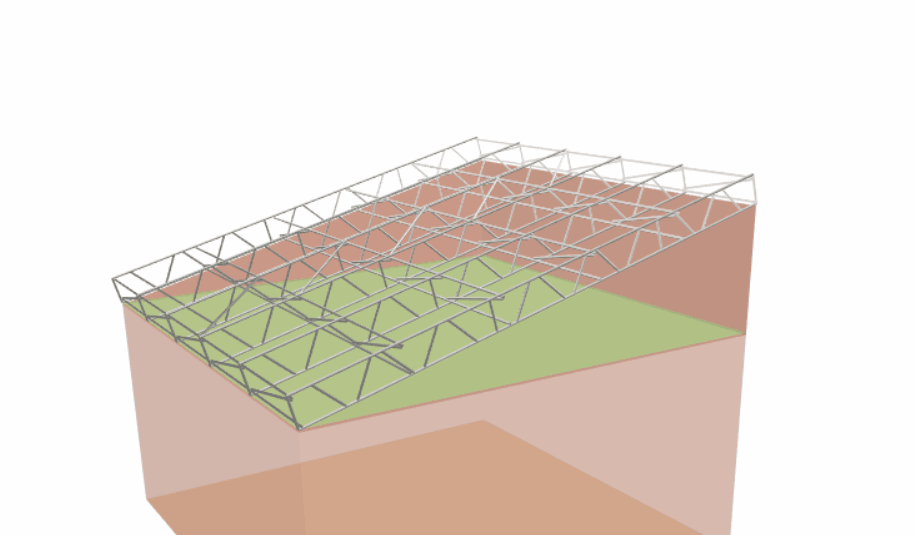
Now that you’ve learned how to make a Mono-Pitched Roof, let’s create an Apex Roof. The trick to making an Apex Temporary Roof is to start by designing one of the sloping sides first. Once you have completed one side of the temporary roof, you can copy and paste it into Schedule IT or you can model two temporary roofs in Model IT with the same pitch and dimensions.
Finally, the second temporary roof can be moved and rotated 180 degrees to align with the original temporary roof. As a result, both temporary roofs (slopes) will meet at the apex.
Multi-Pitched Roof
The process of setting up a Multi-Pitch Temporary Roof in SMART Estimator is almost identical to creating an Apex Roof. The only difference is that instead of two roofs, we will be creating multiple Sets of Temporary Roofs with different pitch angles.
Once the temporary roofs are positioned correctly, we can adjust the Base Heights of each temporary roof so that they’re appropriately aligned to make a Multi-Pitched Roof.
-
Temporary Roof Material calculation
It is important to note that the temporary roof in SMART Estimator is intended only for estimation purposes. Due to the fact that the software does not calculate any connections between the supporting scaffold and the roof, the material list will need to be modified in order to ensure 100% accuracy.
It is more than sufficient to produce an estimate of material hire – although estimators should always double check the figures when pricing their estimates.
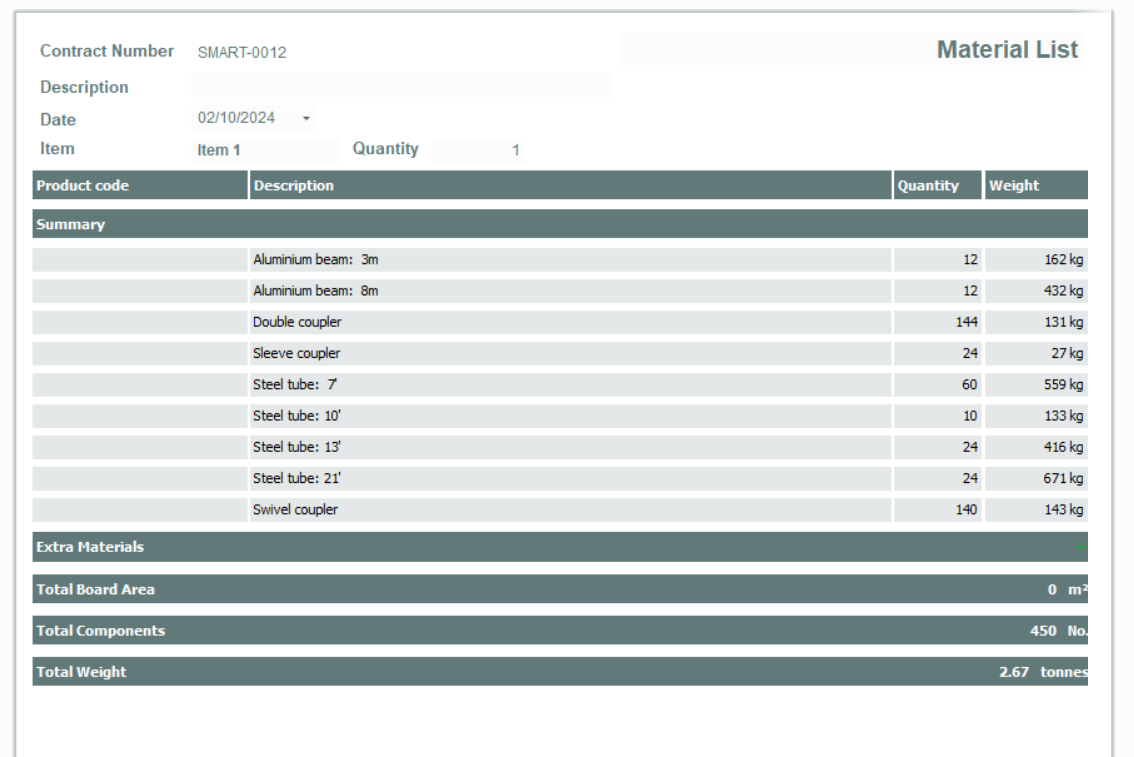
Dual or Multi Pitch material calculation
It is also important to note that when using more than one roof to create a dual pitch or multi pitch roof, beam connections will not be automatically calculated and must be accounted for in the estimate.


