-
Overview of the Drawings
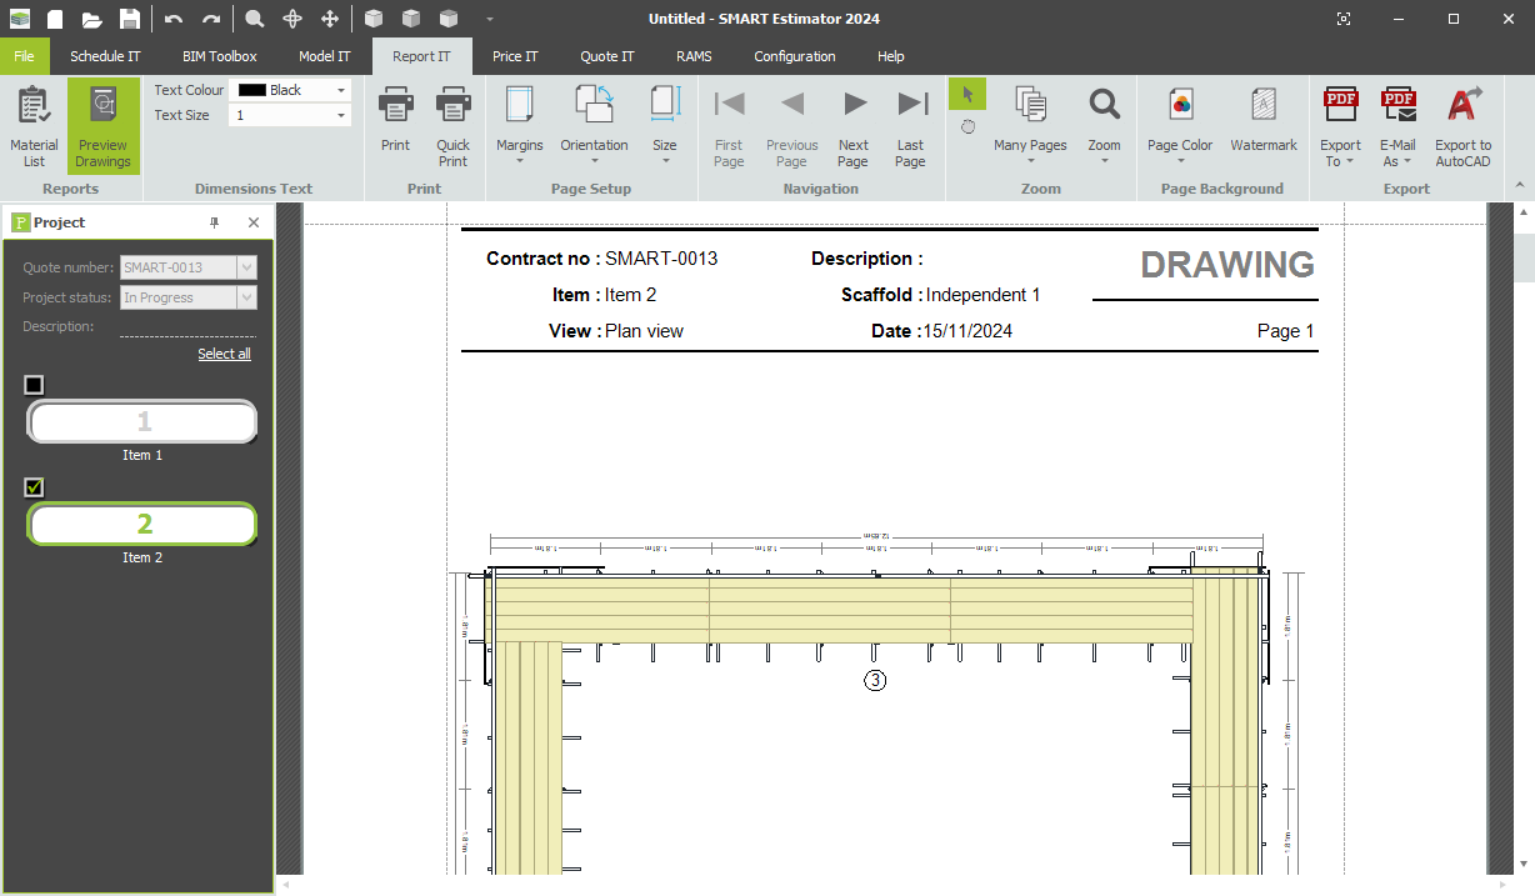
With the Report IT Module, you also have the option to create professional technical drawings of your scaffold model. Click on the Preview Drawings button and a new toolbar will be displayed similar to the Print Preview for Material Lists.
A Scaffold Model is Required for the Drawings
You’ll need a scaffold model created in Model IT or Schedule IT to create technical drawings. It is only possible to use this feature if a scaffold model is included in the item.
Watermarking the Drawings Document
If you would like to add a Watermark to your Drawings before sending them to your customer, please click here for more information.
-
Selecting the Drawings
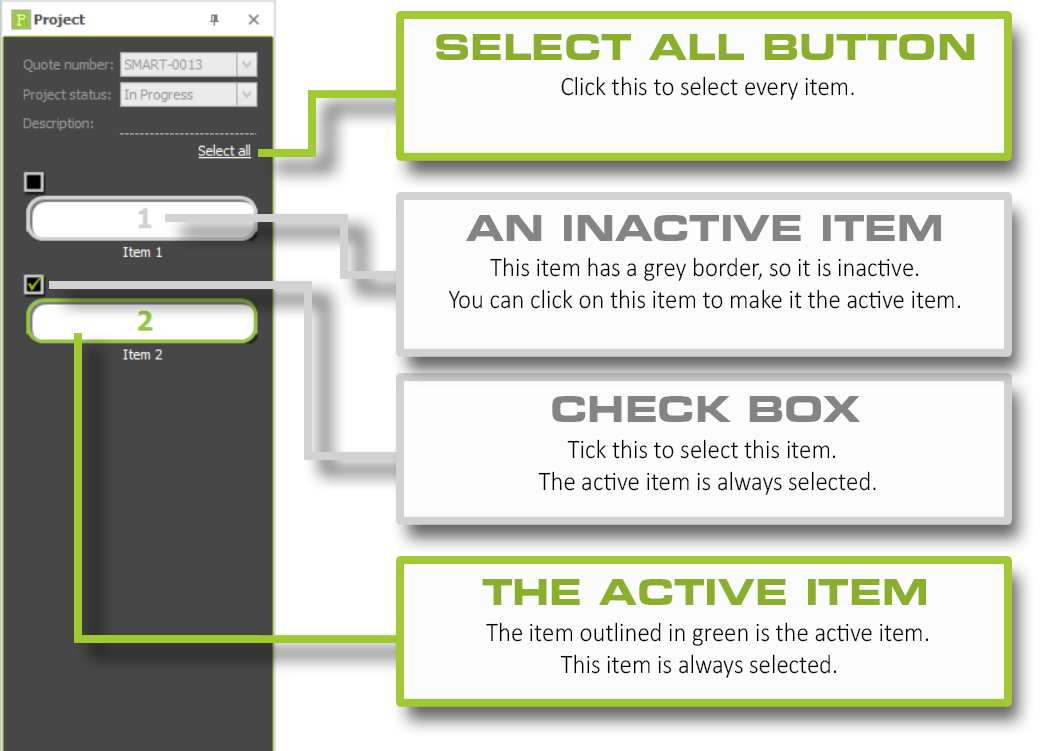
Now the first step is to select the drawing to be displayed. You can change what drawings are shown by selecting or de-selecting the items in the Project Browser by clicking on the Check Box.
Additionally, you may select only one item in the Project Browser by clicking on it, alternatively you can also select all the items within the project by clicking the Select All button.
- If your project has more than one item, drawings are shown for each selected item in order.
- If your item has more than one scaffold, a plan view is created showing all scaffolds. After that drawings are shown for each scaffold.
Drawings & Multiple Elevations
For models with more than one elevation of scaffolding, a plan view drawing will be generated along with drawings for each elevation. Elevations in the plan view are numbered according to the elevation drawings.
Drawings & Splitting Elevations
If your model contains split elevations, they will automatically be combined into a single elevation drawing. As a result, you can create realistic elevations with changes in height, steps and slopes at the ground level, bridges, and gable ends if desired.
-
Editing the Dimensions Text
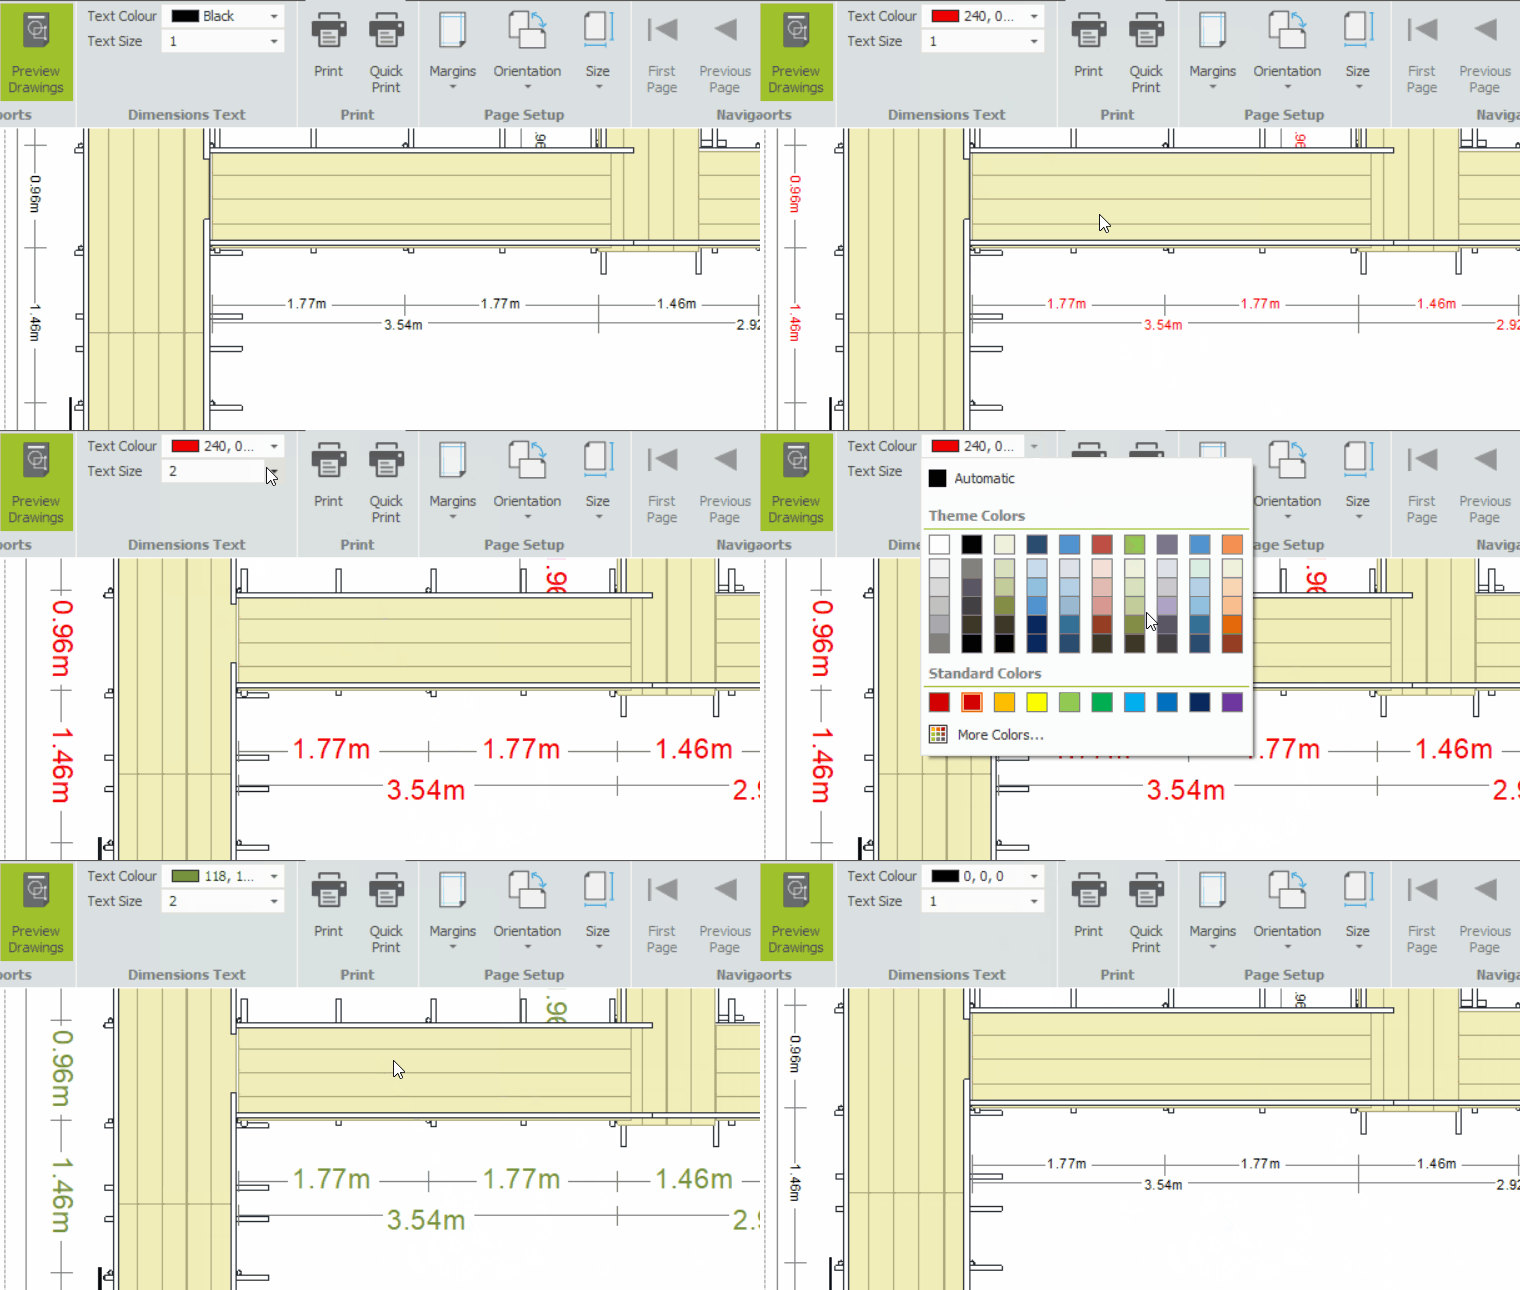
You can change the colour of the text by selecting a swatch of colour from the Text Colour menu on the Dimensions Text section of the Report IT Toolbar.
In the dimensions Text Size menu, you can increase the size of the text that tells you what the dimensions are by entering a value greater than “1”. Once updated, the dimensions text is multiplied by this value on every page of the drawings.
Tip: Different Sizes on Different Pages
If you have scaffolds of different sizes on different pages, please select the correct Text Size and print each page separately.
-
Exporting the Drawings
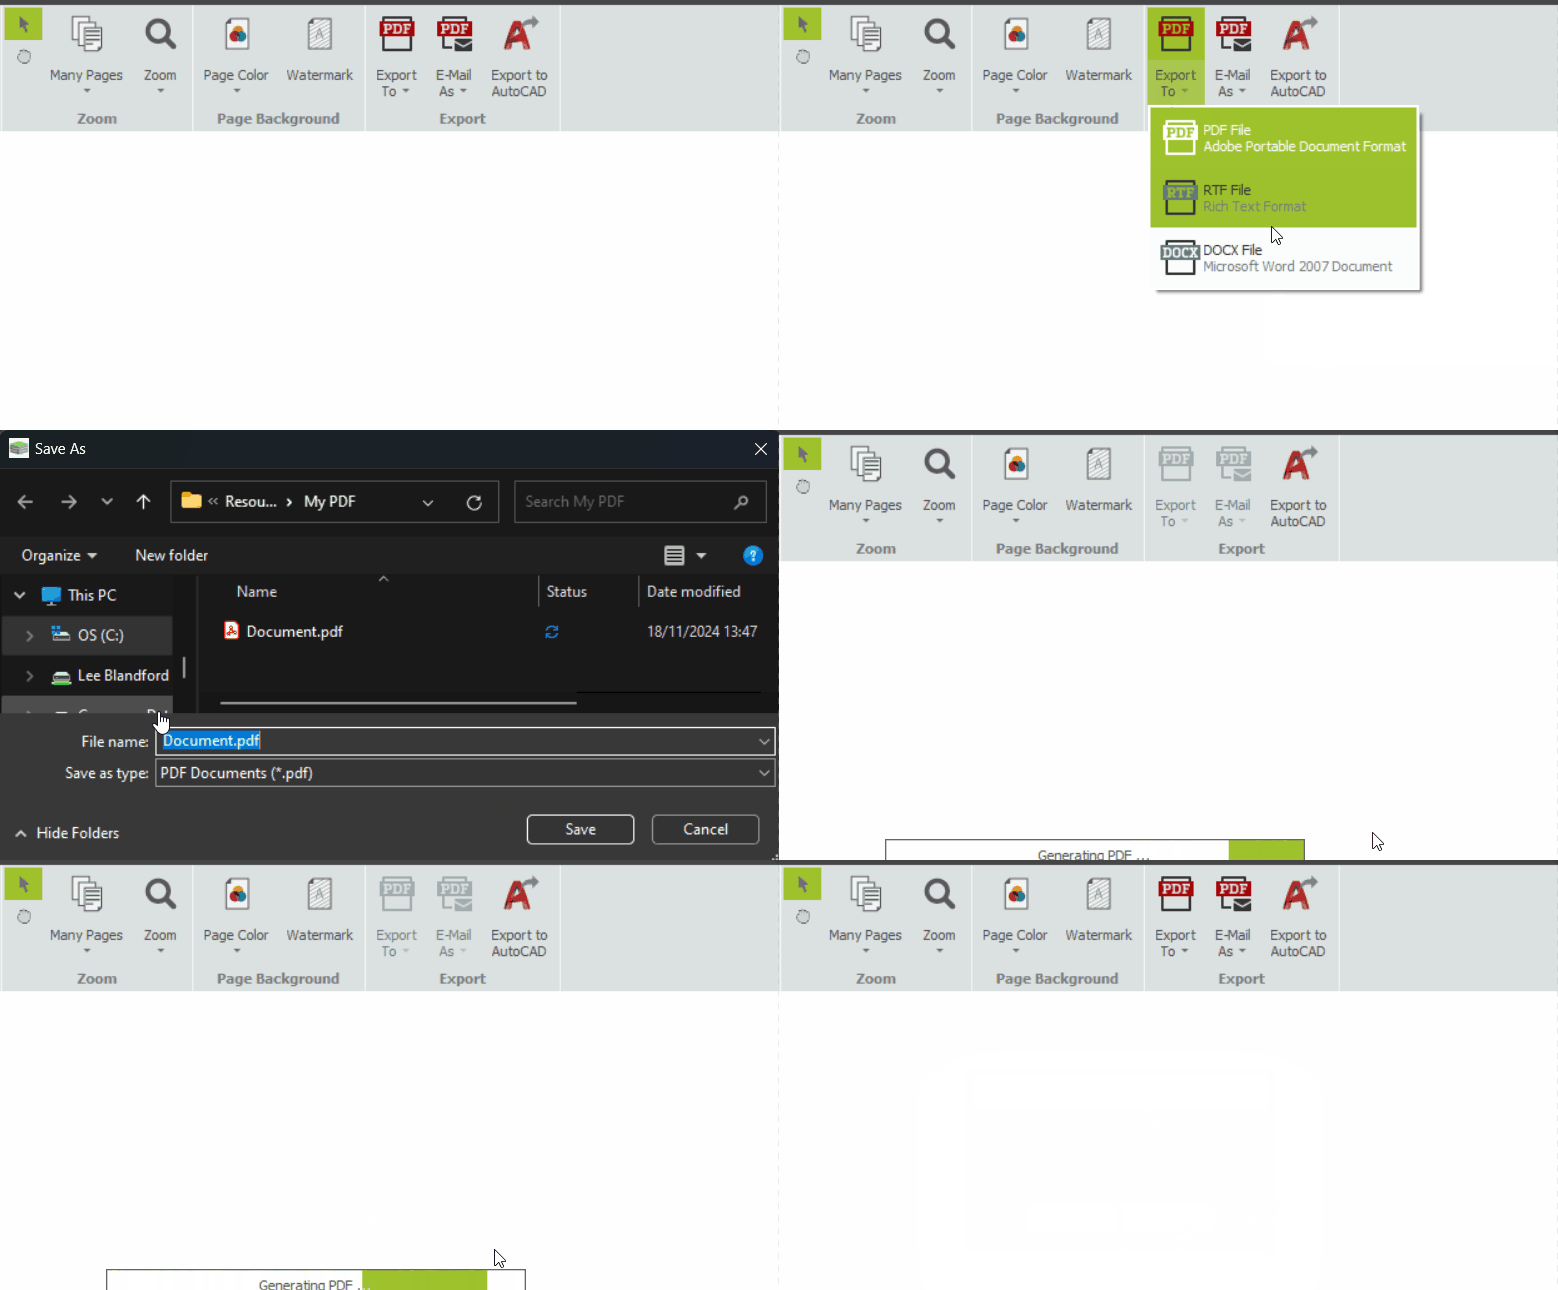
You can export the Scaffold Drawings by navigating across the ribbon to the Print Preview button. In the Export tools, you can either save the drawings as a file or send them directly to the customer via email. Click on the dropdown menu of the tool you wish to use and select a format.
Saving the Drawings
When you save the file, you will be directed to file explorer. From here, you can choose where to save it on your computer, such as on the desktop.
E-Mailing the Drawings
By saving it as an email, a blank email will be created with the file format already attached. From here you can enter the Customer’s email address and send the Scaffold Drawings.
File Format Description Adobe PDF Export the Scaffold Drawings as an editable and portable .PDF document. This is so that it can be emailed to clients and viewed using a PDF Reader or in a browser such as Microsoft Edge or Google Chrome. Microsoft Word Export the Scaffold Drawings in a .DOCX (Or .RTF) file format, compatible with most word processing software. If you wish to add your own company header, accreditations or images to the drawing document. AutoCAD Export the Drawings as a Draw IT (.DXF) file, which can be opened in AutoCAD, AutoCAD Lite and other CAD Software. -
Preview Drawings: Tools & Features
The following is a brief description of each tool on the Ribbon:
Tools & Features Description Warning Log This icon appears if any errors, warnings, or information messages apply to the material lists.
For example, a message may be raised to inform you if tube-and-fitting bracing is required to accommodate a bay length for which a standard bracing component is not available.Print Preview Deselect this to close the Print Preview. Dimensions Text Tools for setting the size and colour of dimensions text. Print Prints the report, providing options to select the required printer and paper. Quick Print Prints the report to the default printer. Page Setup Allows you to choose the paper size, margins, and orientation: portrait or landscape. Navigation Provides options to move back and forth through the pages of the report. Zoom Zooms the report to allow you to see the material lists in detail or to view multiple pages. Page Colour Allows you to specify the background colour to use while printing, for example if your company uses a coloured background on its stationery. Watermark Allows you to add a text or image watermark to the report. You might use this to show your company logo on the reports. Export to Allows you to export the report to an Adobe PDF, Microsoft Word document or Microsoft Excel spreadsheet. Email as Allows you to create an email with the material lists attached as an Adobe PDF, Microsoft Word, or Microsoft Excel file. Export to AutoCAD Exports the drawings as a DXF file that can be opened in AutoCAD or AutoCAD LT to easily create professional CAD drawings.
This feature requires the Draw IT Link module to be available.


