-
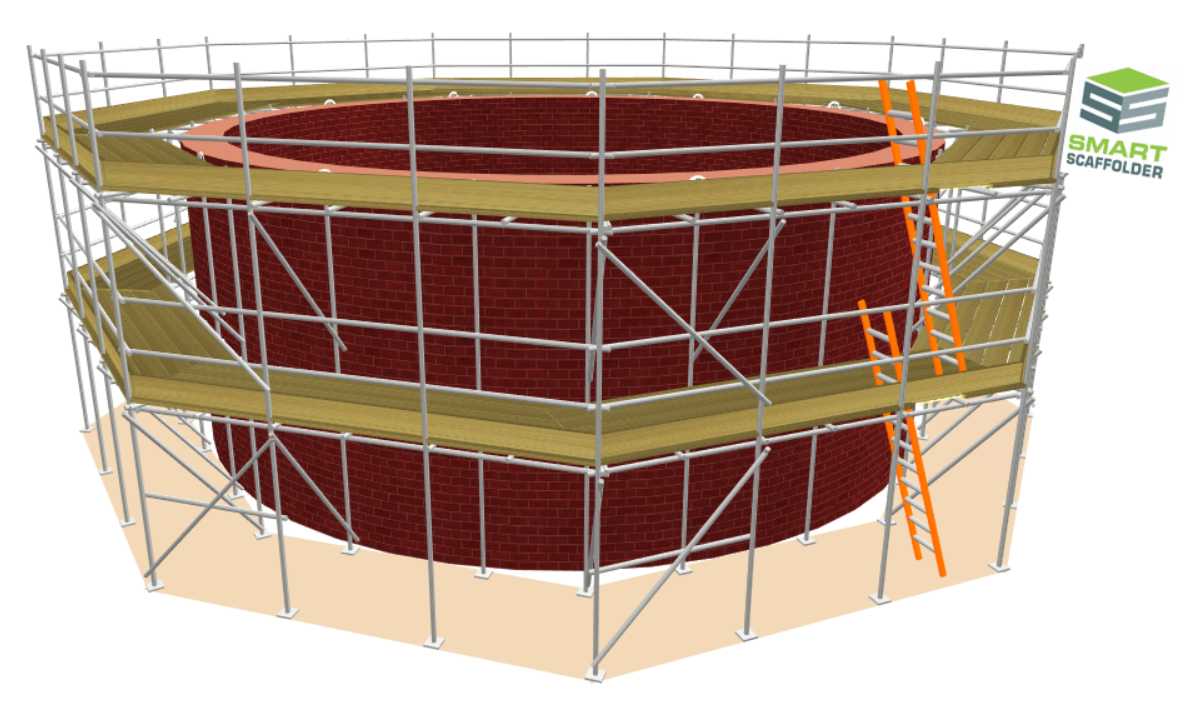
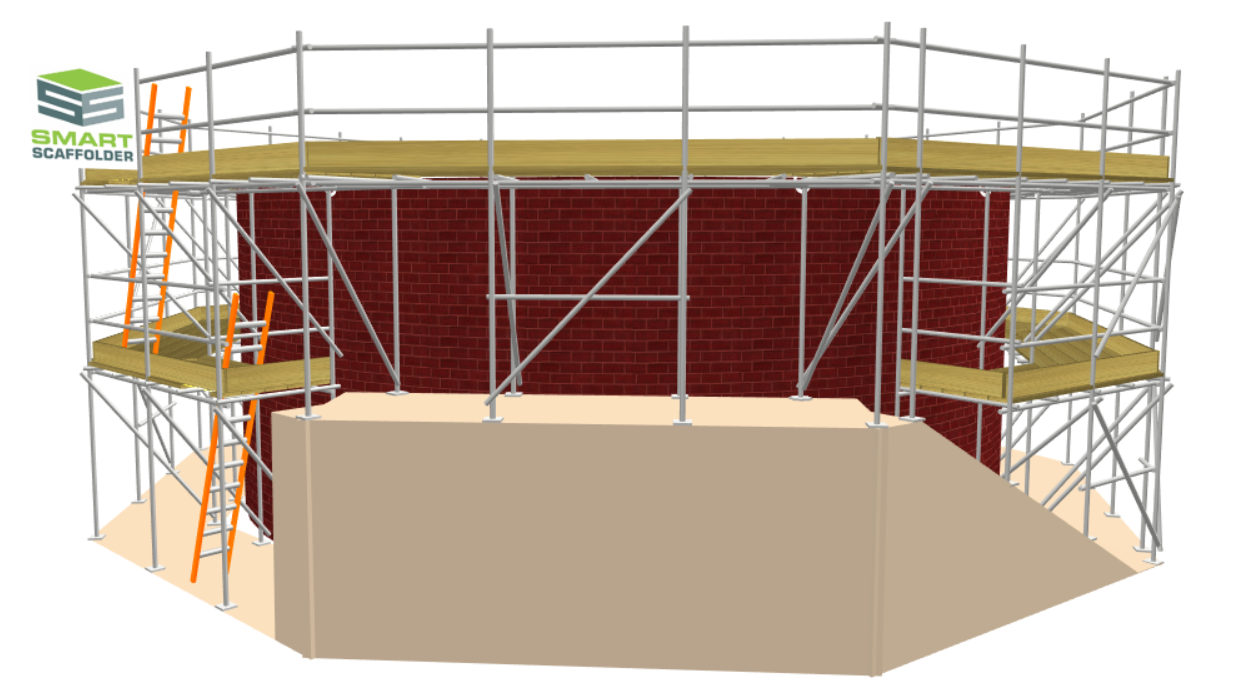
Overview of a Circular Tank
The circular tank is a specialised scaffold type, designed to conform to the curved surface of an elevation, such as a tank, boiler or a circular structure.
As far as functionality goes, such as lift heights, add-ons, and ground conditions, it shares many similarities with the Independent Scaffold. Every tower of the tank behaves the same way as an independent elevation.
-
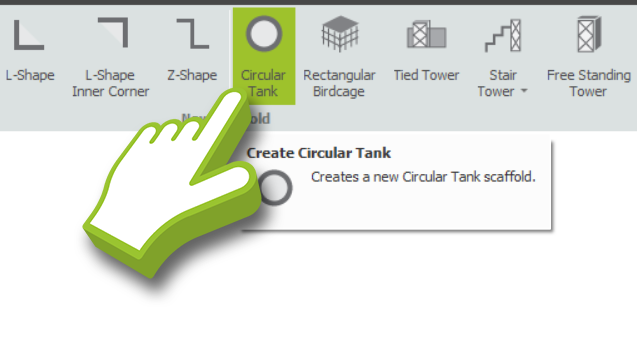
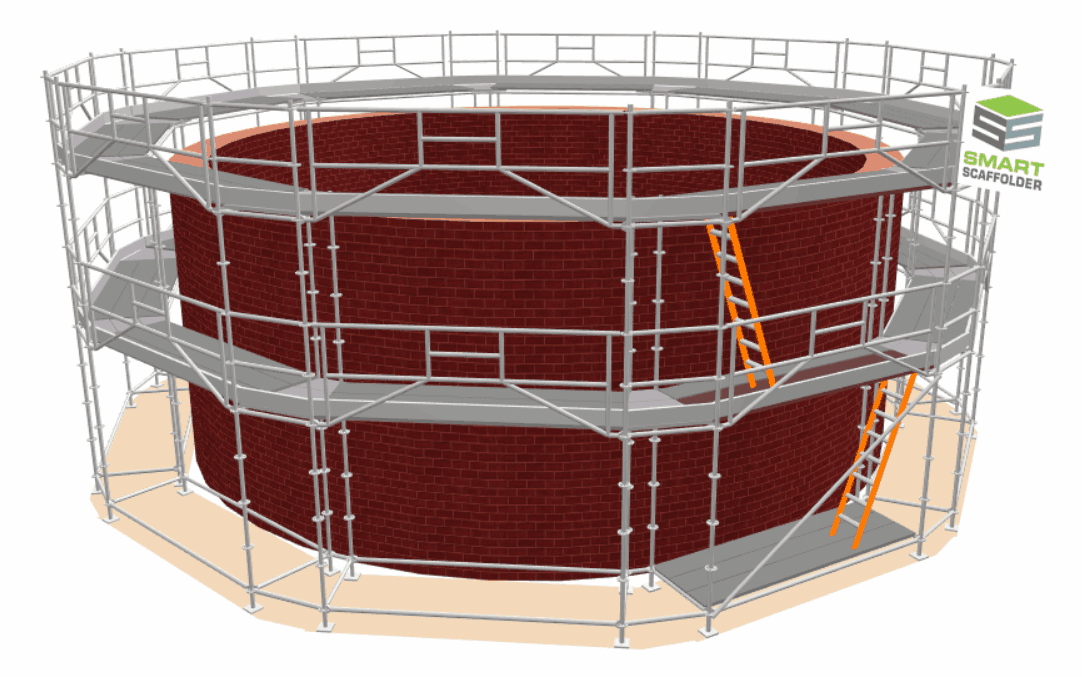
Creating a Circular Tank
In order to create an independent scaffold, navigate to Model IT and select the Scaffolds View. Then click on the Circular Tank option along the toolbar to create a circular tank. By default, a circular tank with a circumference of 31.42 metres is created with a height of 4 metres and a diameter of 10 metres.
-
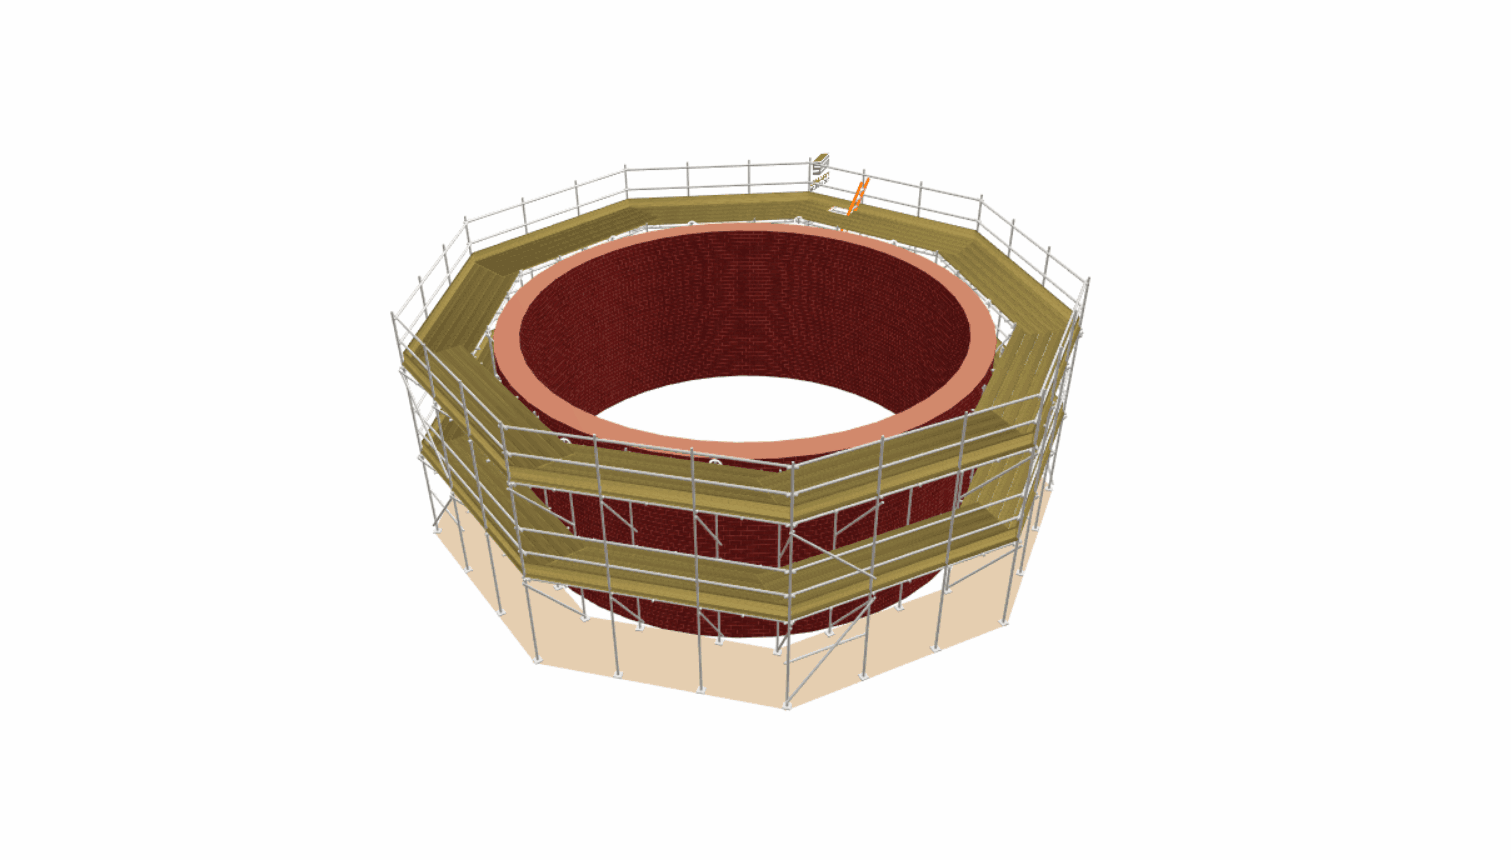
Adjusting the Tank Dimensions
Using the 3D Model Controls, such as the Red Highlight and the Toolbox Dialog, we can now modify the Tied and Freestanding Towers. It is likely that you will use both of these features extensively.
Adjusting the Tank’s Diameter / Circumference
When hovering your mouse over the curved elevation of the tank, you can click and drag to adjust its diameter or circumference. Alternatively, you can use the Toolbox Dialog box and the Tab key to cycle through the options. Once you have entered the Diameter or Circumference in metres, press Enter.
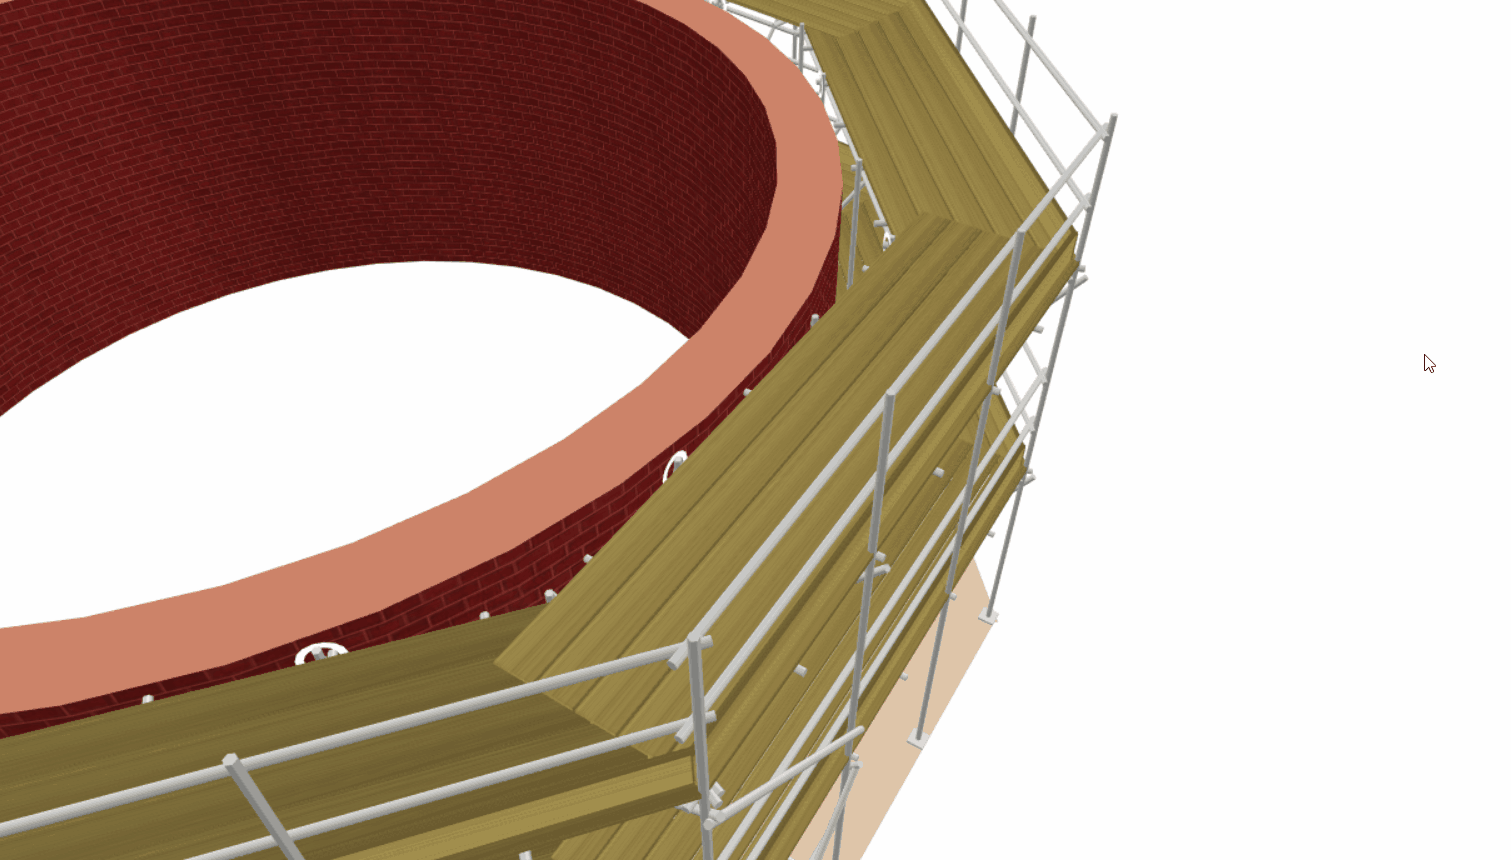
Adjusting the Tank’s Bay / Tower Length
Using the Toolbox Dialog, you can adjust the Bay Length and Tower Length by hovering over the Circular Tank standards. Specify the length, and then press Enter to apply these changes.
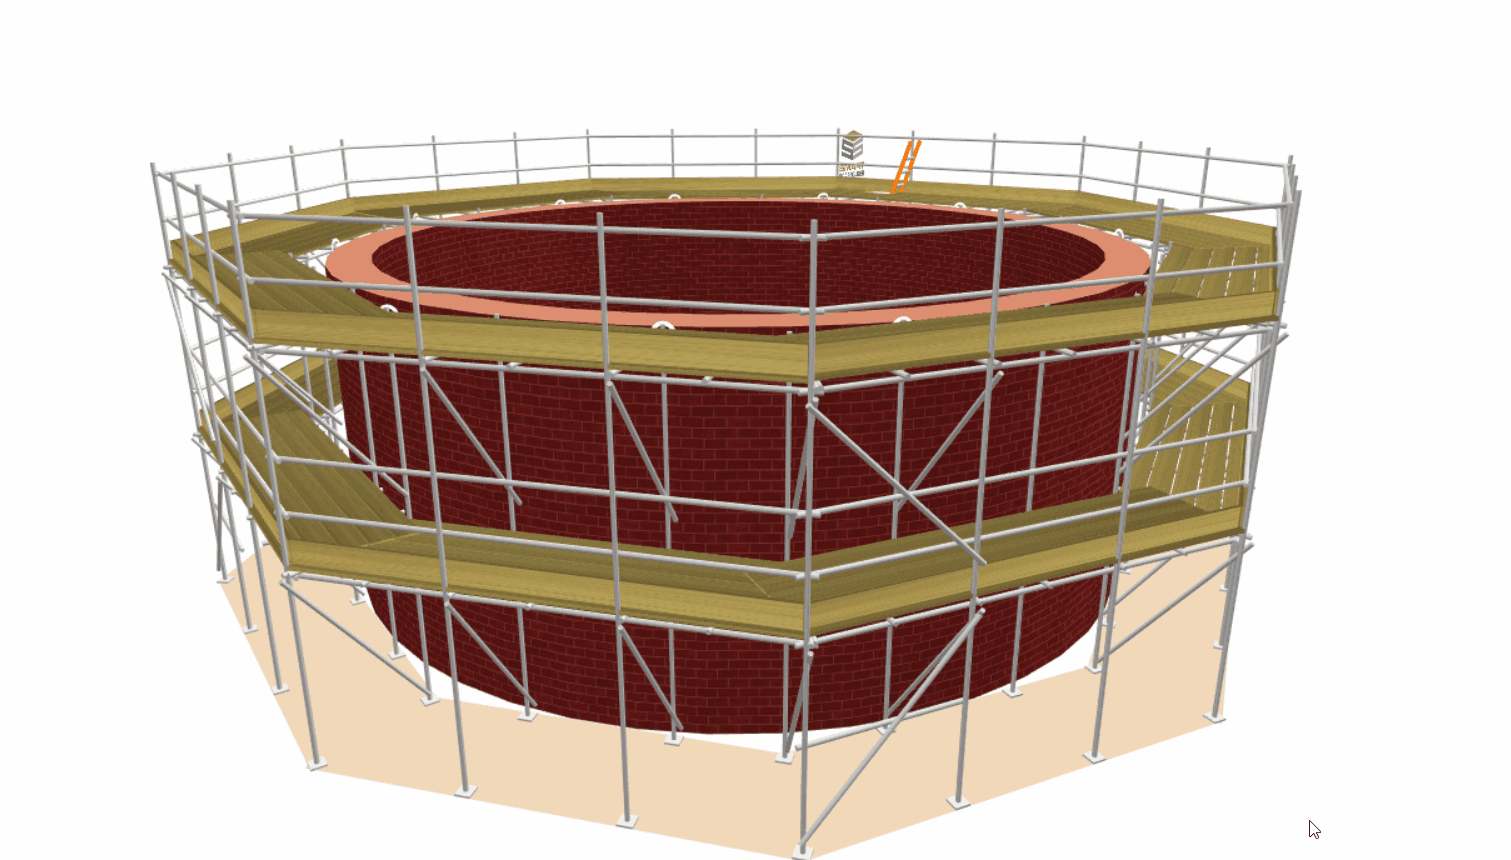
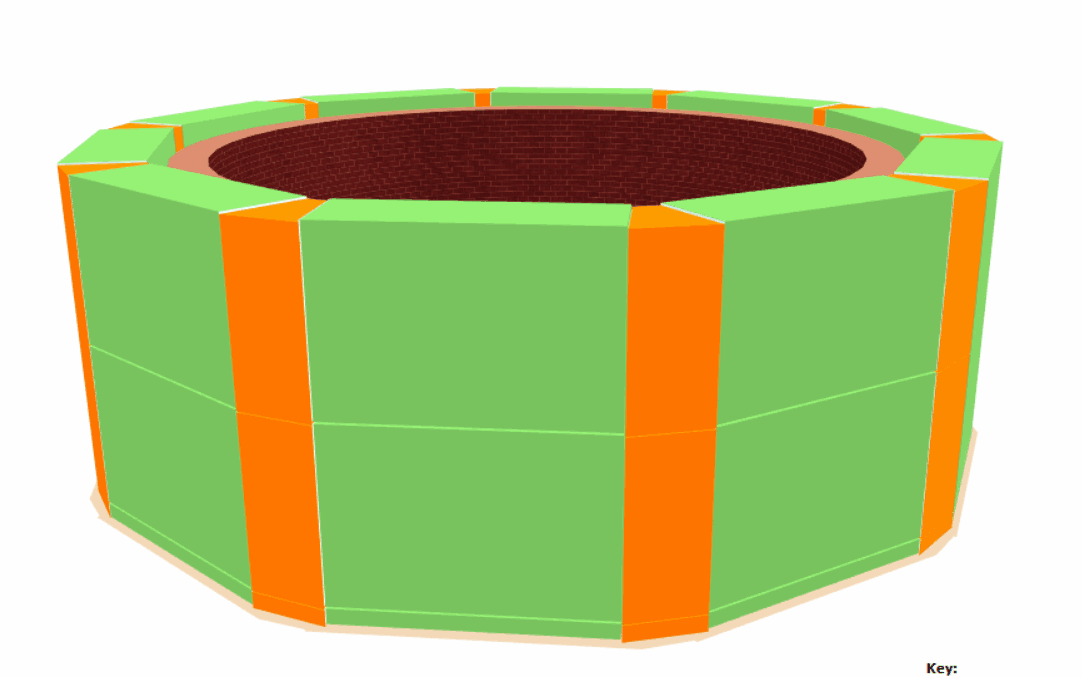
Auto-adjustment of Bays
Upon modifying the Circular Tank’s diameter, the bays will automatically adjust according to the bay length, removing or adding bays as necessary. Furthermore, the Circular Tank’s circumference will automatically be changed into either a set of square or trapezoidal bays, depending on the size of it’s circumference.
Adjusting the Tank’s Height
You can adjust the height of the Circular Tanks by hovering your cursor over the top of the elevation until it is highlighted in red. Simply click and drag the tank to the desired position. It is also possible to manually adjust the Height value on the Toolbox Dialog by entering a value and pressing the Enter key.
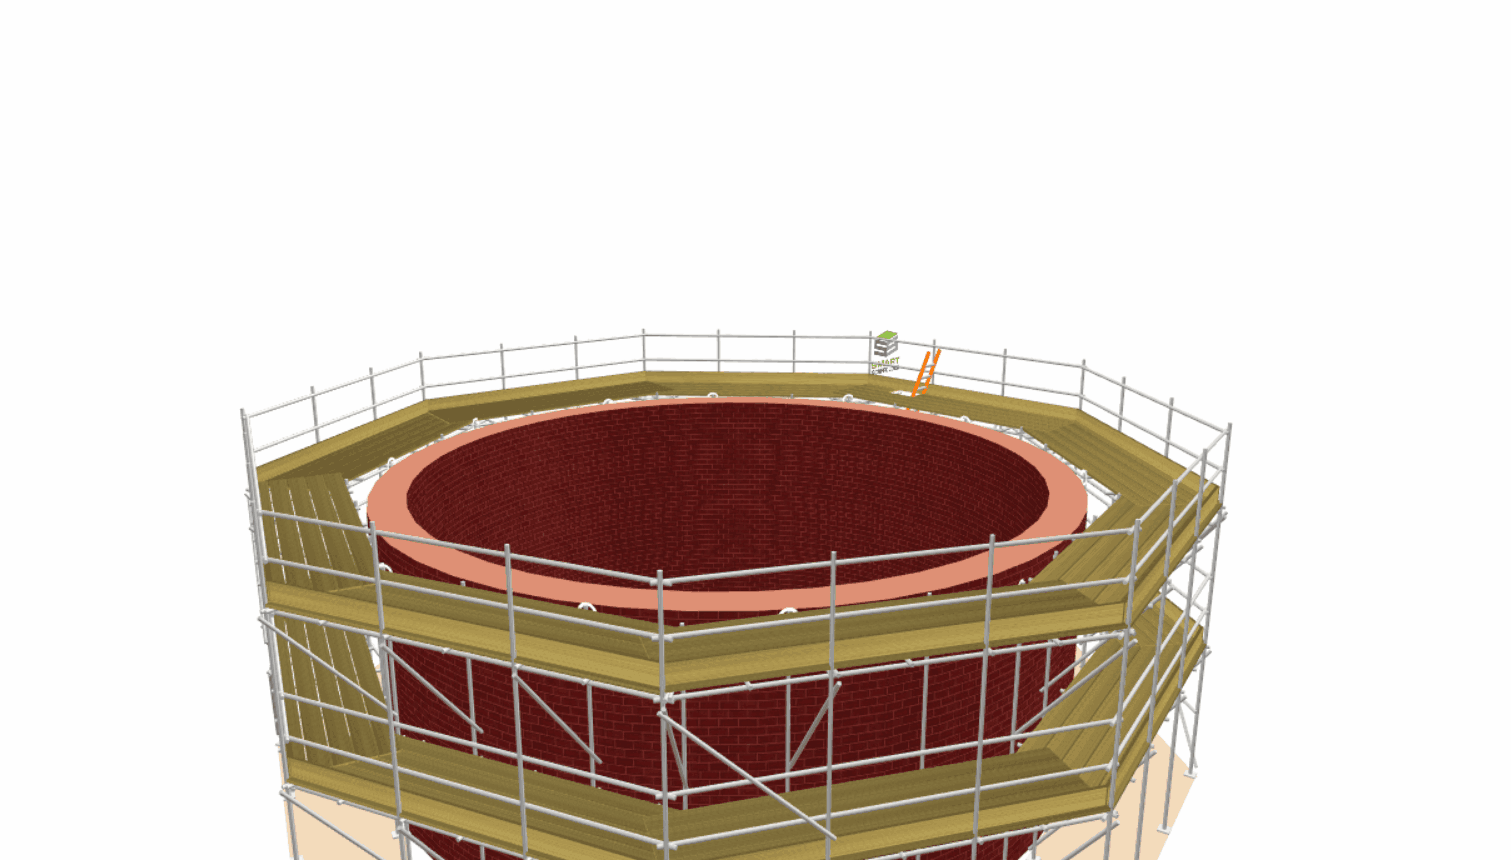
Adjusting the Tank’s Width
Also when you hover your mouse over the toeboards, you will see that they’re highlighted in red. On the toeboards, you can manually specify how many boards make up the width on the Main Boards value. Then, press Enter to confirm your changes.
You can also add inside boards by selecting the Inside Boards option from the Toolbox Dialog. Specify the number of inside boards you need, and then press Enter to apply these changes.
-
Modifying a Circular Tank
Attached Scaffolds
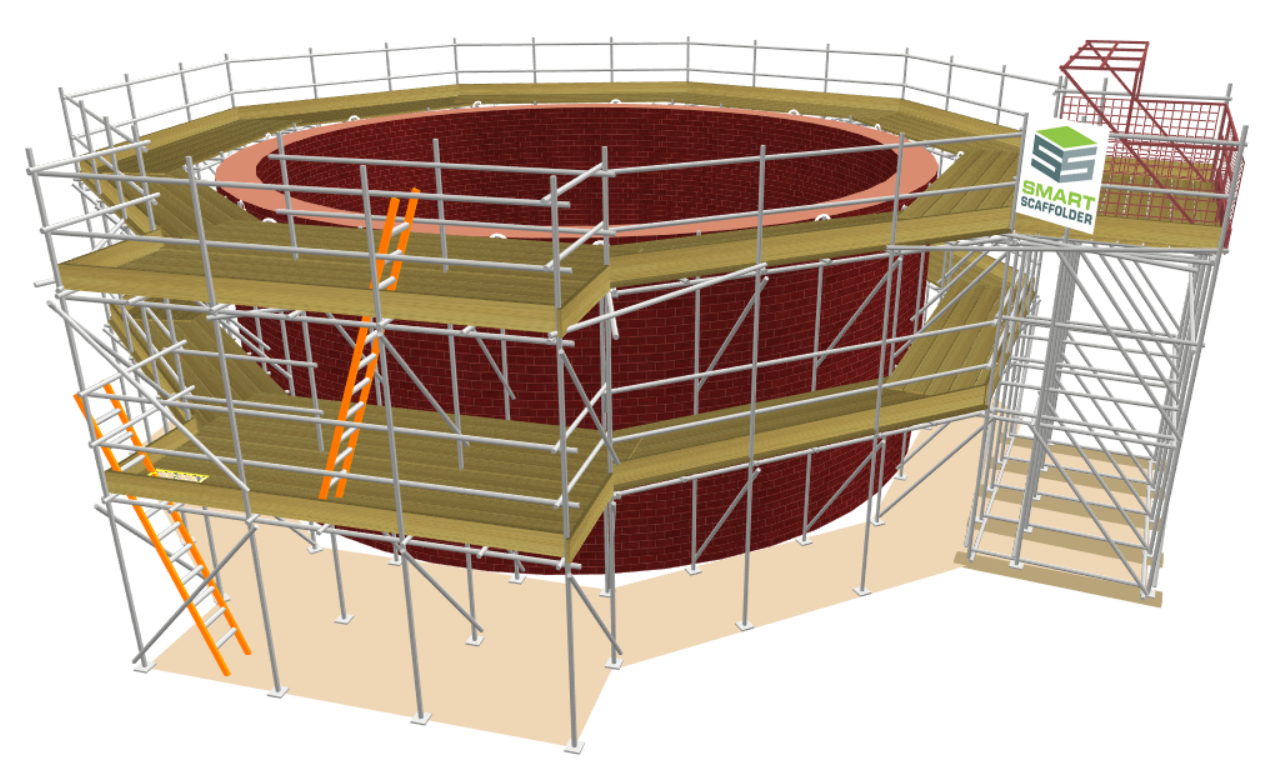
When you wish to apply an attached scaffold to a bay of the Circular Tank, go to the Scaffolds view, and on the ribbon click on one of the Attached Scaffolds, such as a Stair Tower, Ladder Tower, Buttress, or Loading Bay.
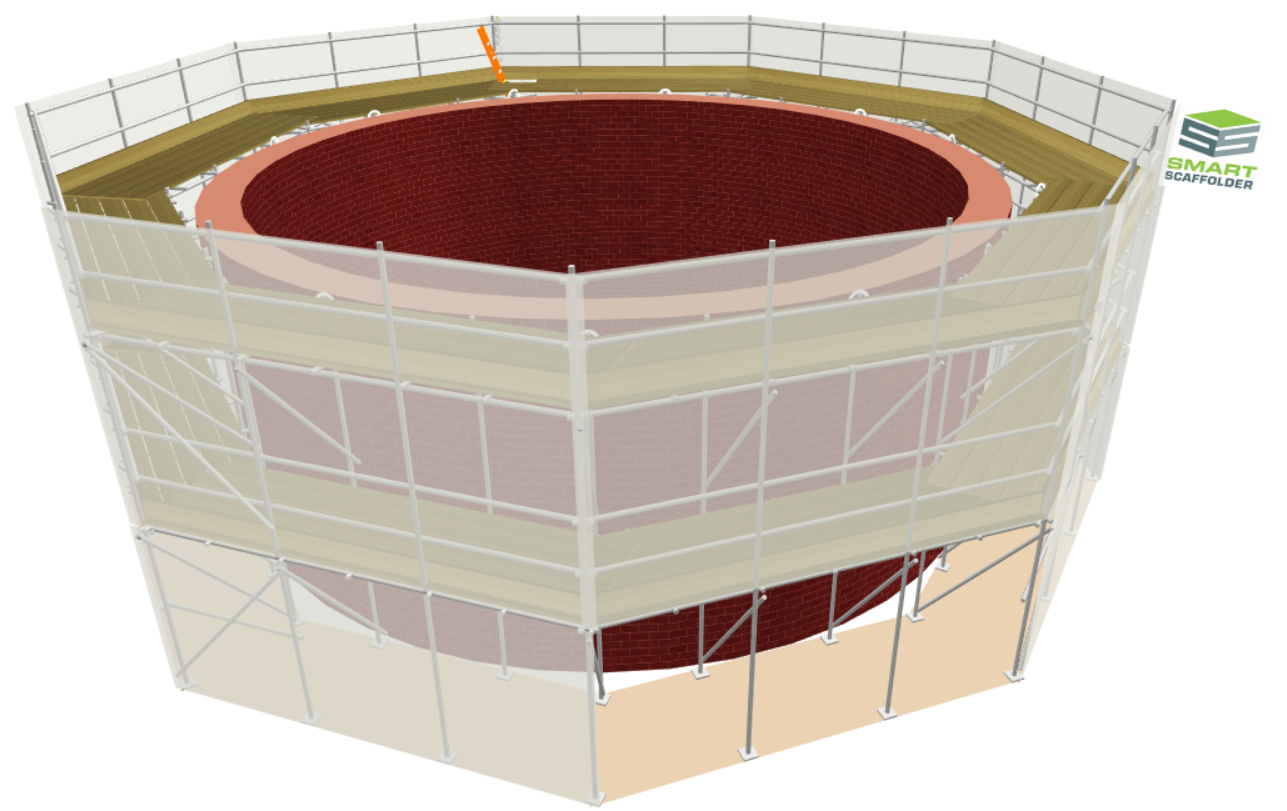
Cladding: Sheeting and Debris Netting
To apply cladding to the Circular Tank, select either the Sheeting or Debris Netting option from the Add-Ons View in the ribbon, then apply it to the Circular Tank. For more information on how to use the Cladding Tools, refer to the Adding Cladding Documentation.
Circular Tank Add-Ons
Using the Associated Tools in Model IT or Schedule IT, you can apply Ladders, Brickguards and Bridges to the scaffold. You can also apply Safety Standards, Rubbish Chutes, Safety Lamps, Double Standards, and Banners to the Circular Tank.
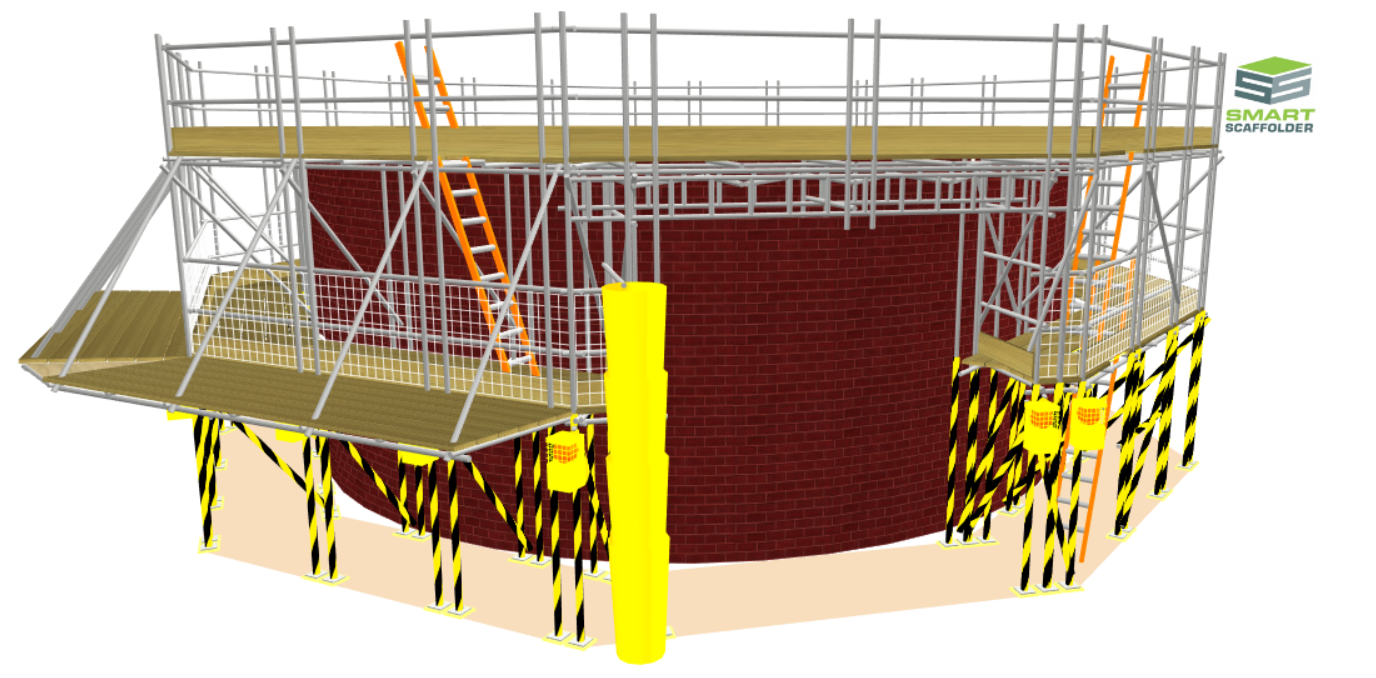
Ground Conditions
Using the ground elements, you can model stepped or sloping ground for Circular Tanks, just as you would for any other scaffold. Simply click and drag on the ground or its controllers whilst modifying the red highlight or using the toolbox dialog to achieve this effect. See the Sloped and Raised Ground documentation for more information.
-
System Scaffolding: Circular Tanks
Exclusive to System Scaffolding
This feature is only available when using System Scaffolding. Ensure that you have read through the System Scaffolding documentation and selected a System Scaffold before proceeding further with this step of the documentation.
Set-out a system circular tank
The bay sizes used for a circular tank can be changed as they are for independent scaffolds, using the Model IT Setting-out View, which is accessed from the Tools view:
While changing the bay size of any circular tank tower, it is important to keep the following in mind:
- All other towers are automatically changed to match;
- The number of towers around the tank may change, to give the most effective solution;
- The size of trapezoidal bays is automatically updated, to stay as close as possible to the circular tank.
Changing the trapezoidal bay size
You can change the minimum size of the trapezoidal bays. To do this, set the Minimum Size by placing the mouse cursor over the trapezoidal bay and typing the desired value.
The actual trapezoidal bay size is calculated automatically for you. The number of towers around the circular tank may change when you change the trapezoidal bay size in some rare circumstances.


