-
Overview of a Birdcage Scaffold
Birdcage scaffolds are similar in functionality to Independent scaffolds in SMART Estimator; therefore, your knowledge of Independent scaffolds applies to Birdcages as well.
-
Creating a Birdcage Scaffold
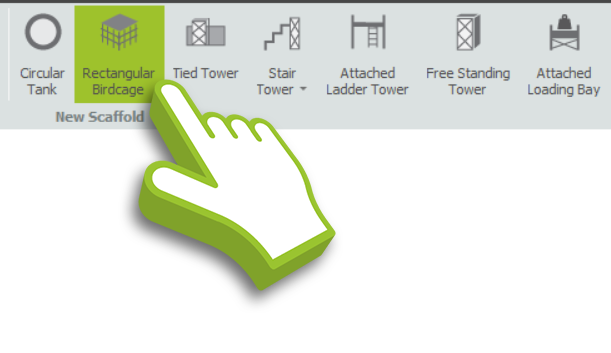
In Model IT, a Birdcage can be created by selecting the Rectangular Birdcage option from the Scaffolds view. By default, the Birdcage is 10 metres long, 10 metres wide, and 3 metres high.
-
Adjusting the Birdcage’s dimensions
Length and Width
Changing the length and width of the Birdcage can be accomplished either by hovering your mouse over the standards and dragging them or by manually entering the dimensions.
Bay Length and Bay Width
The bays along the length and the width of the Birdcage are automatically set out to match the dimensions that you have specified. If you want to restrict the maximum length or width of the bays, for example because your scaffold is to be more heavily loaded, you can set the Maximum bay length and Maximum bay width accordingly.
Lift Height
The Birdcage height is specified in the same way: press the Tab key until the Height field is highlighted, type in the new value, and press the Enter key. Additional lifts are automatically added or removed to match the new height you have specified.
-
Modifying a Birdcage Scaffold
Using the 3D Model Controls, such as the Red Highlight and the Toolbox Dialog, we can now modify the Birdcage that you created just a moment ago. It is likely that you will use both of these features extensively.
Creating a Bridge
With the Bridge tool in the Add-ons toolbar, you can construct a bridge through a Birdcage using beams or no beams. To construct a bridge, select either a Unit Beam, Ladder Beam, or No Beam option from the drop-down menu, then apply the bridge to a Birdcage lift. Lacing and bracing tubes are automatically applied to join beams together.
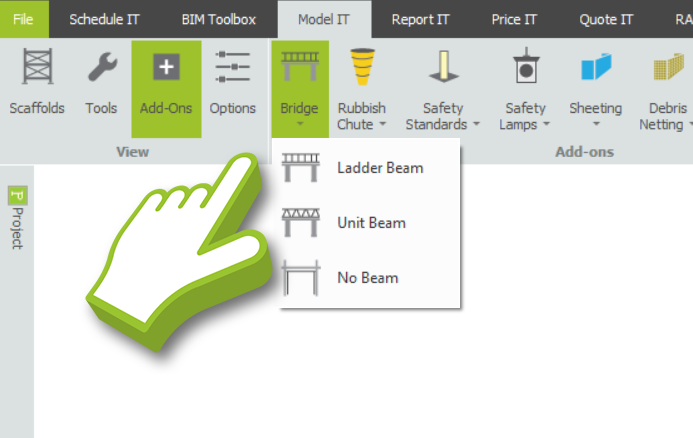
You can construct a bridge on any bay, and multiple bridges can be constructed on the same lift if both bridges are in-between an adjacent bay. The bridge types available will vary based on the active scaffolding system.
Add Sheeting or Debris Netting
It is possible to add sheeting and debris netting to a Birdcage by selecting the Sheeting option from the Add-ons toolbar and clicking on the Birdcage lifts.
Place Sheeting on All/One side of the Birdcage
Using the Shift and Ctrl keys, you can modify the Red Highlight so that it applies cladding to all lifts or to a single elevation.
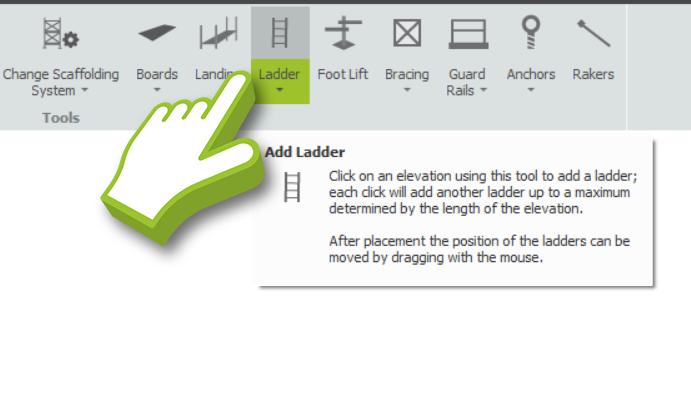
Ladders and Landing Platforms
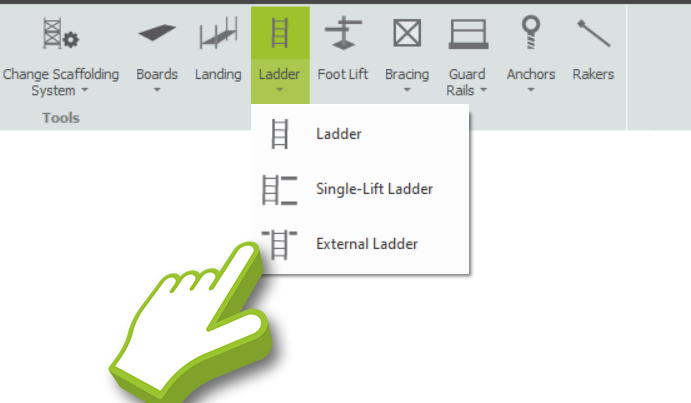
To build a ladder in Model IT within the Birdcage, select the Ladder tool in the Tools View. Then select the bay where the ladder will be placed: Normally, a ladder is built from the ground to the top lift by default.
You may move the ladder along its Length or Width by hovering your mouse over the ladder to access the Toolbox Dialog, then setting the desired value in the corresponding box. You can click and drag the ladder along its length, but not the width.

In addition, you can select from several ladder types by clicking below the Ladder Tool and selecting from the drop-down menu. A Single-Lift Ladder can be used to connect one lift to another, or you can create an External Ladder.
Landing Platforms and Ladders
When you click on the Landing tool and select the non-boarded lift, a boarded lift will be applied where the ladder is located and the ladder will be split into two sections.
Modifying the Guard Rails
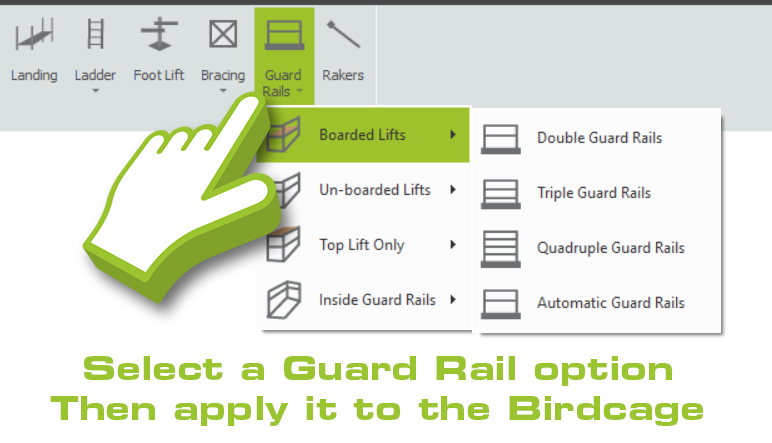
Birdcage guard rails are selected according to the scaffolding system used. When using tube-and-fitting scaffolds, a double guard rail is installed at all boarded lifts by default and a single guard rail is installed at non-boarded lifts. This can be altered by selecting one option from the menus under the Guard Rails button.
By using the Erase tool, you can remove the guard rails from the Birdcage perimeter, either on all sides or from one side. You can do this by using the Ctrl key to modify the highlight.
Guard rails on one side can’t be removed?
To prevent falls into the Birdcage, guardrails built around the internal sides of a ladder landing will remain in place.
Cantilever Platforms
You can add cantilever platforms to a Birdcage by clicking the Cantilever Platforms button. Click on the main deck to place the platforms around the whole Birdcage. Alternatively, hold the Ctrl key to place the platforms only on one edge.
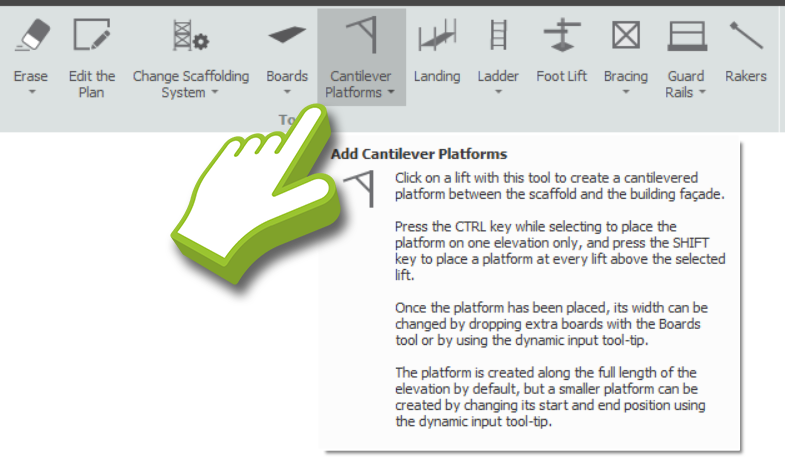
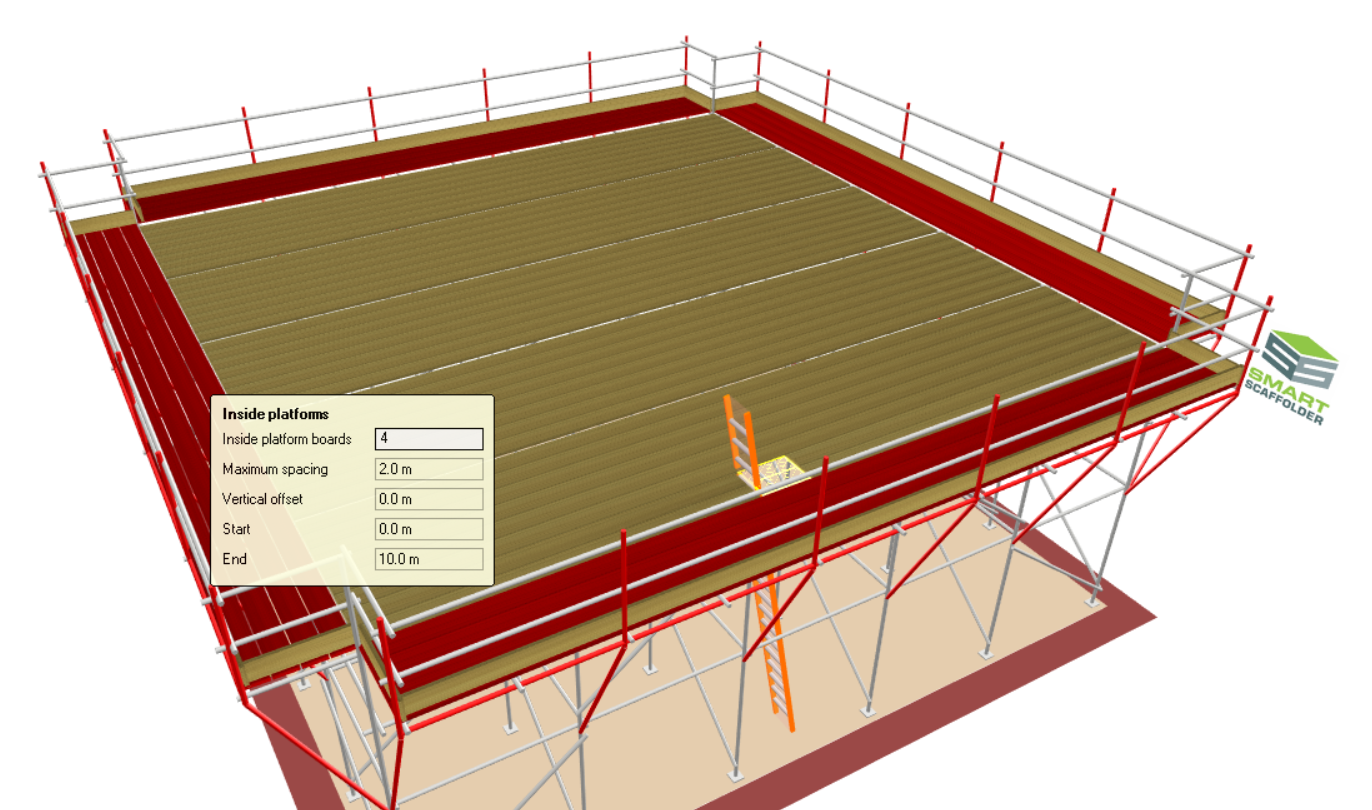
By moving the mouse over the cantilever platforms once they have been placed, the dimensions can be displayed. From here as shown on the Toolbox Dialog, you can manually set the platform width to set how many boards make up the Cantilever Platform. Finally, you can set the maximum spacing to support the platform further underneath with standards. You can also set the vertical offset to put the platform below the main deck and finally the start and end points to create a short platform.
Material selection for cantilever platforms
Cantilever platforms can be constructed from wood, steel, or aluminium decking, depending on the materials available in the scaffolding configuration.
Add-ons available for the Birdcage
Using the Associated Tools in Model IT or Schedule IT, you can apply Ladders, Brickguards and Bridges to the scaffold. You can also apply Safety Standards, Rubbish Chutes, Safety Lamps, (Cladding) Sheeting and Debris Netting, Double Standards, and Banners to the Birdcage.

-
Showing the Birdcage next to an elevation
Whenever you wish to display your Birdcage next to a wall, simply hover your mouse over the red border surrounding the Birdcage, then click and drag upwards to raise its elevation. If you wish to drag only one elevation from the Birdcage, hold down the Ctrl key.
-
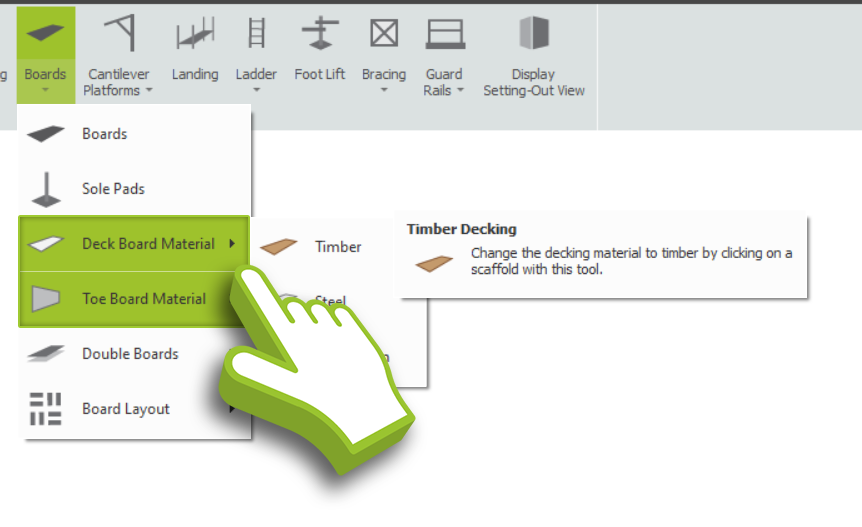
Specifying the deck materials
By default, Birdcages are constructed with timber decks and toe boards. Other materials may, however, be used if they are available in the material catalogue of the scaffolding system you are using.
You may change the deck or toe board material by clicking on the drop-down arrow below the Boards tool and selecting the appropriate material.
-
System Scaffolding: Birdcage Scaffold
Exclusive to System Scaffolding
This feature is only available when using System Scaffolding. Ensure that you have read through the System Scaffolding documentation and selected a System Scaffold before proceeding further with this step of the documentation.
Changing the trapezoidal bay size
In the same way that the Setting-Out View for independent scaffolding is available, a birdcage can also be viewed in the Setting-Out View as a set of coloured blocks, where the colours correspond to the length and width of each bay.
In this example, the Setting-Out View makes it easier to see that the birdcage is 4 bays long and 4 bays wide, where each bay measures 2.5m in each direction.
System Birdcage Dimensions
To change a bay’s length or putlog length, move the mouse to a face of the coloured blocks, once highlighted, type in the new value, and press Enter. The lengths of the other bays will automatically change so that the birdcage still fills the same building dimensions.

Changing the Length for all Bays
If you want to reduce the length of all bays, the quickest way is to change the Maximum Bay Length, as described earlier.
Specifying the Decking Layout
When using a System scaffold system, excluding Macdeck, you can choose between alternate or parallel boarding. Simply click below the Boards tool to access the drop-down menu and hover your mouse over the Board Layout. Select the layout you wish to use and apply it to the Birdcage.
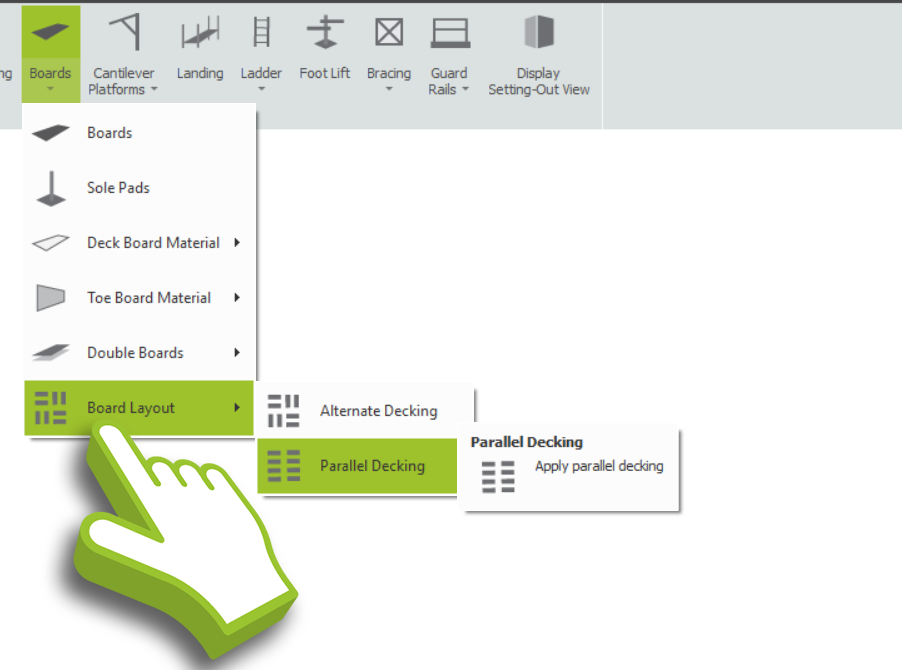

Parallel Decking
Boards are aligned in parallel with each other.
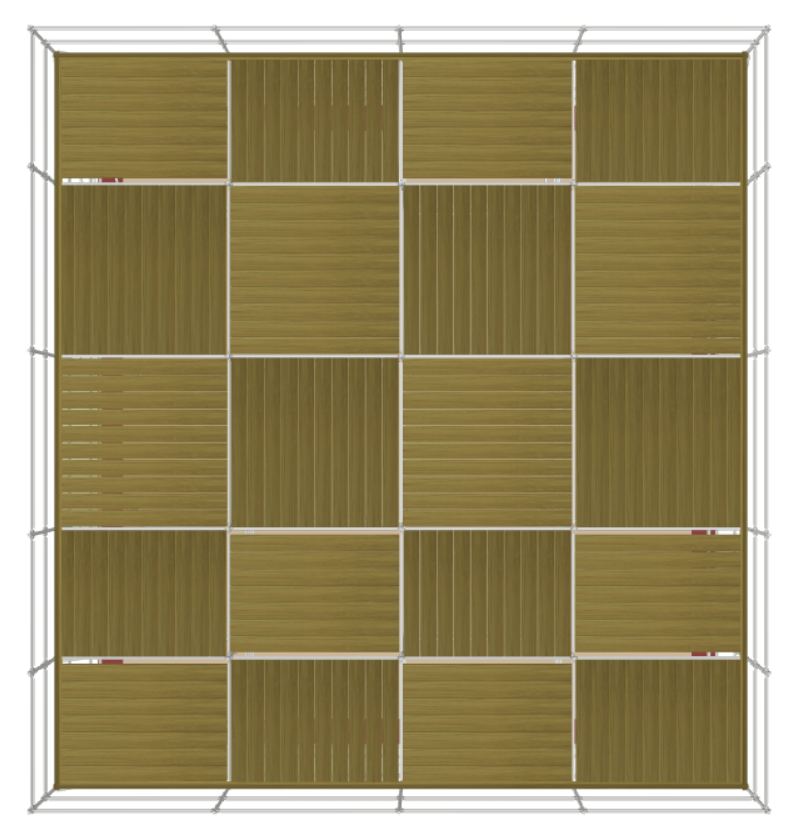
Alternate Decking
Boards are alternately aligned per bay in a Checkerboard Pattern.


