SMART Manager

Creating and Setting up your Site

If your company uses SMART Estimator, you can import projects from SMART Estimator, click here to find out how.

  1. Click on the Plus Button

    If you want to add a site manually firstly click the Add new site button located in the top right of the Sites tab.


  2. Create your Site

    This will open the new site dialog, where you can enter the details to create your new site, on the first page of the dialog you can enter the Site name, location and select a depot* if you have more than one. You can also select whether cameras are permitted on site (in certain cases such as reporting a defect the app will require a photo before proceeding, unless you choose the “No” option here) once completed click “✓ Save”.

    * Depots can be configured in the company setup tab.

    There are 2 options on the first site setup screen. Firstly, if your site does not allow cameras, you can disable the need for photos in the handovers, inspections and variations. Secondly you can enable stock control for the site, for more information on stock control in SMART Manager click here.
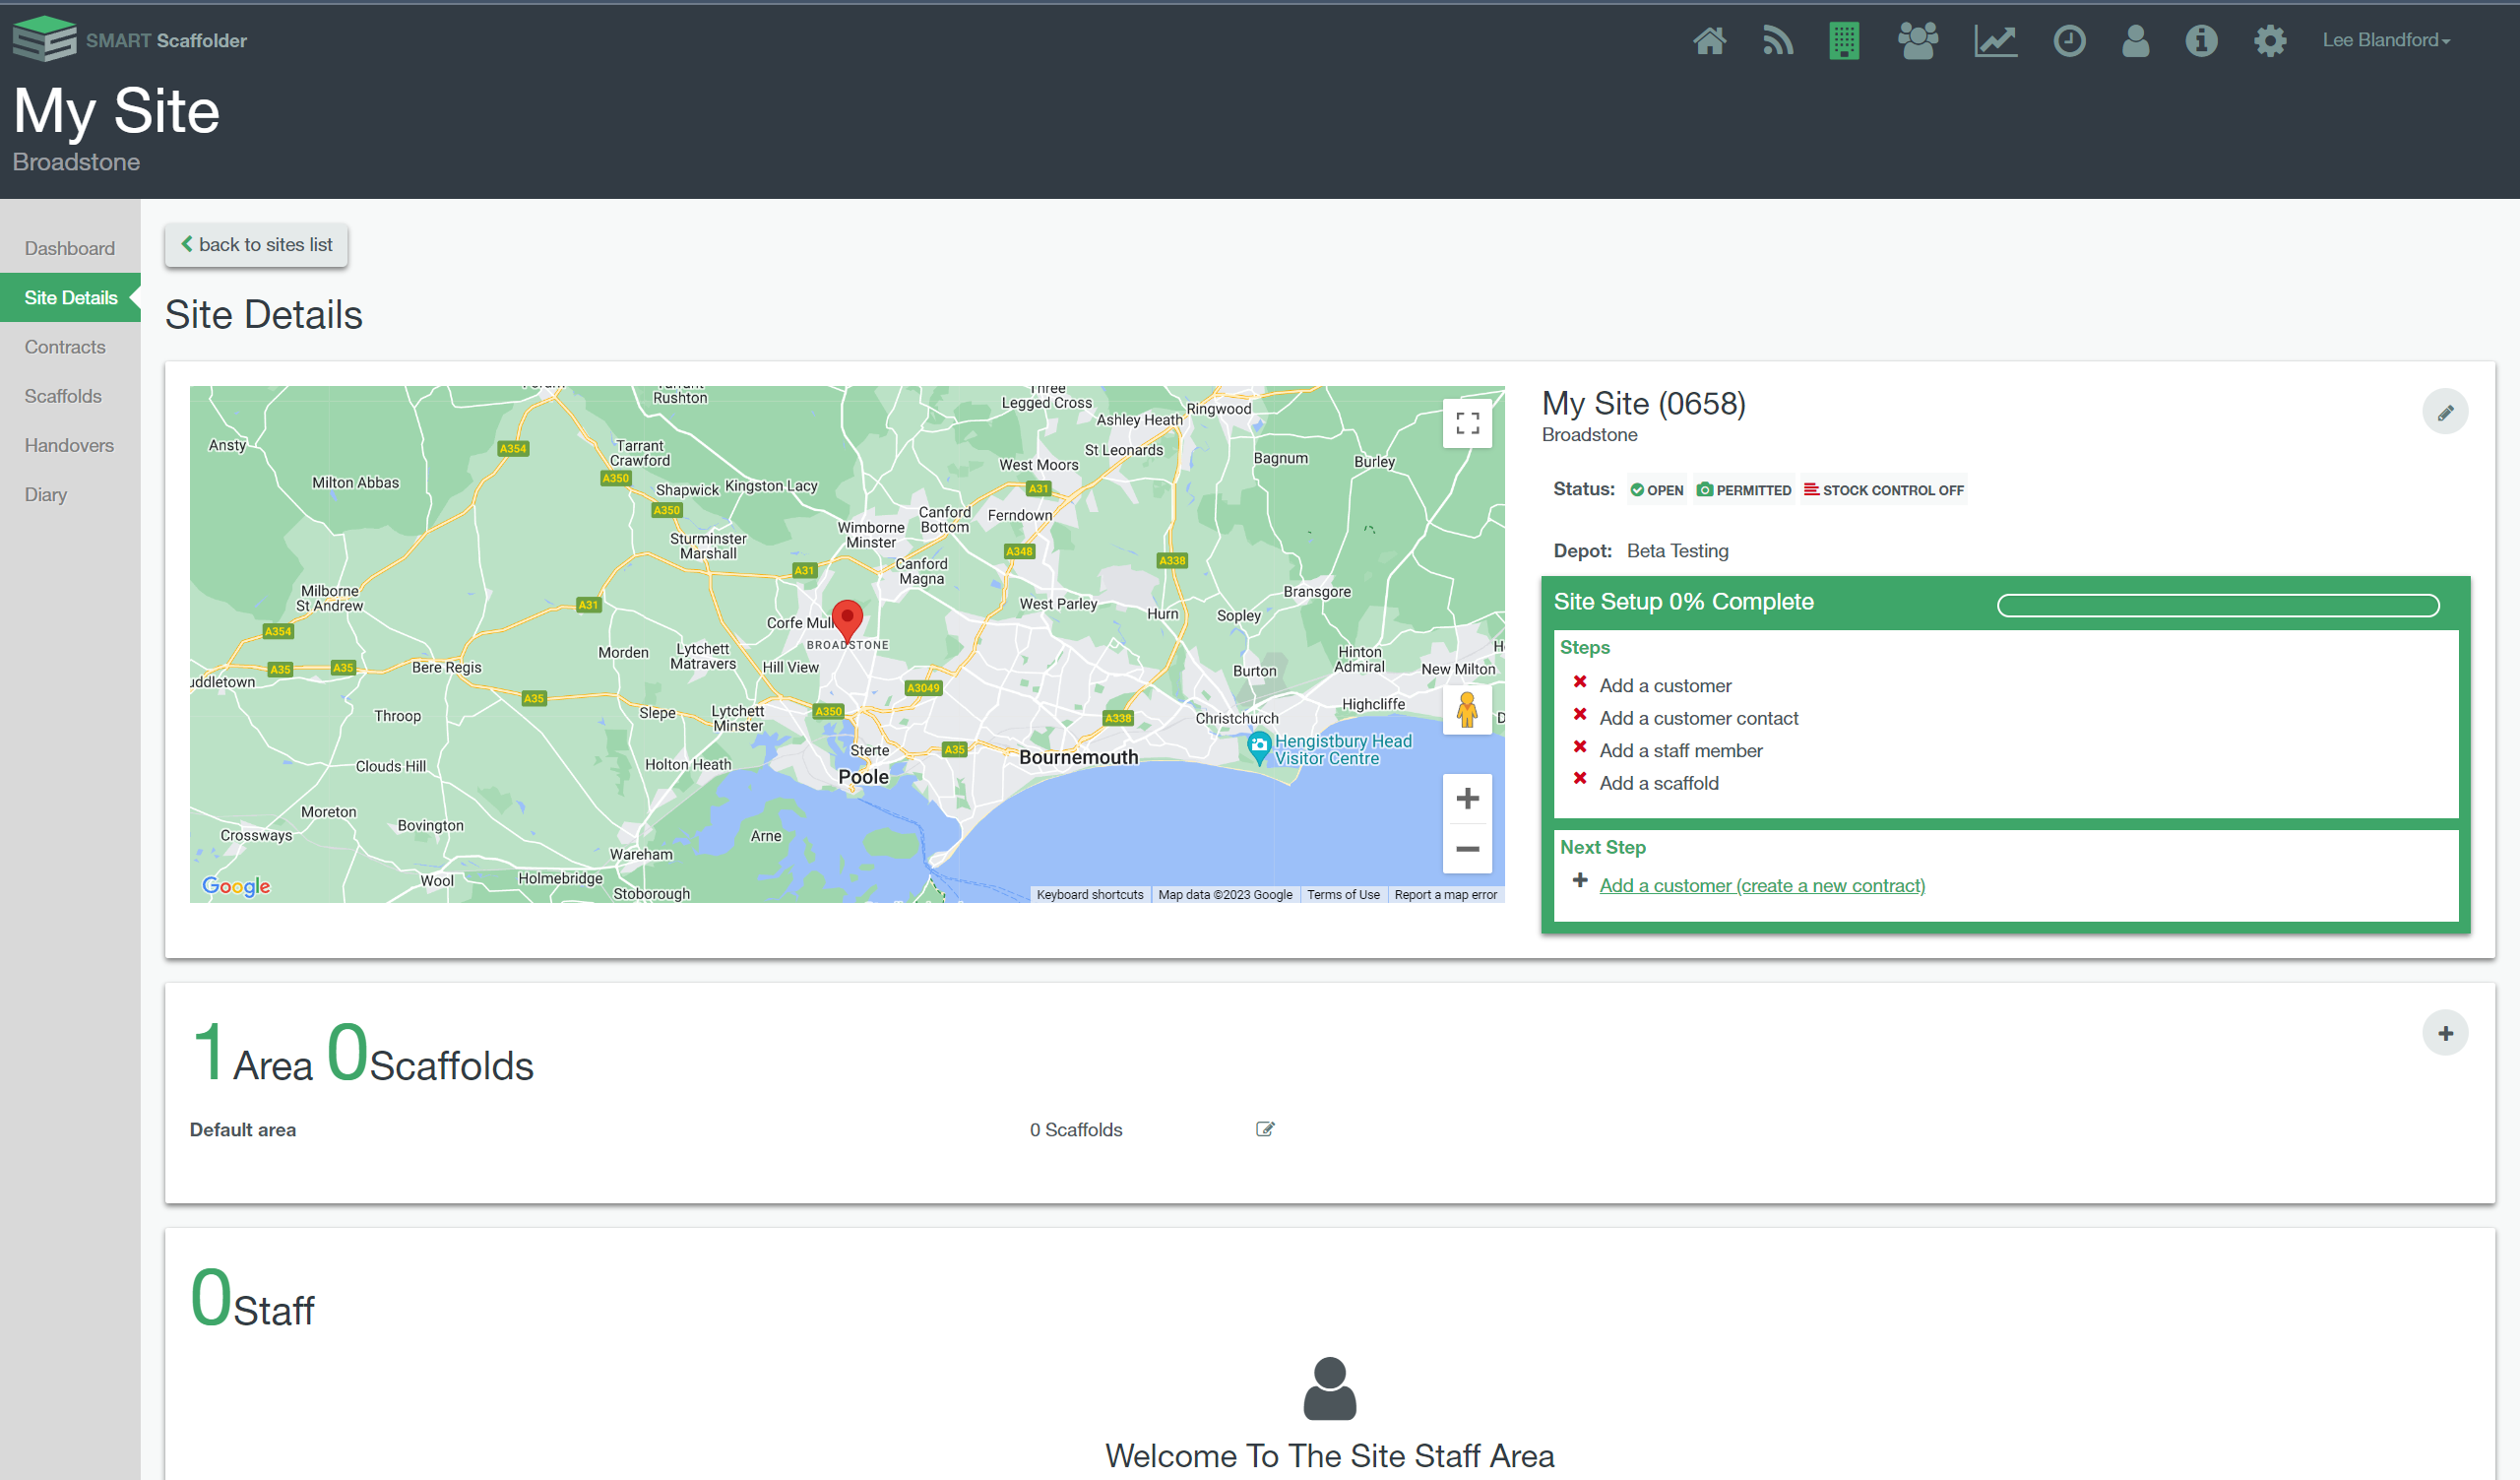
Site Setup Overview
Adding a Customer / Create a new Contract
  1. Click on “Add a new customer”

    There is a Site setup progress tracker highlighted in green, you can go to the next step by clicking on “Add a new customer (create a new contract)” to add your customer, this will open the “New Contract” dialog.

  2. Fill in the Fields

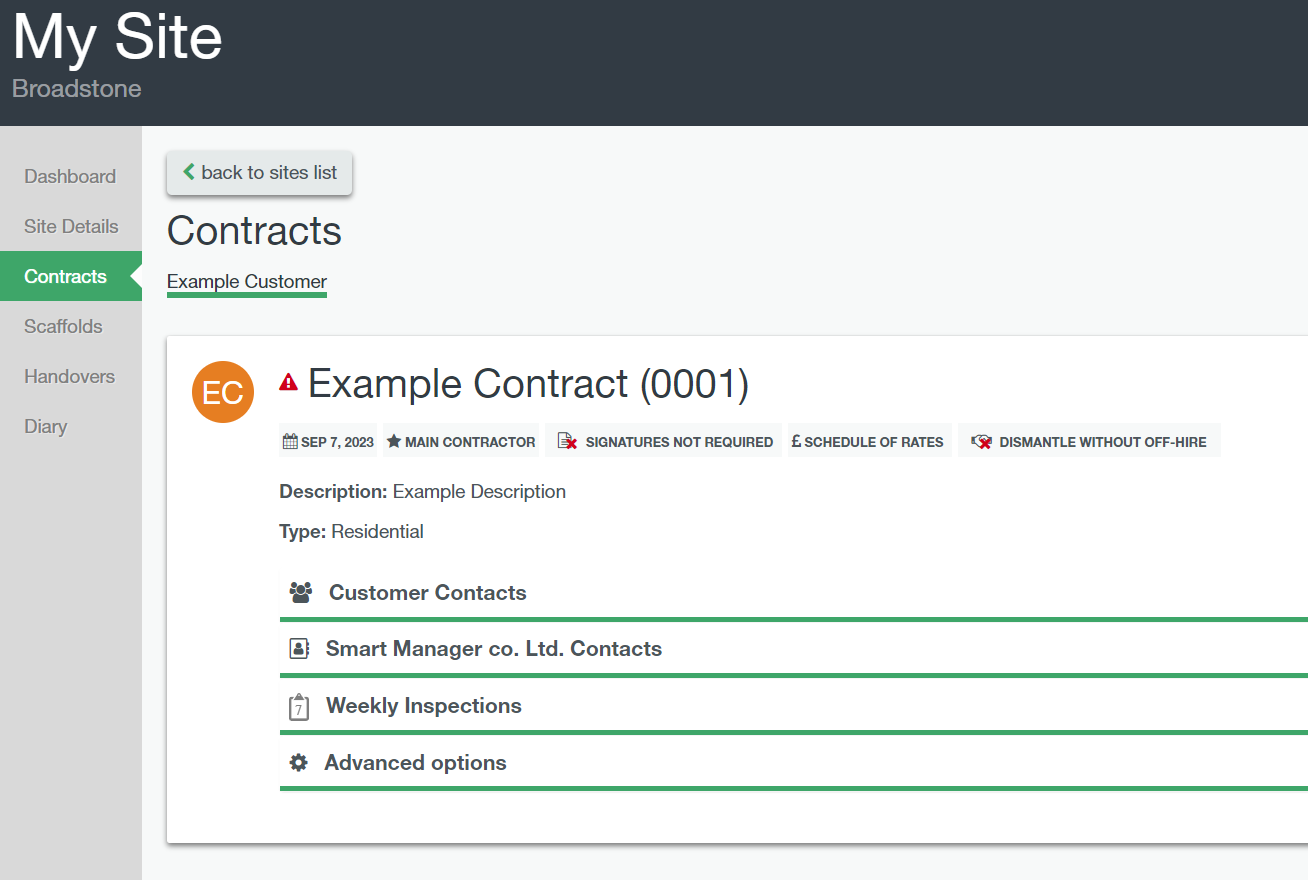
    Select the customer or add a customer by clicking the “+ Add” Button. Then set the contract name and reference for the new site’s contract (please note that the contract reference cannot be altered once scaffolds have been assigned to them) optionally you can set the Contract Type and optionally add a description for the Contract. Finally, complete the six tick options below as appropriate.


    “Is the customer the main contractor?”

    The main contractor will receive all the inspection and unsafe scaffold reports for the site, not just scaffolds assigned to their contract. You can only assign one main contractor per site.


    “Allow handover/off-hire documents to be submitted without the customer signature?”

    This will allow app users to bypass the mandatory customer signature when submitting handovers or off-hire certificates, by selecting the customer not present option in the signature section.

    Signatures can be captured at a later date and acceptance forms can be uploaded to the handover using the C.O.V.I Feature (Confirmation of Verbal Instruction). Click here to find out more.


    “Does the contract have an agreed schedule of rates?”

    This will determine whether or not variation instructions need to be submitted to the Estimator for pricing before completing the variation certificate.


    “Are you contracted to carry out inspections for this customer?”

    This will determine whether the user is prompted to set a next inspection date for the recurring ‘7 day’ inspections when handing over scaffolds.


    “Handover/Variation risk photos required?”

    This will determine whether the handover and variation risk photos are mandatory or optional.


    “Dismantle without off-hire?”

    This will determine whether the software will allow users to mark scaffolds as dismantled without first completing an off-hire certificate.

  3. Click the Save Button

    Click “✓ Save” to proceed once you are happy. This will create the contract for the customer selected, you will now be able to select the contract when adding scaffolds to the site. If you wish to assign more than one customer to a site, you can create additional contracts by navigating to the contract section on the left-hand menu.

    click here to find out how.

    Look out for Info buttons in the software, if you hover over these, they provide tips on usage.


Adding and Setting up a Customer Contact
  1. Proceed with the Next Step

    You should now notice that the Site setup progress tracker has reached 25% after completing one of the steps to setting up your site.


    Once you have added the required contracts select the next step on the setup progress tracker “Add a customer contact”.

  2. Fill in the Fields

    This will open the “Add Customer Contact” dialog, here you select the contract you wish to add a contact for. Then fill out the form with the Contact name, Contact type (site contact or office) Email address (this must be correct as this will be used for sending handover and inspection reports), Phone number and finally Subscriptions. Under subscriptions you need to tick which reports you wish the customer to receive.


    All sites require at least one contact. If the contact is not set the site will not appear for staff members within the SMART Handover or SMART Inspection apps.

  3. Click the Save Button

    Click “✓ Save” to proceed once you are happy. All reports that you have specified that the customer contact is allowed to receive will now be sent to their email address.

    For more information about adding additional customers or internal contacts, click here.

  4. Prompt to Consider

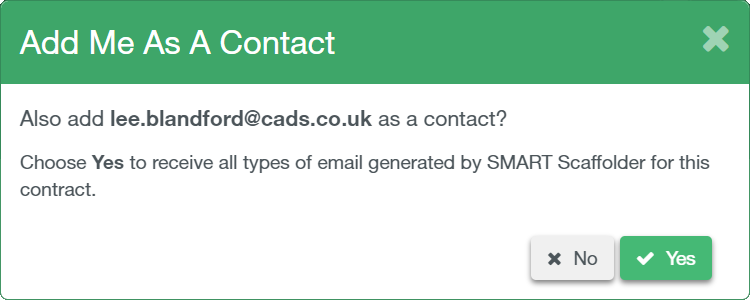
    After clicking save, the “Add Me As A Contact” dialog will appear, clicking “✓ Yes” will add you as a Contact to this Site and your email will receive all the reports for this contract.

Adding and Setting up a Staff Member
  1. Proceed with the Next Step

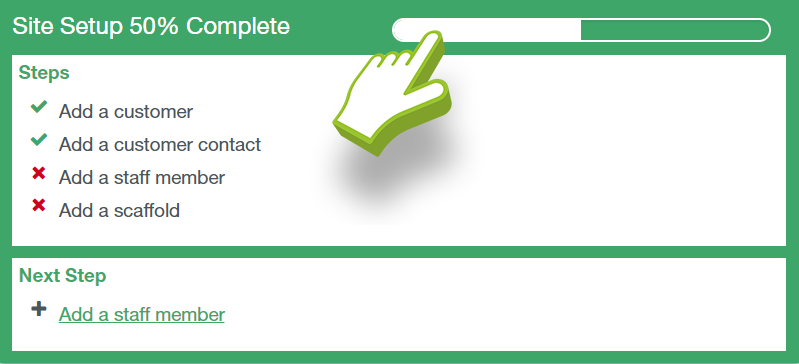
    In a similar manner to the previous step, the progress tracker for site setup has now reached 50% following the completion of one of the steps.


    Once you have added all the required site contacts you can proceed to the next step on the Site setup progress tracker (located in site details) “+ Add a staff member”.

  2. Assign staff to site

    Here you select a member of staff to assign to the site (please note the site will only be visible in the app to staff members assigned here)

  3. Click the Save Button

    Click “✓ Save” to proceed once you are happy. The Staff Members you’ve assigned to the site will now be visible in the staff section at the bottom of the site details screen.


    To add additional members of staff click the “+ Add Staff” in the staff section at the bottom of the site details screen.

Adding in your First Scaffold
  1. Proceed with the Next Step

    Once a staff member has been assigned to your site, the site setup progress bar will show that it’s now 75% complete. There is only one step left to complete the site setup.


    The last step for initial site setup is to add your scaffolds, click “+ Add a scaffold” in the site setup tracker on the site details screen.


    As an alternative, you may import scaffolds in bulk using our CSV import tool. For more information, click here.

  2. Fill in the Scaffold Details

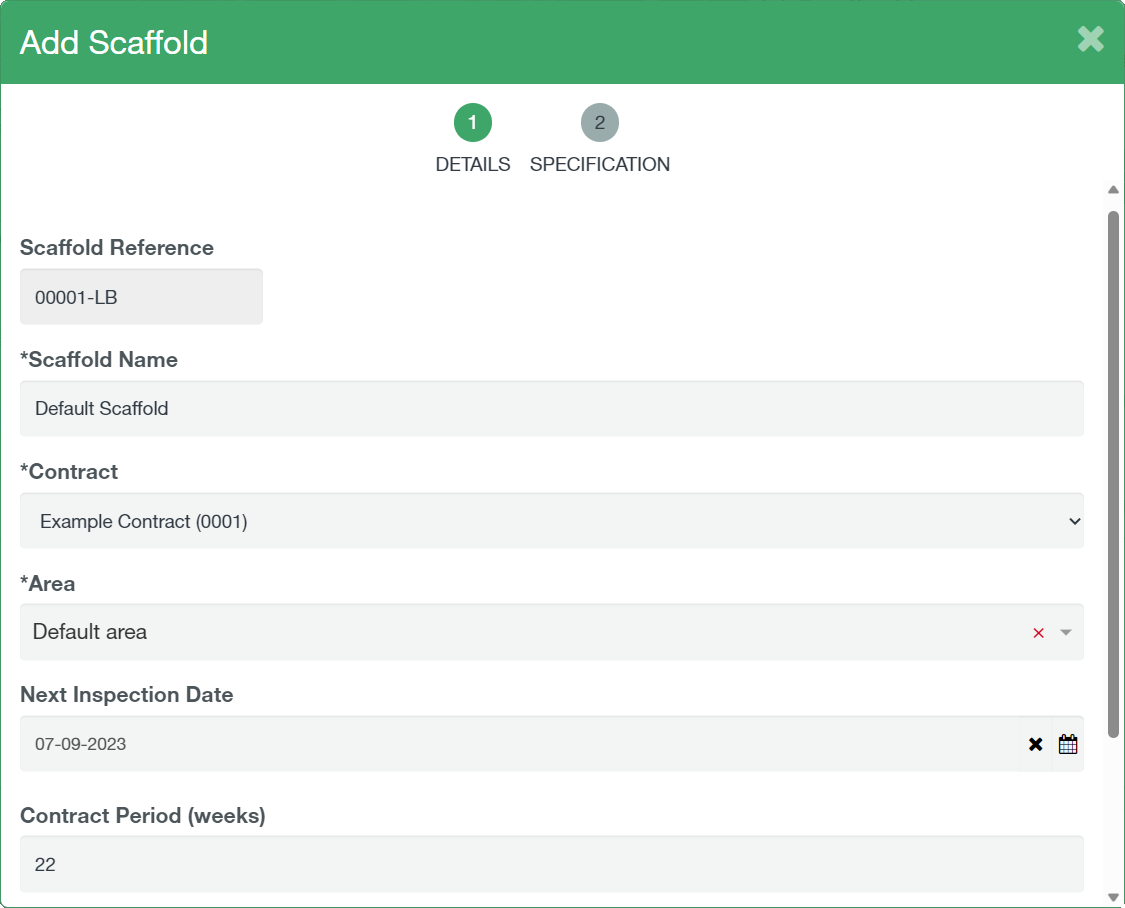
    This will open the dialog for adding your first scaffold to the Site. You’ll first see the “Add Scaffold Details” section of the dialog. In Smart Manager, the scaffold reference serves as a unique identifier for identifying each scaffold. The scaffold reference cannot be edited. It’s automatically generated for you, so you do not need to worry about it. It will consist of a 4 digit number and suffix of the quick ID for the staff that created it. Staff members Quick ID are set in the dialog to add or edit Staff profiles, click here to find out more.

    In this screen, you fill out the scaffold name and choose the Contract the scaffold relates to. As well as the Area you wish to group the scaffold under. Assign the next inspection date and the quoted contract period (in weeks) and then complete the two tick options below. Once you have completed the first page, proceed to the second page by clicking “> Next Button”.


    “Set scaffold to on-hire?”

    If your scaffold is yet to be handed over, Leave this unticked. If the scaffold has already been handed over tick this and enter the on-hire date for the scaffold.


    “Will the scaffold be affected by adverse weather?”

    This will determine whether your scaffold is subjected to adverse weather conditions (e.g. High winds or Snow).

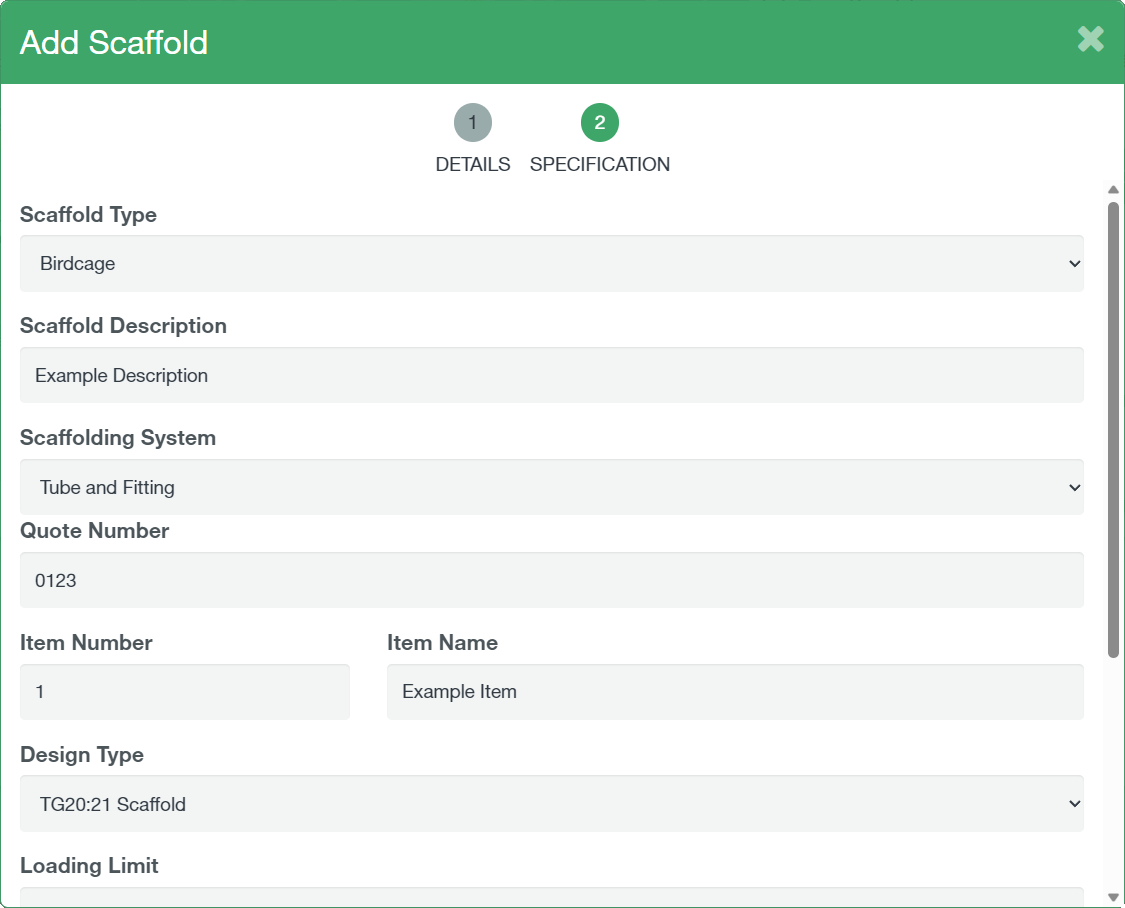
  3. Complete the Specification

    Upon pressing the “> Next” button, the “Add Scaffold Specification” section will appear. Fill out the following fields according to the scaffold specifications.

  4. Finishing the initial setup

    Once you have completed the second page as appropriate, click the “✓ Save” button. This will complete the sites initial setup and create the first scaffold. The site setup tracker on the site details screen will now be replaced with a box depicting the number of customers, staff and contacts on the site.

    To find out how to add additional scaffolds Click here.

    Congratulations on setting up your first Site and scaffold. Click here to find out how to handover a new scaffold using SMART Handover.