SMART Manager
-
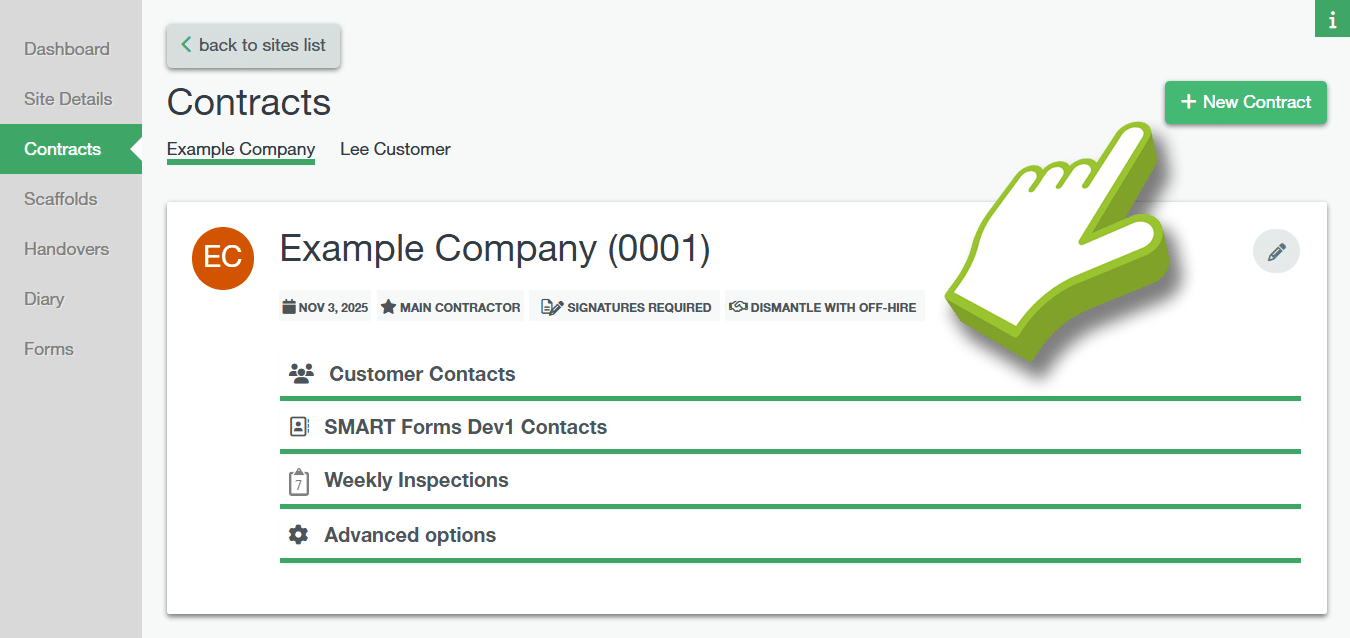
Click on “New Contract”
You can assign as many contracts as you like to a single site within the software. You can add multiple contracts for the same customer or multiple customers to suit your needs. To add a new customer contract , click the “New Contract” button in the top right-hand corner of the contract section.>
-
Fill in your Details
This will open the “Add Customer contract dialog ”.
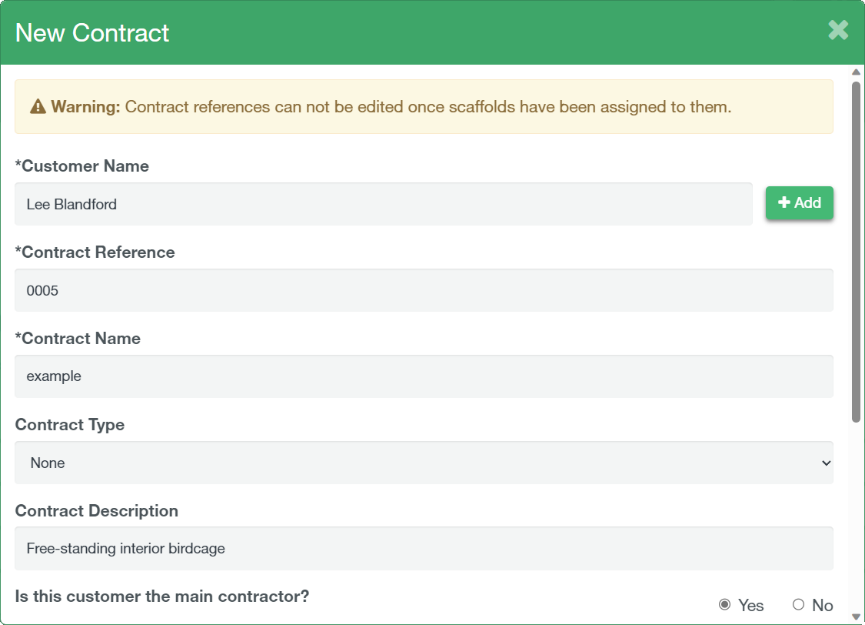
Select the customer and set the contract reference for the new site’s contract (please note that the contract reference cannot be altered once scaffolds have been assigned to them) complete the six tick options below as appropriate.
“Is the customer the main contractor?”
The main contractor will receive all the inspection and unsafe scaffold reports for the site, not just scaffolds assigned to their contract. You can only assign one main contractor per site.
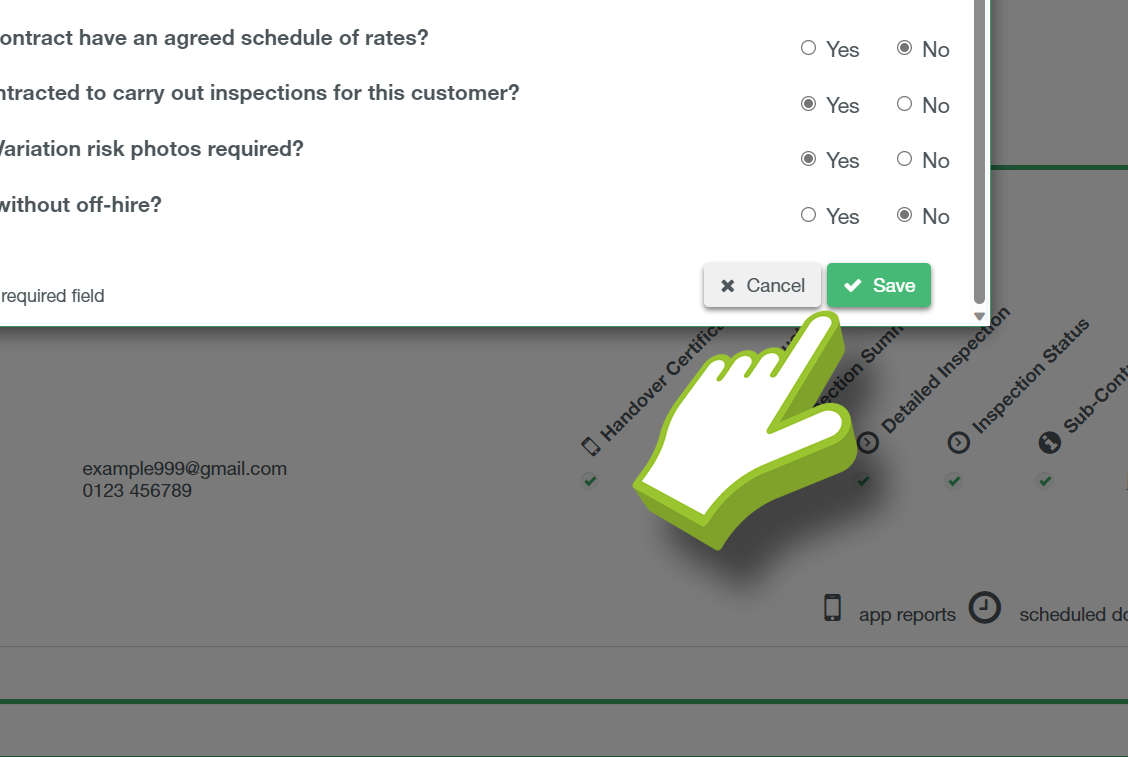
“Allow handover/off-hire documents to be submitted without the customer signature ?”
This will allow app users to bypass the mandatory customer signature when submitting handovers or Off-hire certificates, by selecting the customer not present option in the signature section.
Signatures can be captured at a later date and acceptance forms can be uploaded to the handover using the C.O.V.I Feature (Confirmation of Verbal Instruction). Click here to find out more.
“Does this contract have an agreed schedule of rates?”
This will determine whether or not variation instructions need to be submitted to the Estimator for pricing before completing the variation certificate.
“Are you contracted to carry out inspections for this customer?”
This will determine whether or not variation instructions need to be submitted to the Estimator for pricing before completing the variation certificate.
“Handover/Variation risk photos required?”
This will determine whether the handover and variation risk photos are mandatory or optional.
“Dismantle without off-hire?”
This will determine whether the software will allow users to mark scaffolds dismantled without first completing an Off-hire certificate.
-
Save your Contract
Once you have completed the “Add Contract” form click “✓ Save” to create the new contract. This will now be visible in the drop-down to select when adding scaffolds to the site.


-
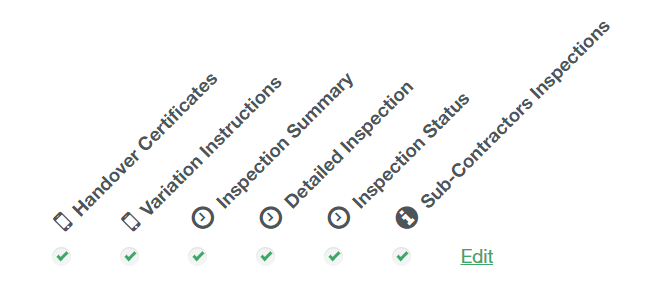
Edit “Contract”
Within SMART Manager, you can edit and manage your contracts at any time. By clicking the Pencil icon in the contract summary screen, you can edit the details you set when creating the contract.

-
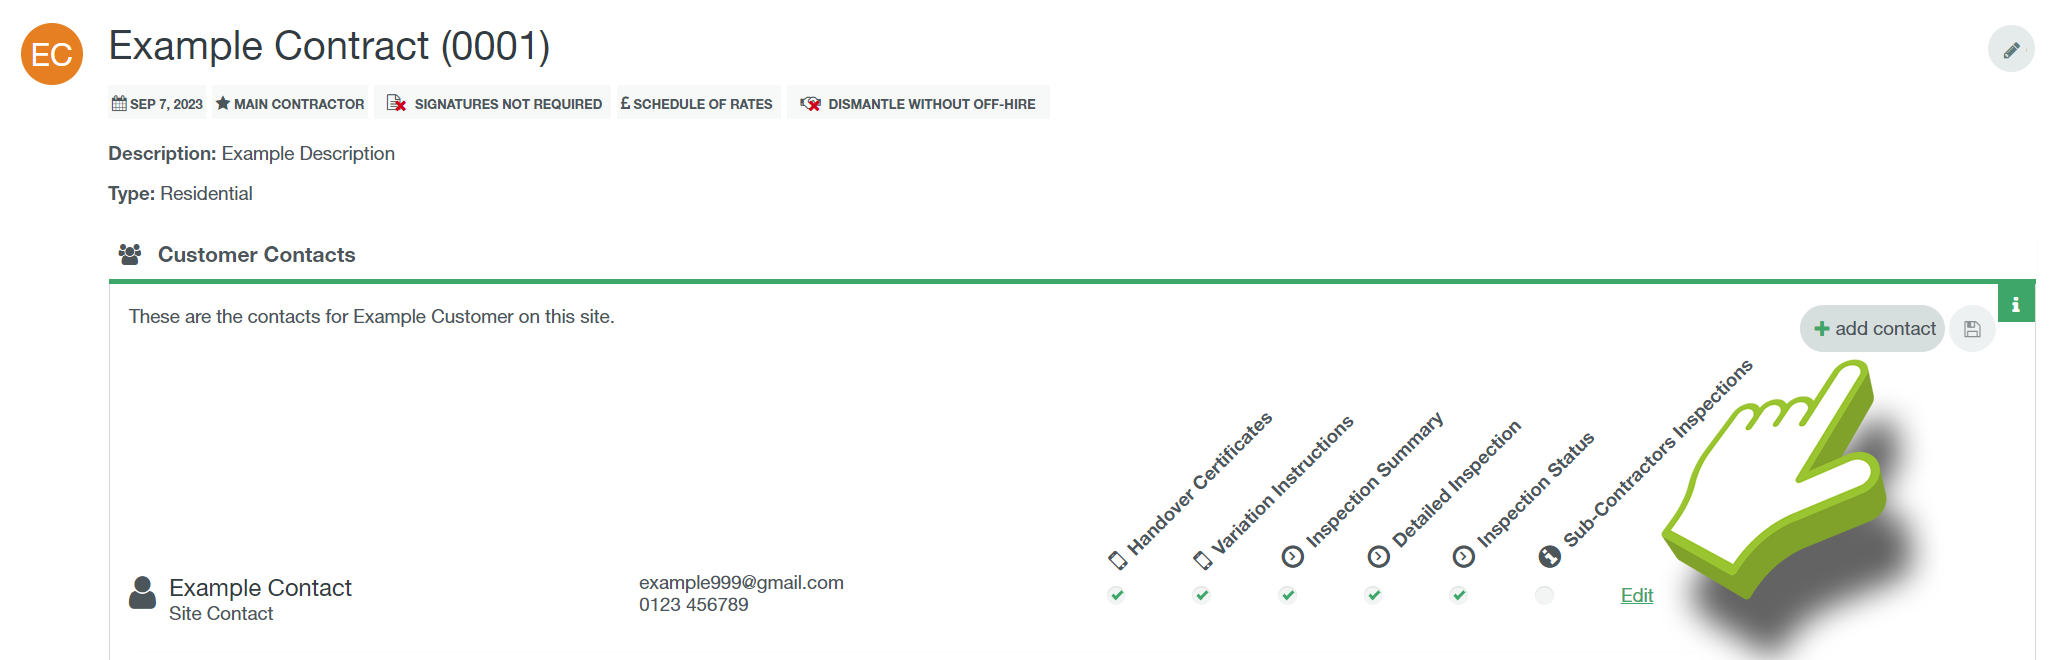
Edit “Customer Contacts”
You can also edit existing customer contacts or add additional contacts in the “customer contact” section.
In the customer contact section , you can edit an existing contacts details by clicking “edit” as well as selecting or deselecting tick boxes to determine which email reports the contact will receive (ensure after making any changes you save your changes using the “save changes” icon in the top right of the section).
You can also add additional contacts, click here to learn more about contacts.

-
Edit “Weekly Inspections”
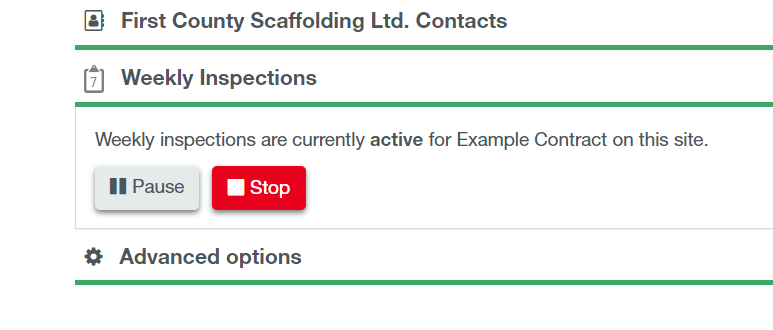
You can pause or stop the weekly inspections in the “weekly inspections” section, this will allow you to pause and resume inspections for the contract e.g. for a week’s shutdown over Christmas. The software will record the reason for the pause and a date for the inspections to automatically resume.

If your contract to carry out the inspections for the customer has ended, you can stop the inspection without closing the contract completely. To do this click “◼ stop” in the weekly inspection section. The software will prompt you to confirm this decision.


-
Add additional Contact
After you have created your contract, you can add additional email contacts to receive copies of the reports automatically. Using the tick box settings, you can control which report each contact receives. There is also a BCC email function to include internal email contacts in the report emails.
To add an additional customer contact , click on the customer contact heading on the contract summary to expand the contact list. Then click add contact:
-
Option 1: Fill in the Form
Once you click add contact it will open the contact dialog, here you can add the contact name, contact type (this will denote whether they can sign documents on-site) email address, phone number and choose which email reports they will receive automatically. (For more info on reports click here)

-
Option 2: Edit the Table
You can also edit the report allocation or contact details by clicking Edit next to the contacts line on the table. Below the customer contacts is the Company contacts, here you can set up your members of staff who need to receive the scheduled email reports. You can add a BCC email which will receive all emails generated for the contract. Or you can add individual staff members from the staff list and set which reports you wish them to receive, just like the customer contacts.


