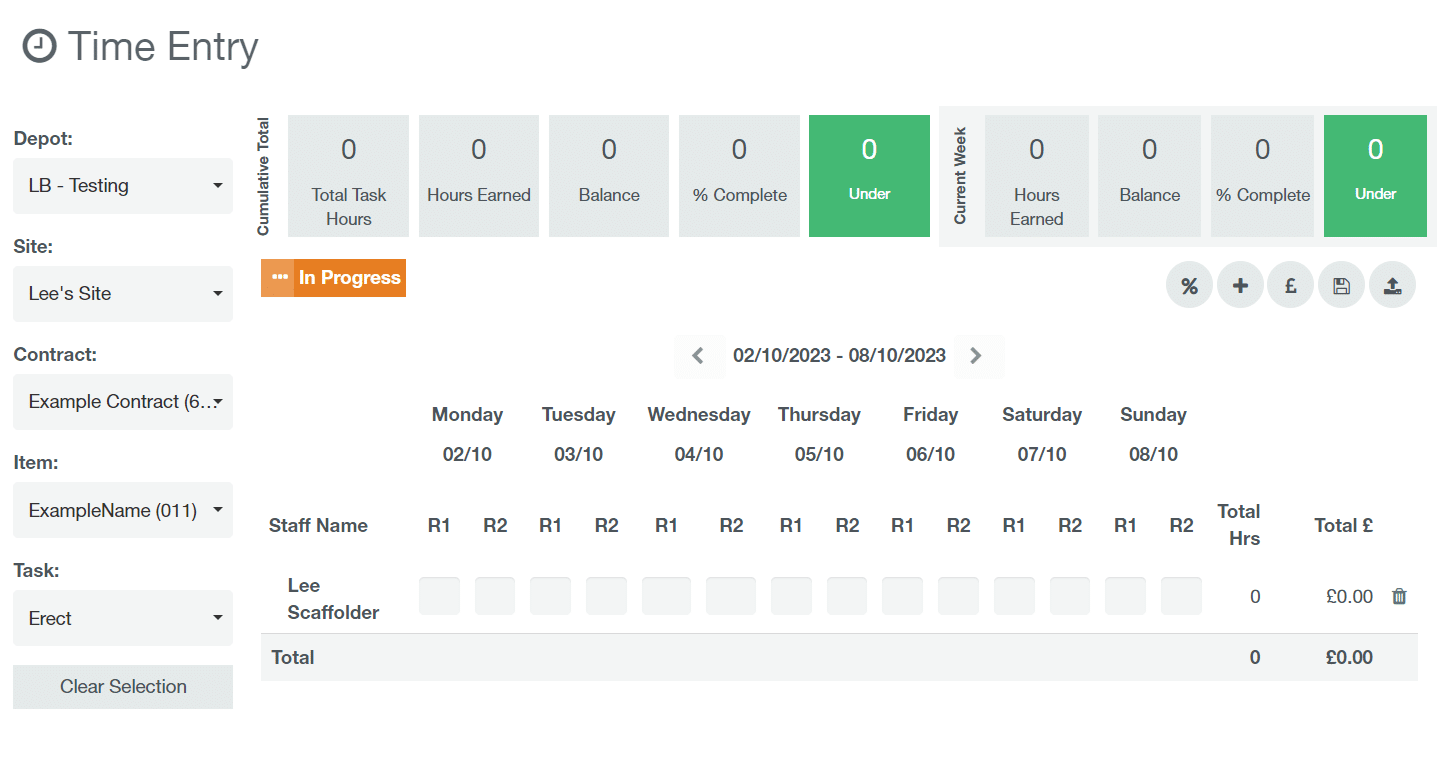
The time entry section allows you to record labour time against a task i.e. erect or dismantle for a given item.
Recording Time against a Task
Filter the Time Entry
Before you can record your labour time you need to open a task. Use the drop-down boxes on the left-hand side of the time entry section to select Depot, Site, Contract, Item and then Task.
Select the Data Range
Once you have selected a task you can record labour hours against a scaffolder.
Once you have selected a task you can record labour hours against a scaffolder. First, select the date range you are recording hours for using the arrows either side of the Date range indicated.
Allocate Labour Time
For each day you can record the hours under either R1 (Rate 1), R2 (Rate 2) or a mixture of both. The Rates are configured in the Staff details screen. Click here for more info on configuring rates.
To record hours against a task, enter the number of hours for each staff member under the relevant date and rate.
Once complete click the “save changes” button in the top right of the time entry section.
Designate Percentage Completion
Once you have recorded your required labour time you need to update the percentage complete of the task. Click the “% complete” button adjacent to the save button in the top right of the section.
Then enter the percent complete for the task and click “✓ Save”. For example, if the task is to erect a 10 lifts scaffold and you have erected 5 lifts enter 50%. Please note this is the percentage complete for the specific task not the overall contract.
You will notice as you record hours and update the % complete your task overview along the top will update. Here you can track the progress of a task at a glance, with the coloured boxes indicating if the task is on track to complete within your estimated labour time or over. It shows this overall and for the current week.
Adding the Expenses
You can also add expenses by clicking the “£ add expenses button in the top right corner of the section. This will allow you to record your expenses per staff member for the current week.
Record any required expenses and click “✓ Save”.
Submit the Timesheet
Once you have recorded the time, percentage complete and any expenses for the current week. Click the “submit” button in the top right-hand corner of the section. The Timesheet has now been successfully submitted.


 You will notice as you record hours and update the % complete your task overview along the top will update. Here you can track the progress of a task at a glance, with the coloured boxes indicating if the task is on track to complete within your estimated labour time or over. It shows this overall and for the current week.


