-
Export to SMART Manager
If you are a user of the SMART Estimator software, you can export projects from your Enterprise Server and import them straight into SMART Manager.
-
Export the Project
Firstly, In your SMART Estimator software, you can create a “Cloud Export File” by opening the file menu. On the vertical sidebar, click on the “Projects” tab. Then select a project and then click the “Create Cloud Import File” button and then click on the action button.
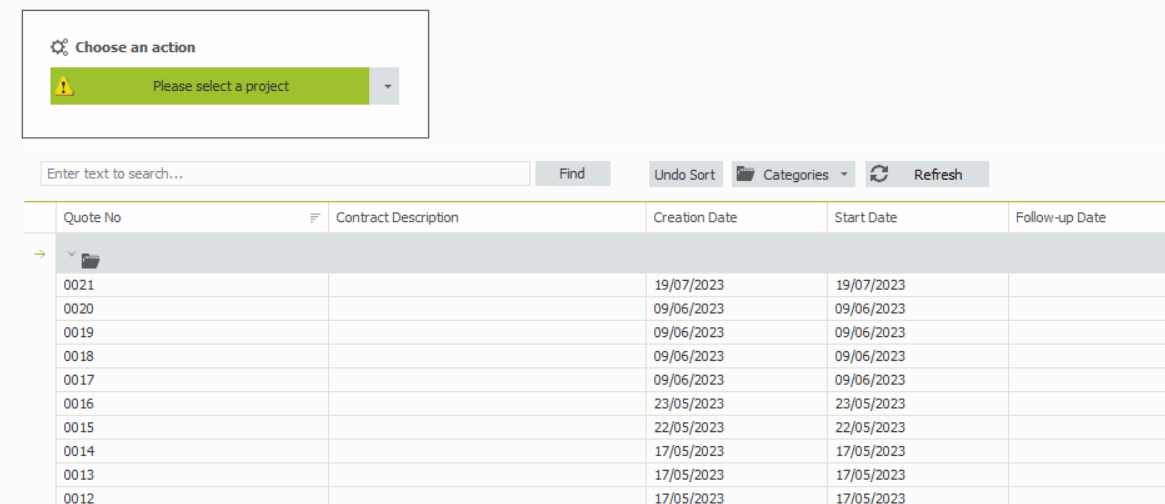
You’ll immediately get prompted whether or not you wish to open the project and then export your project. Click “Yes” to continue.

-
Save your File
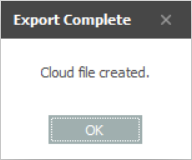
This will open a file browser dialog to allow you to save the Cloud Export File onto your computer. Choose where you wish to save the file carefully, you will need to navigate here later.

You will see a message to confirm the export was successful.
-
Click the “Import” button
Once you have created your cloud export file, open SMART Manager and navigate to the Sites tab, the import function is accessed by clicking the import button in the top right of the screen.

-
Click the “Browse” Button
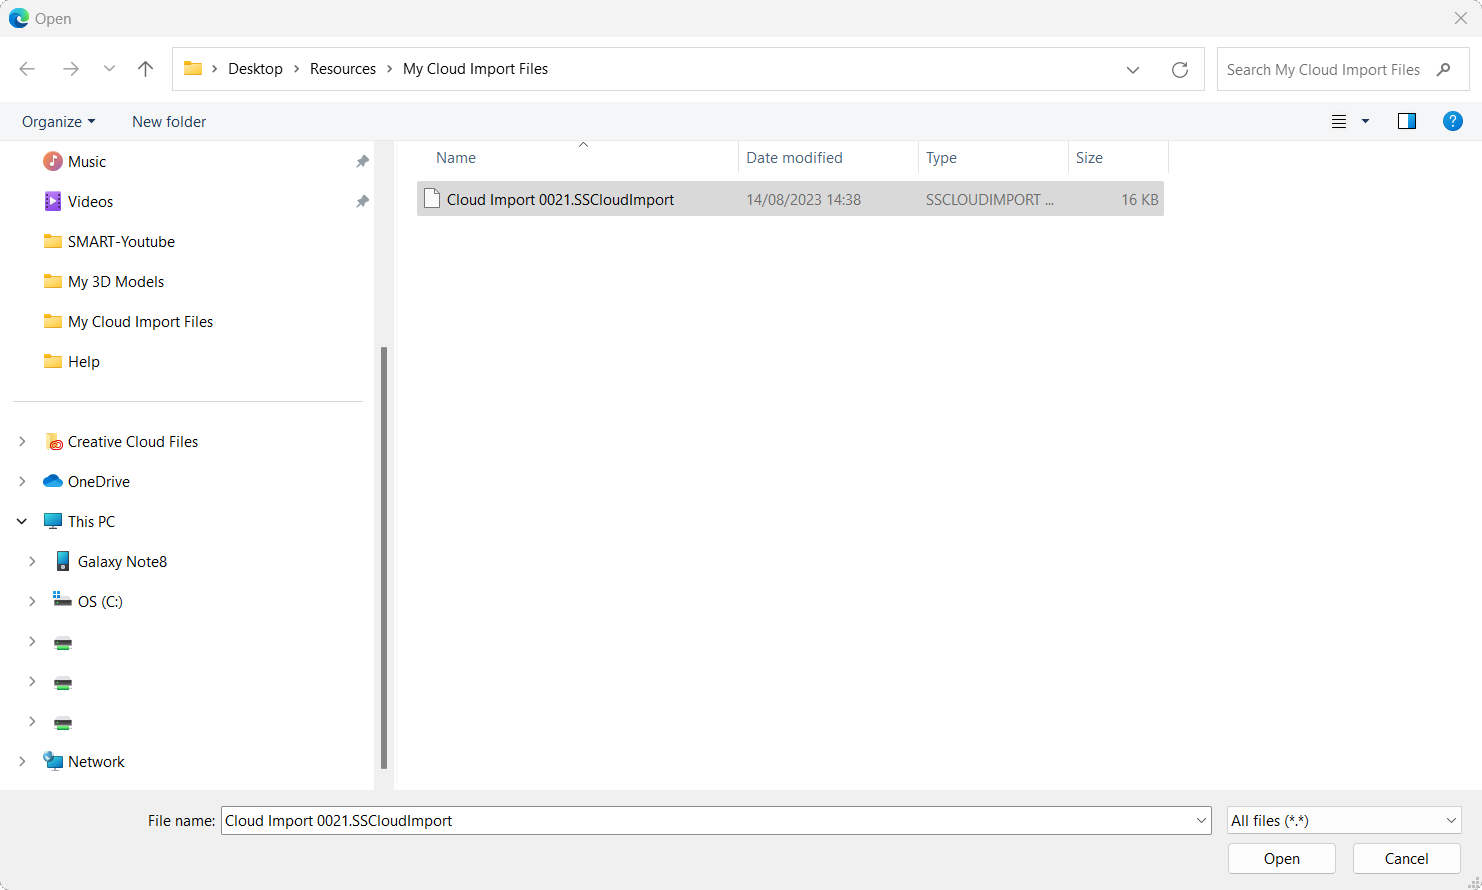
This will start the import wizard, click the “ browse” button and navigate to the location of your cloud export file created in the previous step.

-
Locate your File
Select your cloud export file and click “open”. Then Click “next”.
-
Site Details Page
On the first page of the Import dialog, enter the Site name, Site address, Depot and whether cameras are permitted on site. Then click “next”

You can optionally enable the Stock Control feature for this site in SMART Manager here. For more information, click here.
-
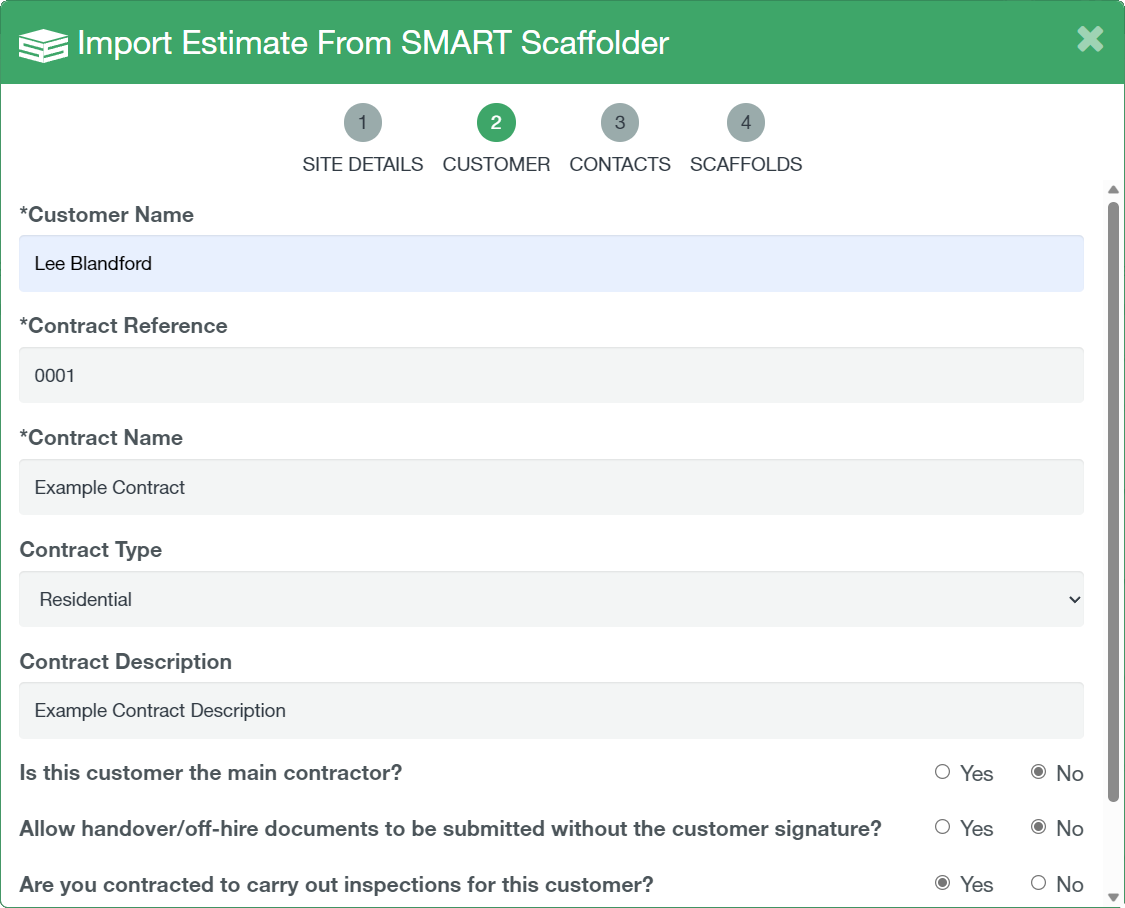
Customer Page
The customer details should be prefilled, if it’s a new customer you will be prompted to save their details. Set the contract reference for the new site’s contract (please note that the contract reference cannot be altered once scaffolds have been assigned to them) complete the three tick boxes at the bottom of the window as appropriate. Once complete click “next”.
-
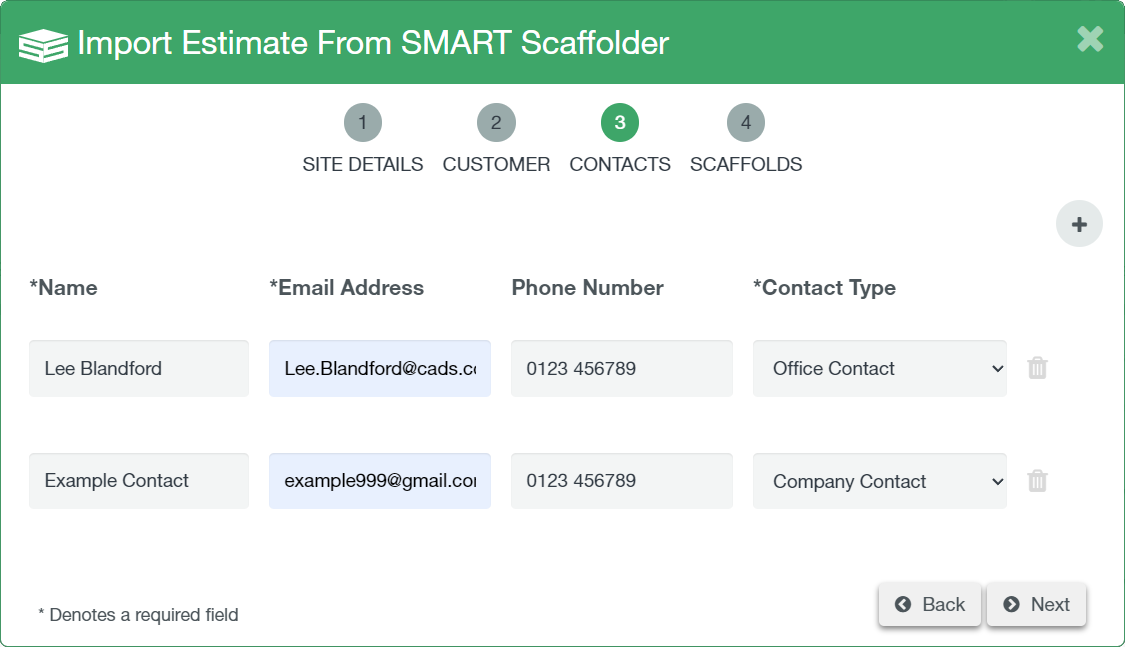
Contacts Page
Ensure the contacts imported from SMART Estimator are correct, or add as required using the add contact button in the top right of the box. Once you’re happy with the contacts for the site click “Next”.
-
Scaffolds Page
The next screen displays the Scaffolds being imported. Review the scaffolds to import, you can deselect scaffolds you don’t wish to import.
Once you’re happy click the “✓ Save” button. This will close the import dialog and open the site you have just imported. Add a member of staff using the “add staff” button.

You have now imported your project from SMART Estimator into SMART Manager.
SMART Manager
What’s New?
SMART Manager
-
Introduction to SMART Manager
Navigating SMART Manager
Dashboard
Staff
Sites
-
Adding a Site
Importing a site from SMART Estimator
Contracts and Customer Contacts
Areas
Assigning Staff to the Site
Scaffolds
-
Adding a scaffold
Batch Importing from CSV
Scaffold Details Screen
Editing Scaffolds
Off-hire or Dismantle scaffolds in SMART Manager
Scaffold Bulk Actions
SMART Handover Mobile App
SMART Inspector Mobile App
-
Navigating the SMART Inspector App
Home Screen
Sites
-
Adding a Site
Adding an Area
Adding a Scaffold
Editing a Scaffold / Scaffold Details Screen
Adding to the Scaffold Diary
Dismantling a Scaffold
-
Recording defects
Editing a Defect
Deleting a Defect
Signing and Submitting your Inspection
Issuing remedial action report
Generating an Unsafe Scaffold Report
SMART Forms Mobile App
Troubleshooting


