SMART Manager
-
Choose the Contract
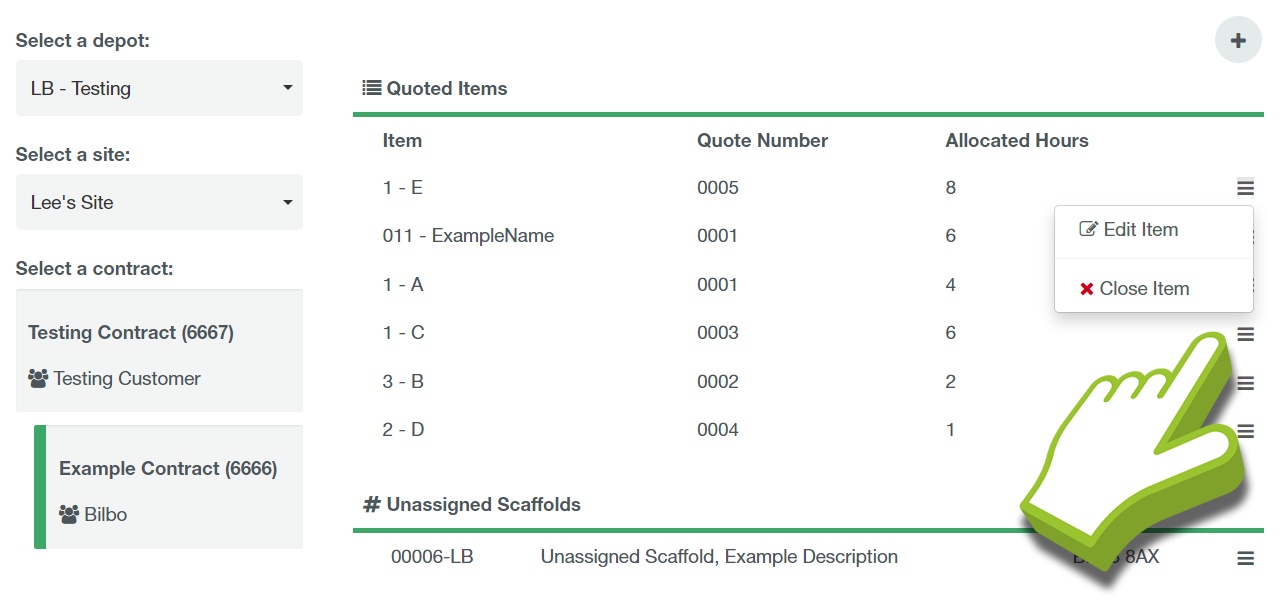
Open the Item section of the Timesheet tab, then select a Depot, then select the Site within the Depot you wish to create an item for. Once you have selected the Site you can choose the Contract to record the Item against.

-
Click the Plus Button
Once you have selected a Site and contract, you will see 2 headings:
Quoted Items – Items already added to the site.
Unassigned Scaffolds – Scaffolds in the site that have not been assigned to an item.To add a new item, click the “add item” button in the top right of the Items section.
This will open the “add Item” dialog box. -
Fill in Item Details
You will need to select the Quote number (if you imported from SMART Estimator this will have been pulled through) if not this can be added to the scaffold details.
Click here for info on creating the Quote Number.
You will also need to add an Item number, Item name and Allocated hours. The allocated hours is how many hours you have estimated the Item will take to complete (including erection, adaption and dismantle).

-
Save your Item
Once you have completed all the fields. Click “✓ Save” to create the item, the new item will now appear under the “Quoted Items” header.

When you import a site from SMART Estimator all the scaffolds will be assigned to the relevant items automatically. Likewise, when you add a scaffold to a site where the Quote number and Items have already been established you can assign your scaffold to an item when created.
If you have an existing scaffold you wish to assign to an existing item, you can do so in the Item section. Select your required contract by filtering by depot, site and then contract. Once you select the contract you should have all your unassigned scaffolds displayed under the heading “# Unassigned Scaffolds”.
Click on the hamburger Icon next to the scaffold you wish to assign to an item and click on “Assign to item”.

This will open the Associate Scaffold dialog where you can select the Quote number and Item you wish to assign the scaffold to. Select accordingly and click “✓ Save”.

To edit or close an item click on the hamburger symbol adjacent to the Item and select “Edit Item” or “Close Item”.

Editing an Item
If you select the “Edit Item” option, you will open the “Edit Item” dialog where you can amend the quote number, item number, item name and allocated hours. Click “✓ Save” once you have made the required changes.

Closing an Item
If you select the “Close Item” option, the software will prompt you to confirm you wish to close the item. Click “Yes close it” to proceed or “No keep It” to cancel.

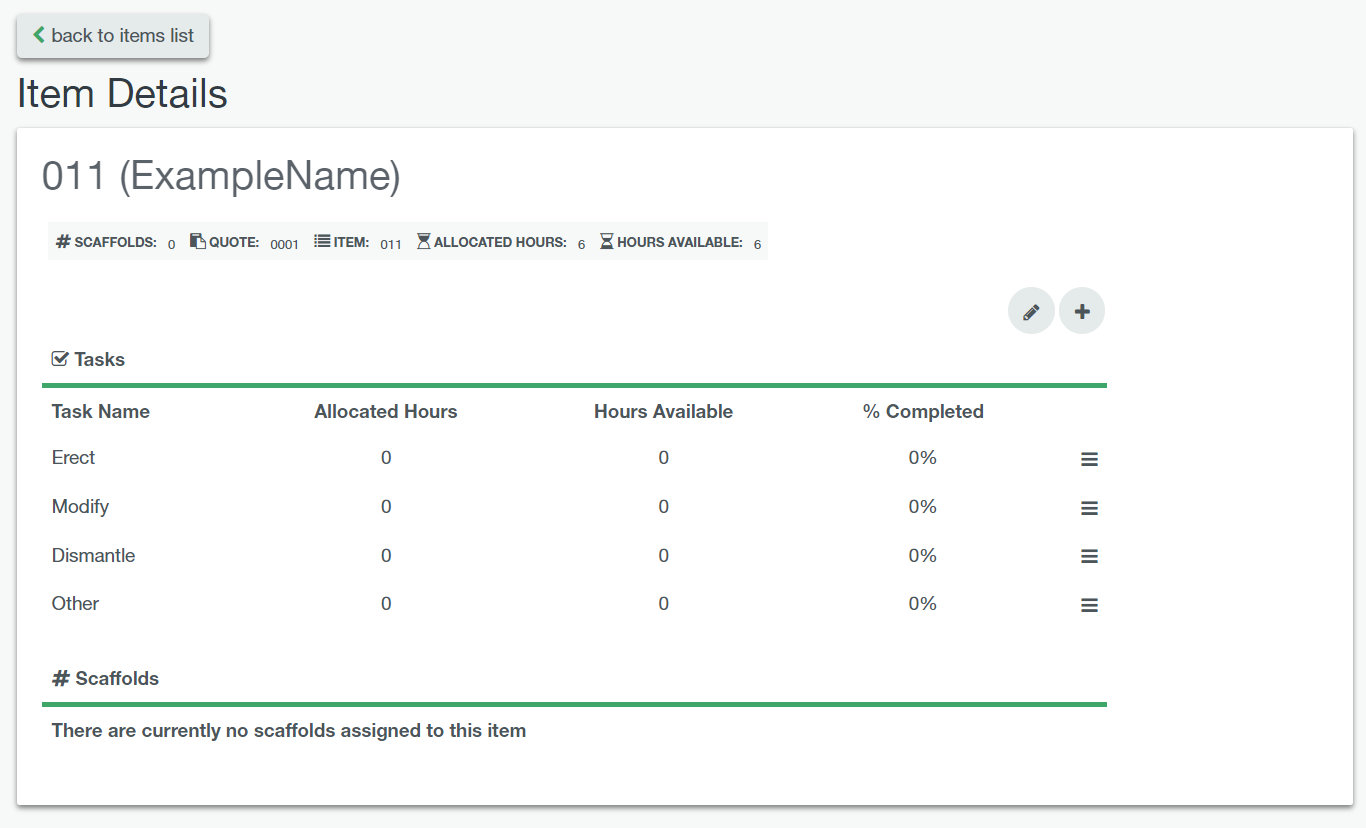
If you click on an item under the “Quoted Items” heading. It will open the Item Details screen for the selected item. Here you will find an overview for the tasks assigned to the item, allocated hours, hours remaining and percentage completed. Below the task is an overview of assigned scaffolds.

Adding and Editing Tasks
Clicking on the the pencil button in the top right you can edit the item.
Clicking on the plus button allows you to add a new task and allocate hours to it.
Deleting Tasks or Viewing the Timesheet
Clicking on the hamburger symbol for a single task will allow you to edit the task, delete the task or view the timesheet for the task, here you can record labour hours against it as well as updating the % standing. Click here for info on recording time against a task.


