SMART Manager

Scaffold Bulk Actions

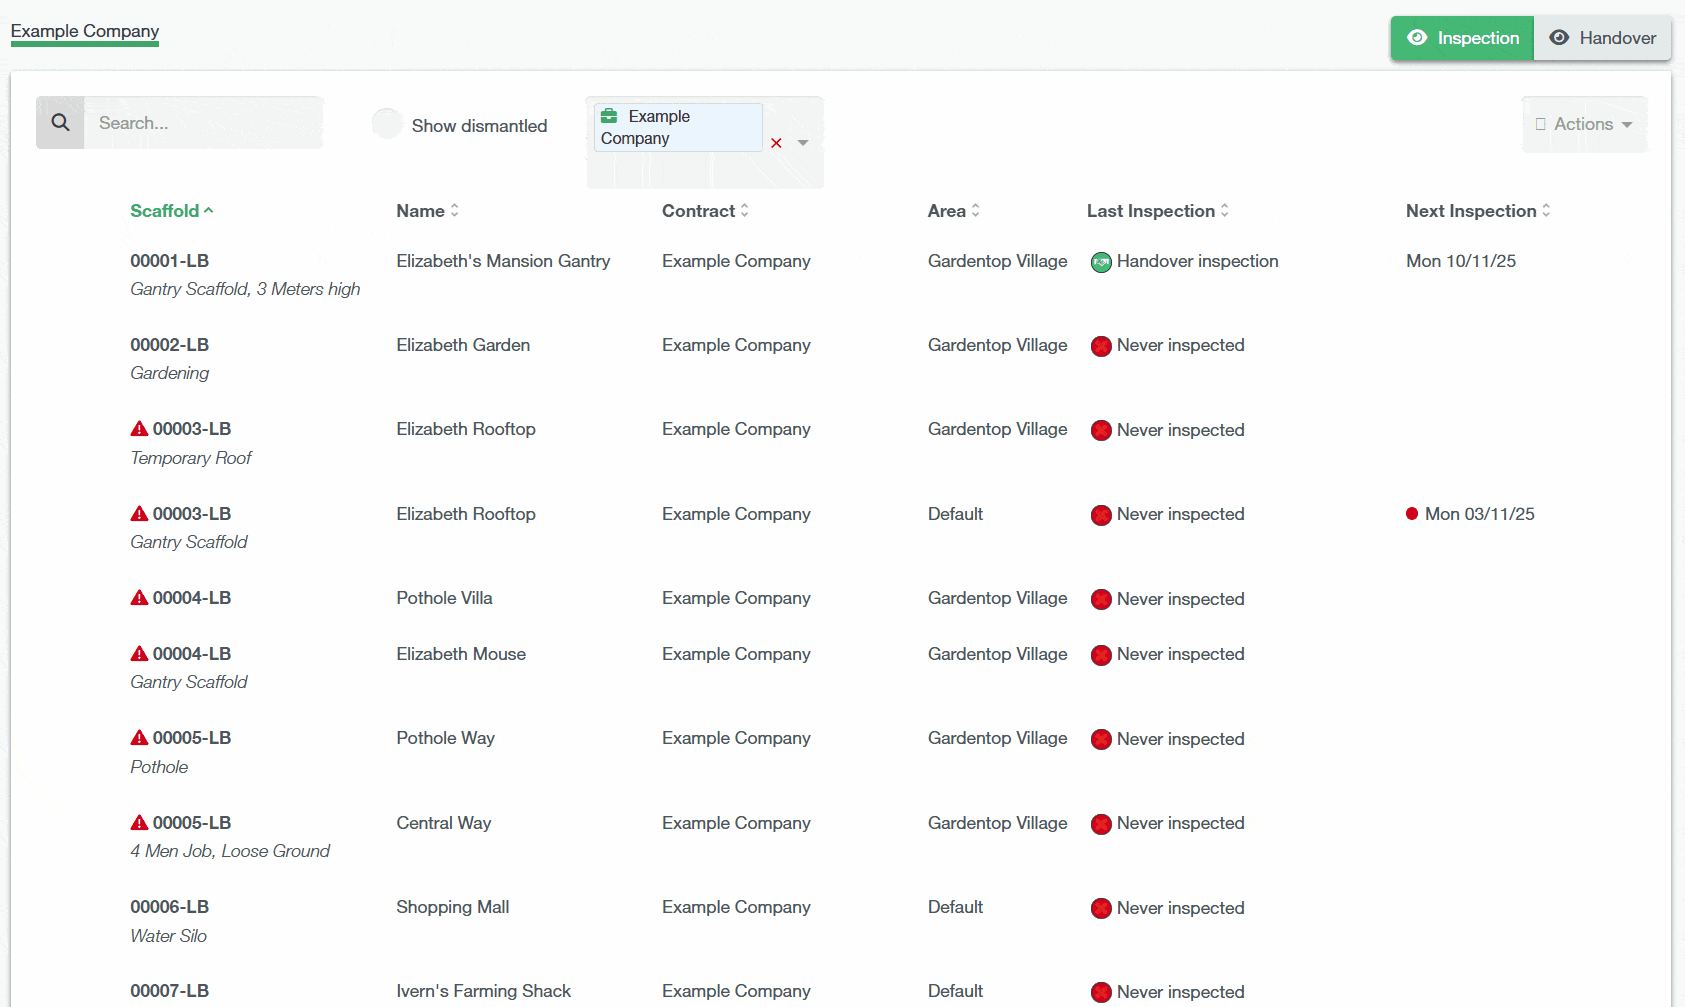
If you need to perform the same action to multiple scaffolds on the same contract? You can utilise the bulk actions on the scaffold section to manage your scaffold items efficiently. You can access these options by clicking the Action dropdown located at the top-right corner of the scaffold list.

There are several options available from the action dropdown menu:


SMART Filtering for Bulk Actions

On the Scaffold List, while you still have a Bulk Action mode active. You can filter the list of scaffolds by their Scaffold Name, Scaffold Description or Quote Number. Then by clicking on the Select All button, all scaffolds filtered from that list will be selected.

Constraint

If you click on another tab (e.g. All Customers, ABC R…), your current selection will be lost.

On-Hire Scaffolds
  1. Select the On-Hire option

    If you wish to On-Hire multiple scaffolds at once, click on the Action dropdown and select On-Hire Scaffolds.

  2. Select the Scaffolds and Open the Modal

    You can then choose which scaffolds you’d like to on-hire, choosing from the available off-hire scaffolds. Once the scaffolds are selected, click Apply to open the On-Hire Scaffolds, Confirmation Modal.


    On the left side of the modal, you’ll see a list of all scaffolds you selected from the scaffold list, while the right side allows you to choose the On-Hire Date.

  3. Confirm your Changes

    Once you’ve Assigned the Date of the On-Hire and you’re happy for the scaffolds to be On-Hired on that date, select the On-Hire Scaffolds button below to on-hire the listed scaffolds.

    Cancelling Keeps Your Progress

    If you select Cancel within the confirmation modal, you will return back to the Scaffold List view with all your previous selections still active and the On-Hire mode still active.

Off-Hire Scaffolds
  1. Select the Off-Hire option

    To begin an Off-Hire action, click on the Action dropdown and select Off-Hire Scaffolds.

  2. Select the Scaffolds and Open the Modal

    You can then choose which scaffolds you’d like to off-hire, choosing from the available on-hire scaffolds. Once the scaffolds are selected, click Apply to open the Off-Hire Scaffolds, Confirmation Modal.


    On the left side of the modal, you’ll see a list of all scaffolds you selected from the scaffold list. On the right side will allow you to specify whether it’s a Full or Partial Off-Hire, the Date of the Off-Hire as well as a dropdown list of Customer Contacts on the site to specify who requested the Off-Hire. You can also choose to add any Additional Comments regarding the Off-Hire.

  3. Confirm your Changes

    Once you’ve set all the details for the off-hire, select the Off-Hire Scaffolds button to apply your changes and off-hire the selected scaffolds.

    Cancelling Keeps Your Progress

    If you select Cancel within the confirmation modal, you will return back to the Scaffold List view with all your previous selections still active and the Off-Hire mode still active.

    Why is the “All Customers” Tab Disabled?

    The All Customers tab will be disabled as the user can only bulk Off-Hire scaffolds for a single contract.

Dismantle Scaffolds
  1. Select the Dismantle Scaffolds option

    To dismantle multiple scaffolds at once, click on the Action dropdown and select Dismantle Scaffolds.

  2. Select the Scaffolds and Open the Modal

    Then, select all the scaffolds you’d like to dismantle from the list by clicking on the Tick-box. You’ll see them highlighted in red once they’re selected.

    Once the scaffolds are selected, click Apply to open the Dismantle Scaffolds, Confirmation Modal.


    On the left side of the modal, you’ll see a list of all the scaffolds you selected from the scaffold list, while on the right side you can specify the Dismantle Date and include any Relevant Notes about the dismantling.

  3. Confirm your Changes

    Once you’ve provided the date and details for the dismantled scaffolding, click the Dismantle Scaffolds button to dismantle the scaffolds you selected.

    Cancelling Keeps Your Progress

    If you select Cancel within the confirmation modal, you will return back to the Scaffold List view with all your previous selections still active and the Dismantle mode still active.

Group Scaffolds
  1. Select the Group Scaffold option

    If you would like to group multiple scaffolds under one scaffold reference number. Select the Group Scaffolds from the Action dropdown.

  2. Select the Scaffolds and Open the Modal

    Now, select all the scaffolds you’d like to group together from the list by clicking on the Tickbox. You’ll see them highlighted in blue once they’re selected. Once you’ve chosen which scaffolds to group, click Apply to open the Group Scaffolds, Confirmation Modal.


    The left-hand panel displays the selected scaffolds along with their current and updated names, while the right-hand panel lets you select the Base Scaffold Reference to use for the group.

  3. Confirm your Changes

    Once you’ve selected the Base Scaffold Reference and are happy, click on the Group Scaffolds button to group the scaffolds under that specified reference.

    Cancelling Keeps Your Progress

    If you select Cancel within the confirmation modal, you will return back to the Scaffold List view with all your previous selections still active and the Group mode still active.

Fix Duplicates
  1. Select the Fix Duplicates option

    If you need to correct any duplicate scaffold references on the Scaffold List, select the Fix Duplicates Scaffolds option from the Action dropdown.

    What are Duplicated References and why do they Occur?

    Duplicate references may appear when two users create the same site at the same time in SMART Handover / Inspector and SMART Manager, usually when the mobile apps are currently offline and they haven’t been Synced. If this happens and you see this warning, follow this steps below.

  2. Select the Scaffolds and Open the Modal

    While in this mode, you will only see scaffolds with duplicate references. Select the scaffold items you wish to amend so that they’re changed to the next reference number and click Apply to open the Fix Duplicate Scaffolds References Modal.


    All the scaffolds shown on this list will be renamed to the next available reference number, as you can see from this example: The duplicate 00003-LB, 00004-LB and 00005-LB will be changed to the next suitable reference number.

  3. Confirm your Changes

    Click on the Fix Duplicates button to confirm your changes.


    Cancelling Keeps Your Progress

    If you select Cancel within the confirmation modal, you will return back to the Scaffold List view with all your previous selections still active and the Fix Duplicate mode still active.

Quick Edit
  1. Select the Quick Edit option

    The Quick Edit Mode lets you make fast, inline changes to multiple scaffolds directly from the scaffold list. To use it, select Quick Edit from the Action dropdown.

  2. What Values can you Change?

    When you edit a value in any row, that row will automatically highlight in yellow and the corresponding checkbox will be selected, indicating that the row will be included in your bulk changes. If you deselect a yellow row, it will turn gray, meaning that any edits made to that row will not be applied.


    Quick Edit supports changes across two main tabs, Inspection and Handover. Simply click on the corresponding main tab to access different values that you can change.

    • In the Inspection Tab, you can edit the Scaffold Description, Scaffold Name, Area fields and the Next Inspection date.
    • In the Handover Tab, you can update the Quote Number, Item Number, and the Hire Period fields.

  3. Select the Scaffolds and Open the Modal

    Once you have edited the list, click Apply to open the Confirm Quick Edit Changes Modal, which displays a summary of your changes.


  4. Confirm your Changes

    Old values will be shown in Red, whilst new values will be shown in Green. If you’re happy with the changes, click on the Apply Changes button and the changes you’ve made will be confirmed.